jenkins+git+docker实验环境的搭建
持续集成(c/i)的实验环境
git/harbor服务器 ip 192.168.200.132
docker服务器 ip 192.168.200.149
Jenkins服务器 ip 192.168.200.150
工具与版本要求
centos 7.5_x86
maven 3.5
tomcat 8
jdk 1.8
jenkins 2.6
docker -ce 18.09.0
查看实验环境
[root@harbor ~]# cat /etc/redhat-release

CentOS Linux release 7.5. (Core)

[root@harbor ~]# uname -r

3.10.-.el7.x86_64
开始部署harbor
[root@harbor ~]# ls
anaconda-ks.cfg docker-compose harbor-offline-installer-v1.5.0.tgz
#创建ca证书
[root@harbor ~]# mkdir -p /data/ssl
[root@harbor ~]# cd /data/ssl/
[root@harbor ssl]# which openssl
/usr/bin/openssl
[root@harbor ssl]# openssl req -newkey rsa:4096 -nodes -sha256 -keyout ca.key -x509 -days 365 -out ca.crt
Generating a 4096 bit RSA private key
.......................................................................................................................................++
...................++
writing new private key to 'ca.key'
-----
You are about to be asked to enter information that will be incorporated
into your certificate request.
What you are about to enter is what is called a Distinguished Name or a DN.
There are quite a few fields but you can leave some blank
For some fields there will be a default value,
If you enter '.', the field will be left blank.
-----
Country Name (2 letter code) [XX]:CN
State or Province Name (full name) []:Beijing
Locality Name (eg, city) [Default City]:Beijing
Organization Name (eg, company) [Default Company Ltd]:yunjisuan
Organizational Unit Name (eg, section) []:yunjisuan
Common Name (eg, your name or your server's hostname) []:www.yunjisuan.com
Email Address []:
[root@harbor ssl]#
#生成证书请求
[root@harbor ssl]# openssl req -newkey rsa:4096 -nodes -sha256 -keyout www.yunjisuan.com.key -out www.yunjisuan.com.csr
Generating a 4096 bit RSA private key
...................................................++
.........................................++
writing new private key to 'www.yunjisuan.com.key'
-----
You are about to be asked to enter information that will be incorporated
into your certificate request.
What you are about to enter is what is called a Distinguished Name or a DN.
There are quite a few fields but you can leave some blank
For some fields there will be a default value,
If you enter '.', the field will be left blank.
-----
Country Name (2 letter code) [XX]:CN
State or Province Name (full name) []:Beijing
Locality Name (eg, city) [Default City]:Beijing
Organization Name (eg, company) [Default Company Ltd]:yunjisuan
Organizational Unit Name (eg, section) []:yunjisuan
Common Name (eg, your name or your server's hostname) []:www.yunjisuan.com
Email Address []:
Please enter the following 'extra' attributes
to be sent with your certificate request
A challenge password []:
An optional company name []:
[root@harbor ssl]#
#生成主机注册表的证书
[root@harbor ssl]# openssl x509 -req -days 365 -in www.yunjisuan.com.csr -CA ca.crt -CAkey ca.key -CAcreateserial -out www.yunjisuan.com.crt
Signature ok
subject=/C=CN/ST=Beijing/L=Beijing/O=yunjisuan/OU=yunjisuan/CN=www.yunjisuan.com
Getting CA Private Key
[root@harbor ssl]#
#查看生成的证书
[root@harbor ssl]# ls
ca.crt ca.key ca.srl www.yunjisuan.com.crt www.yunjisuan.com.csr www.yunjisuan.com.key
#信任自签发的证书
[root@harbor ssl]# cp www.yunjisuan.com.crt /etc/pki/ca-trust/source/anchors/
[root@harbor ssl]# update-ca-trust enable
[root@harbor ssl]# update-ca-trust extract
#关闭selinux
[root@harbor ssl]# setenforce 0
#查看selinux的状态
[root@harbor ssl]# sestatus
#安装docker
[root@harbor ssl]# yum -y install yum-utils device-mapper-persistent-data 1vm2 wget
[root@harbor yum.repos.d]# wget http://mirrors.aliyun.com/docker-ce/linux/centos/docker-ce.repo
[root@harbor yum.repos.d]# yum -y install docker-ce
[root@harbor yum.repos.d]# systemctl start docker
[root@harbor yum.repos.d]# vim /etc/docker/daemon.json
[root@harbor yum.repos.d]# cat /etc/docker/daemon.json
{
"registry-mirrors":[ "https://registry.docker-cn.com" ]
}
[root@harbor yum.repos.d]# systemctl daemon-reload
[root@harbor yum.repos.d]# systemctl restart docker
[root@harbor yum.repos.d]# docker version
Client:
Version: 18.09.0
API version: 1.39
Go version: go1.10.4
Git commit: 4d60db4
Built: Wed Nov 7 00:48:22 2018
OS/Arch: linux/amd64
Experimental: false
Server: Docker Engine - Community
Engine:
Version: 18.09.0
API version: 1.39 (minimum version 1.12)
Go version: go1.10.4
Git commit: 4d60db4
Built: Wed Nov 7 00:19:08 2018
OS/Arch: linux/amd64
Experimental: false
#搭建harbor,先复制证书
[root@harbor ssl]# cd /data/ssl/
[root@harbor ssl]# mkdir -p /etc/ssl/harbor
[root@harbor ssl]# cp /data/ssl/www.yunjisuan.com.key /etc/ssl/harbor/
[root@harbor ssl]# cp /data/ssl/www.yunjisuan.com.crt /etc/ssl/harbor/
#harbor的现在地址
[root@harbor install]# wget http://harbor.orientsoft.cn/harbor-v1.5.0/harbor-offline-installer-v1.5.0.tgz
#安装harbor
[root@harbor install]# cd ~
[root@harbor ~]# tar xf harbor-offline-installer-v1.5.0.tgz -C /data/install/
[root@harbor ~]# cd /data/install/harbor/
[root@harbor harbor]# cp harbor.cfg{,.bak}
[root@harbor harbor]# cat -n harbor.cfg | sed -n '7p;11p;23p;24p;68p'
7 hostname = www.yunjisuan.com
11 ui_url_protocol = https
23 ssl_cert = /etc/ssl/harbor/www.yunjisuan.com.crt
24 ssl_cert_key = /etc/ssl/harbor/www.yunjisuan.com.key
68 harbor_admin_password = Harbor12345
[root@harbor harbor]#
#安装docker-compose命令
[root@harbor harbor]# cd ~
[root@harbor ~]# chmod +x docker-compose
[root@harbor ~]# mv docker-compose /usr/bin/
[root@harbor ~]# which docker-compose
/usr/bin/docker-compose
#启动harbor
[root@harbor ~]# cd /data/install/harbor/
[root@harbor harbor]# ./install.sh --with-clair
给其他服务器下发信任证书
[root@harbor ~]# scp /data/ssl/www.yunjisuan.com.crt 192.168.200.149:/etc/pki/ca-trust/source/anchors/

The authenticity of host '192.168.200.149 (192.168.200.149)' can't be established.

ECDSA key fingerprint is SHA256:gm/RhqGrfDo5Rgcr/LmBAaqPv6tmni7cRpXjGEWZQpg.

ECDSA key fingerprint is MD5:ae:f6:0b:6e::::cf:bd:e8:f5:b5:c4:e0:da:.

Are you sure you want to continue connecting (yes/no)? yes

Warning: Permanently added '192.168.200.149' (ECDSA) to the list of known hosts.

root@192.168.200.149's password:

www.yunjisuan.com.crt                                                         %      .9KB/s   :

[root@harbor ~]# scp /data/ssl/www.yunjisuan.com.crt 192.168.200.150:/etc/pki/ca-trust/source/anchors/

The authenticity of host '192.168.200.150 (192.168.200.150)' can't be established.

ECDSA key fingerprint is SHA256:gm/RhqGrfDo5Rgcr/LmBAaqPv6tmni7cRpXjGEWZQpg.

ECDSA key fingerprint is MD5:ae:f6:0b:6e::::cf:bd:e8:f5:b5:c4:e0:da:.

Are you sure you want to continue connecting (yes/no)? yes

Warning: Permanently added '192.168.200.150' (ECDSA) to the list of known hosts.

root@192.168.200.150's password:

www.yunjisuan.com.crt                                                         %     .5KB/s   :

[root@harbor ~]#
让另两个服务器立即生效并且映射域名,重启docker
[root@docker ~]# update-ca-trust enable

[root@docker ~]# update-ca-trust extract

[root@docker ~]# echo "192.168.200.132 www.yunjisuan.com" >> /etc/hosts

[root@docker ~]# systemctl restart docker
[root@jenkins ~]# update-ca-trust enable

[root@jenkins ~]# update-ca-trust extract

[root@jenkins ~]# echo "192.168.200.132 www.yunjisuan.com" >> /etc/hosts

[root@jenkins ~]# systemctl restart docker
部署git在harbor上和Jenkins上
[root@harbor harbor]# yum -y install git
[root@harbor harbor]# useradd git

[root@harbor harbor]# echo "" | passwd --stdin git

Changing password for user git.

passwd: all authentication tokens updated successfully.
#在harbor上的git用户下创建仓库
[root@harbor ~]# su - git
Last login: Thu Dec 20 18:34:32 CST 2018 on pts/0
[git@harbor ~]$ mkdir solo.git
[git@harbor ~]$ cd solo.git/
[git@harbor solo.git]$ git --bare init
Initialized empty Git repository in /home/git/solo.git/
[git@harbor solo.git]$ ls
branches config description HEAD hooks info objects refs
[git@harbor solo.git]$
在Jenkins上安装git
[root@jenkins ~]# yum -y install git
#用git下载solo的bao
[root@jenkins ~]# git clone https://github.com/b3log/solo.git
[root@jenkins ~]# cd solo/
[root@jenkins solo]# ls
CHANGE_LOGS.html Dockerfile LICENSE pom.xml README_zh_CN.md
docker-compose.yml gulpfile.js package.json README.md src
#创建用于提交的git目录
[root@jenkins solo]# mkdir -p /code
[root@jenkins solo]# cd /code/
[root@jenkins code]# git clone root@192.168.200.132:/home/git/solo.git
Cloning into 'solo'...
The authenticity of host '192.168.200.132 (192.168.200.132)' can't be established.
ECDSA key fingerprint is SHA256:gm/RhqGrfDo5Rgcr/LmBAaqPv6tmni7cRpXjGEWZQpg.
ECDSA key fingerprint is MD5:ae:f6:0b:6e:80:96:67:cf:bd:e8:f5:b5:c4:e0:da:11.
Are you sure you want to continue connecting (yes/no)? yes
Warning: Permanently added '192.168.200.132' (ECDSA) to the list of known hosts.
root@192.168.200.132's password:
warning: You appear to have cloned an empty repository.
[root@jenkins code]# ls
solo
[root@jenkins code]# ls solo/
[root@jenkins code]#
#将solo项目的代码通过git上床到harbo服务器
[root@jenkins solo]# cd solo/
[root@jenkins solo]# git add .
[root@jenkins solo]# git commit -m "all"
[root@jenkins solo]# git config --global user.email "493115250@qq.com" #第一次提交会报错,需要告诉git全局变量,邮箱和使用者
[root@jenkins solo]# git config --global user.name "suge" #第一次提交会报错,需要告诉git全局变量,邮箱和使用者
[root@jenkins solo]# git commit -m "all"
[root@jenkins solo]# git push origin master
root@192.168.200.132's password:
Counting objects: 2099, done.
Compressing objects: 100% (2044/2044), done.
Writing objects: 100% (2099/2099), 27.44 MiB | 12.93 MiB/s, done.
Total 2099 (delta 367), reused 0 (delta 0)
To root@192.168.200.132:/home/git/solo.git
* [new branch] master -> master
#修改SOLo的配置文件,并再次上传
[root@jenkins solo]# cd /code/solo/src/main/resources/
[root@jenkins resources]# vim latke.properties
[root@jenkins resources]# cat -n latke.properties | sed -n '29p;31p'
29 serverHost=192.168.200.149 #修改成docker的ip
31 serverPort=8888 #监听端口
[root@jenkins resources]# cd /code/solo/
[root@jenkins solo]# git add .
[root@jenkins solo]# git commit -m "latke"
[master 82250cf] latke
1 file changed, 2 insertions(+), 2 deletions(-)
[root@jenkins solo]# git push origin master
root@192.168.200.132's password:
Counting objects: 11, done.
Compressing objects: 100% (6/6), done.
Writing objects: 100% (6/6), 534 bytes | 0 bytes/s, done.
Total 6 (delta 3), reused 0 (delta 0)
To root@192.168.200.132:/home/git/solo.git
705030c..82250cf master -> master
[root@jenkins solo]#
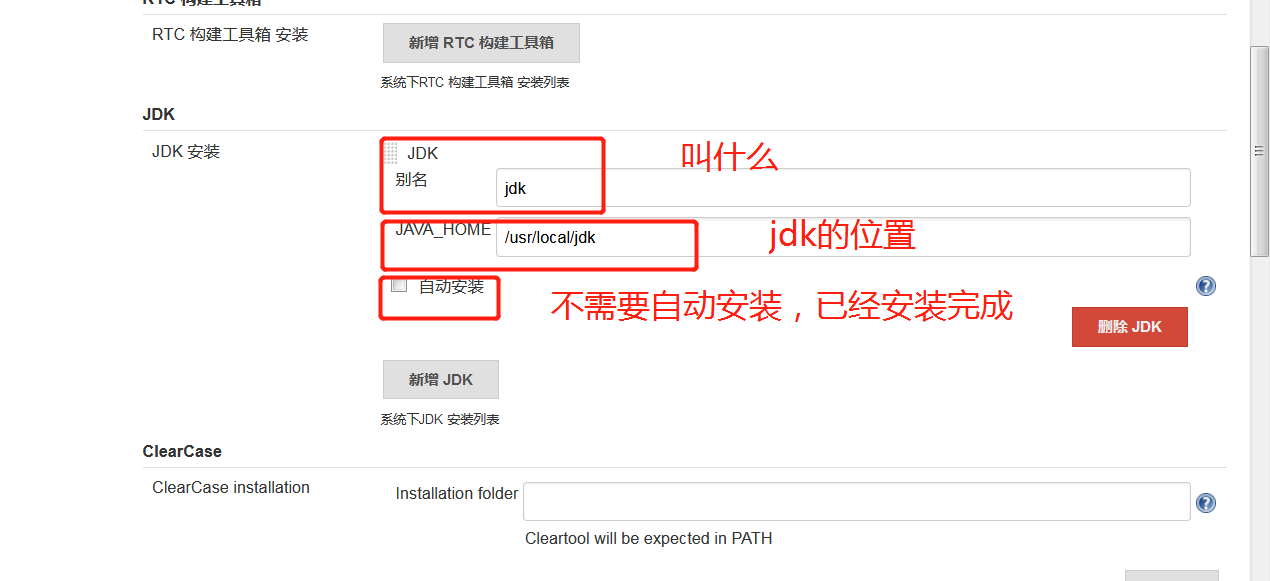
在docker服务器上安装jdk。先不需要设置环境变量
[root@docker ~]# ls

anaconda-ks.cfg  jdk-8u45-linux-x64.tar.gz

[root@docker ~]# tar xf jdk-8u45-linux-x64.tar.gz -C /usr/local/
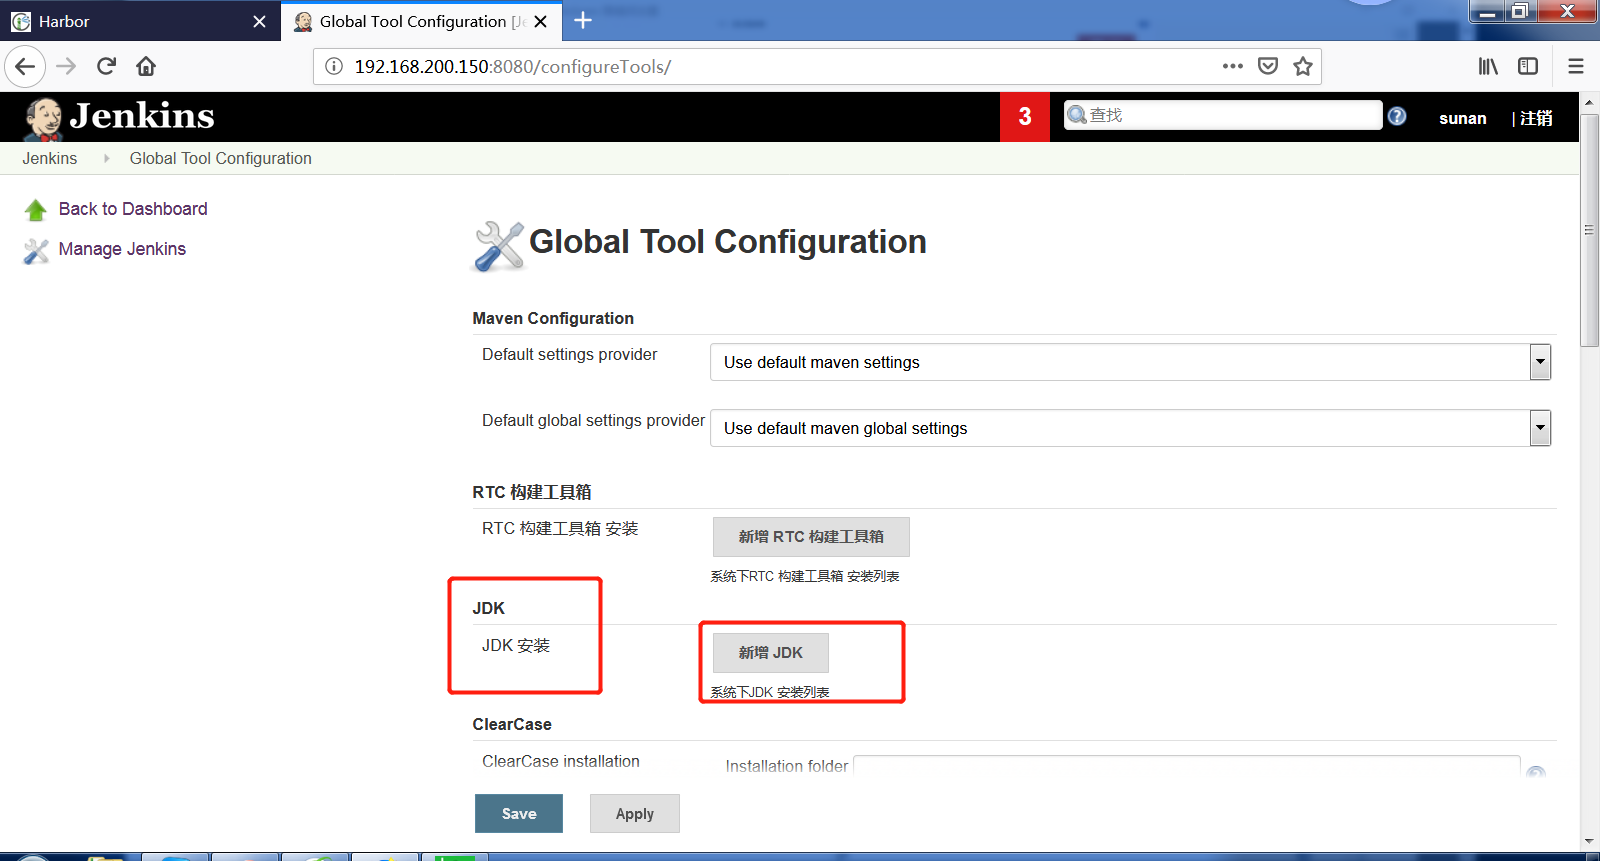
在Jenkins服务器上安装Jenkins镜像
[root@jenkins ~]# ls
anaconda-ks.cfg apache-tomcat-8.0..tar.gz jdk-8u45-linux-x64.tar.gz
apache-maven-3.5.-bin.tar.gz docker-compose solo
[root@jenkins ~]# tar xf jdk-8u45-linux-x64.tar.gz -C /usr/local/ #因为是镜像的所有不用设置环境变量
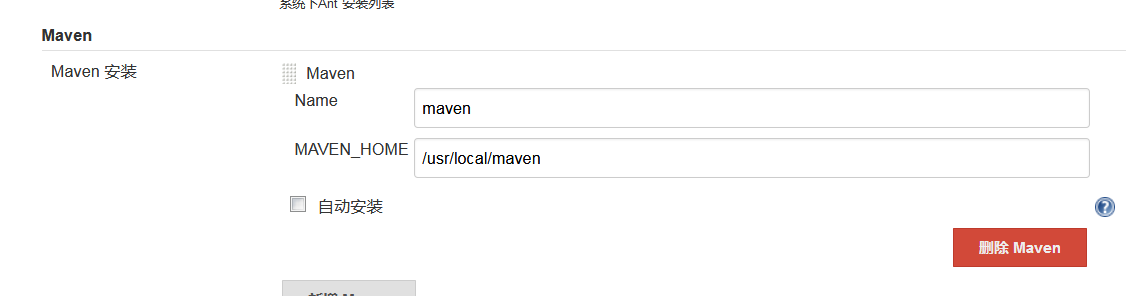
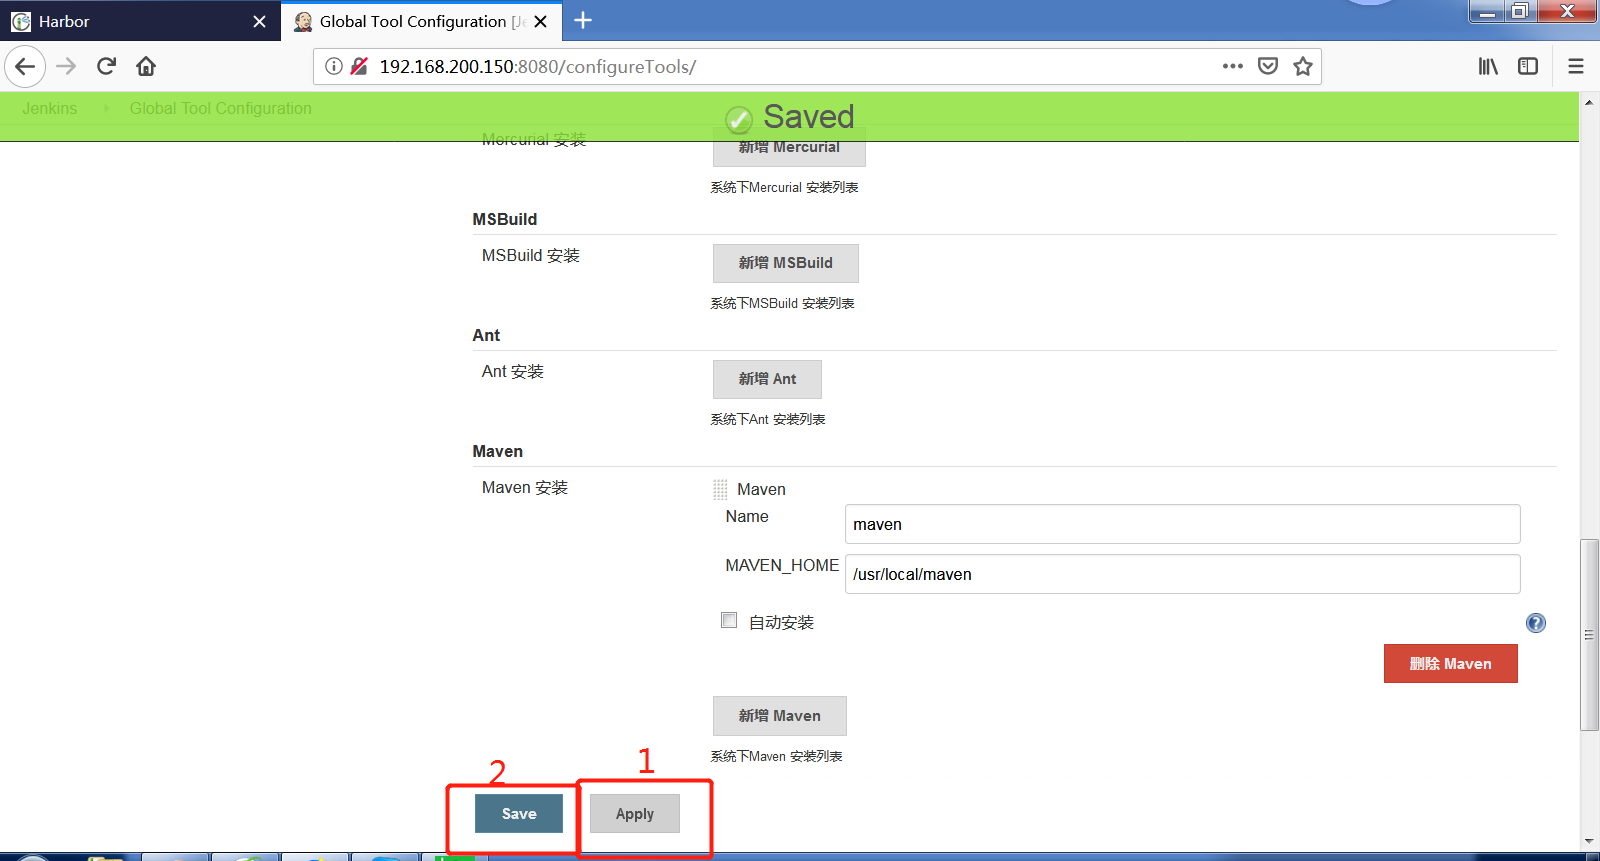
[root@jenkins ~]# tar xf apache-maven-3.5.-bin.tar.gz -C /usr/local/
#创建Jenkins的镜像dockerfile
[root@jenkins ~]# mkdir -p dockerfile/jenkins
[root@jenkins ~]# cd dockerfile/jenkins/
[root@jenkins jenkins]# vim Dockerfile
[root@jenkins jenkins]# cat Dockerfile #下的Jenkins镜像是Ubuntu的
FROM jenkins
USER root
RUN echo "" > /etc/apt/sources.list.d/jessie-backports.list && \
wget http://mirrors.163.com/.help/sources.list.jessie -O /etc/apt/sources.list
RUN /usr/bin/apt-get update && /usr/bin/apt-get install -y git libltdl-dev
Jenkins的容器的数据目录我们需要在宿主机上挂载,以免丢失
Jenkins需要的jdk我们也在宿主机上安装
Jenkins构建java代码的maven我们也安装在宿主机上
Jenkins需要docker支持镜像
Jenkins需要免秘钥交换拉取git代码,我们需要挂载本地的密匙
#进行免秘钥分发
[root@jenkins jenkins]# ssh-keygen

Generating public/private rsa key pair.

Enter file in which to save the key (/root/.ssh/id_rsa):

Enter passphrase (empty for no passphrase):

Enter same passphrase again:

Your identification has been saved in /root/.ssh/id_rsa.

Your public key has been saved in /root/.ssh/id_rsa.pub.

The key fingerprint is:

SHA256:tlI4gYrpwQsCX+6DdsnphBl3QFldtkB/tlRQtmCAfJQ root@jenkins

The key's randomart image is:

+---[RSA ]----+

|    .o.+o+=o+o+  |

|   ...  ++Eo + . |

|.   + .  .o + .  |

|o+ + . o   + .   |

|=o+ o + S   .    |

|+ oO + + .       |

| o= O . .        |

| . + . .         |

|    .            |

+----[SHA256]-----+

[root@jenkins jenkins]# ssh-copy-id -i ~/.ssh/id_rsa.pub git@192.168.200.132

/usr/bin/ssh-copy-id: INFO: Source of key(s) to be installed: "/root/.ssh/id_rsa.pub"

/usr/bin/ssh-copy-id: INFO: attempting to log in with the new key(s), to filter out any that are already installed

/usr/bin/ssh-copy-id: INFO:  key(s) remain to be installed -- if you are prompted now it is to install the new keys

git@192.168.200.132's password:

Number of key(s) added:

Now try logging into the machine, with:   "ssh 'git@192.168.200.132'"

and check to make sure that only the key(s) you wanted were added.

[root@jenkins jenkins]# ssh git@192.168.200.132

Last login: Thu Dec  ::

[git@harbor ~]$ exit

logout
#启动镜像
[root@jenkins jenkins]# docker build -t jenkins:1 .
[root@jenkins jenkins]# docker run -dit --name jenkins -p 8080:8080 -v /var/jenkins_home/:/var/jenkins_home/ -v /usr/local/apache-maven-3.5.0/:/usr/local/maven -v /usr/local/jdk1.8.0_45/:/usr/local/jdk -v /var/run/docker.sock:/var/run/docker.sock -v /usr/bin/docker:/usr/bin/docker -v ~/.ssh/:/root/.ssh jenkins:1
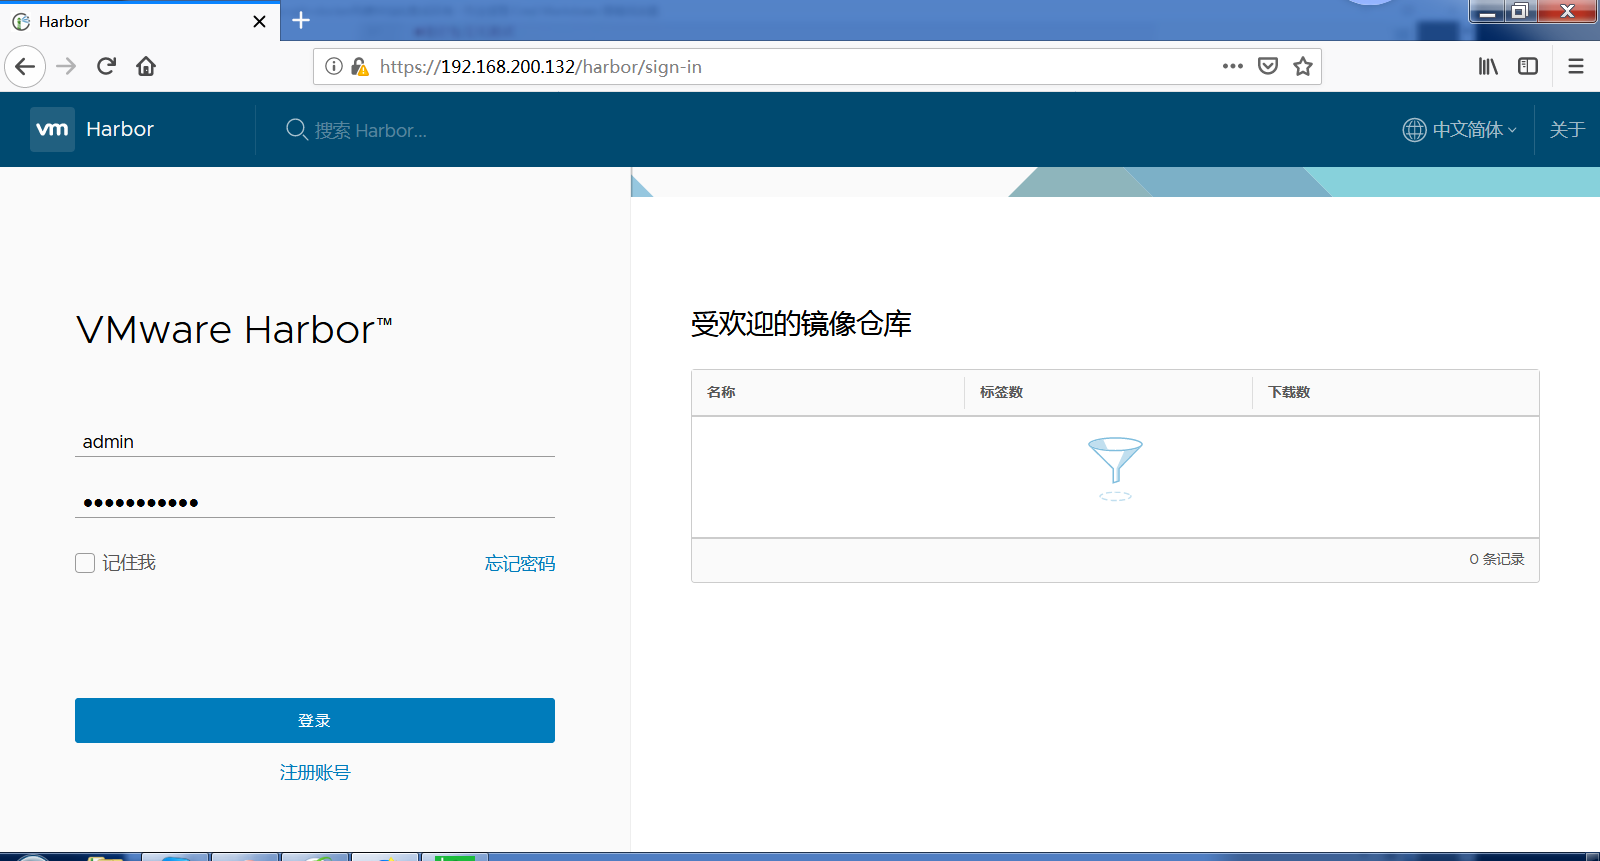
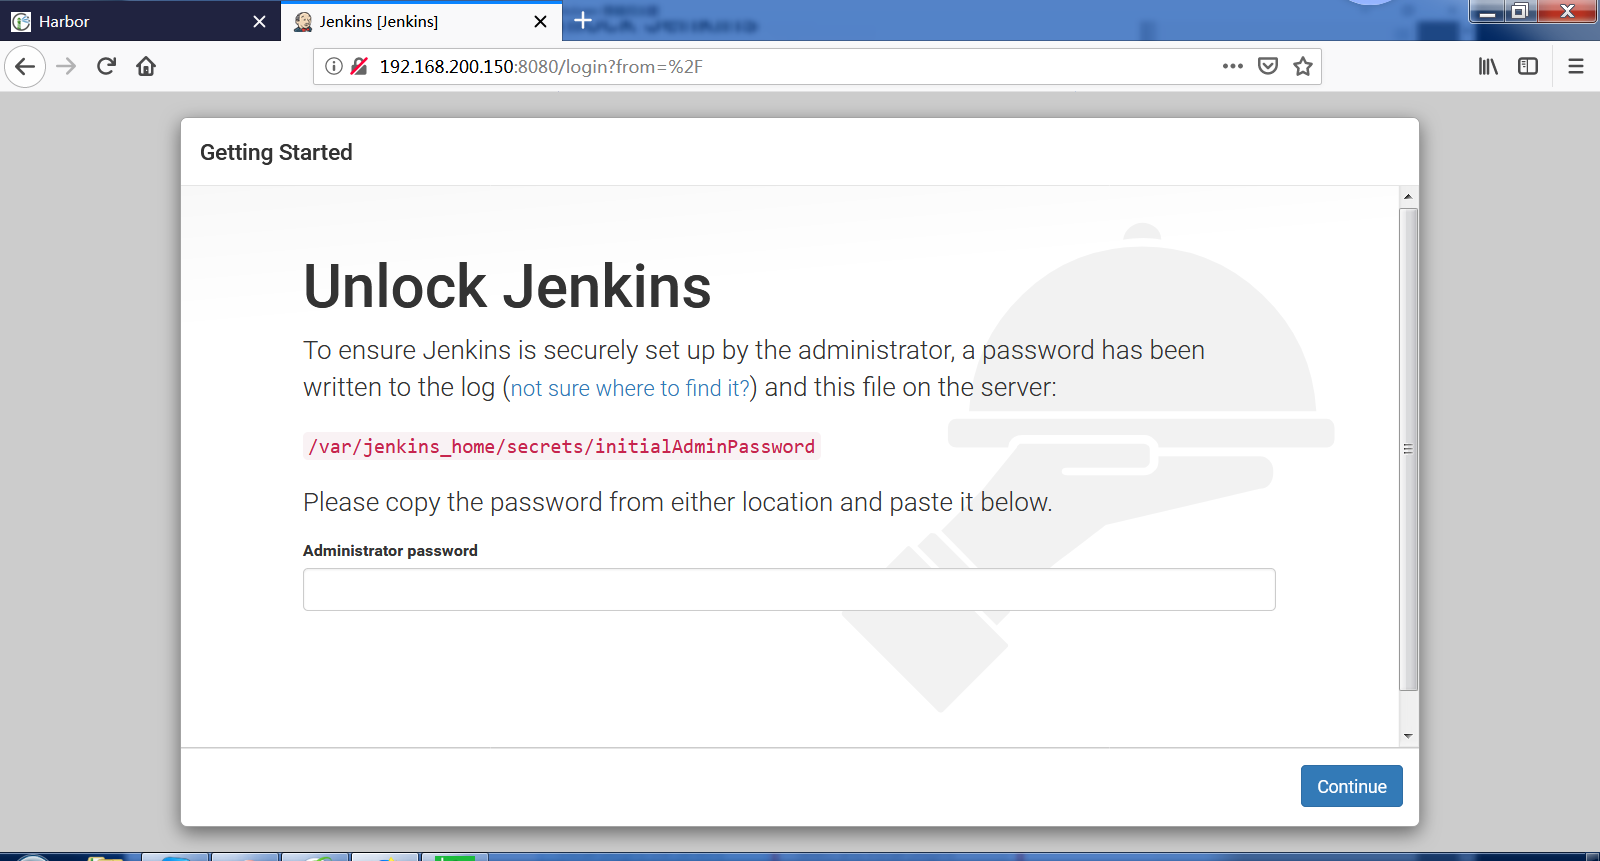
利用浏览器登陆Jenkins,提取密码的命令如下:
[root@jenkins jenkins]# docker exec jenkins cat /var/jenkins_home/secrets/initialAdminPassword

67a7a47315314a76bcae06ee790309a4

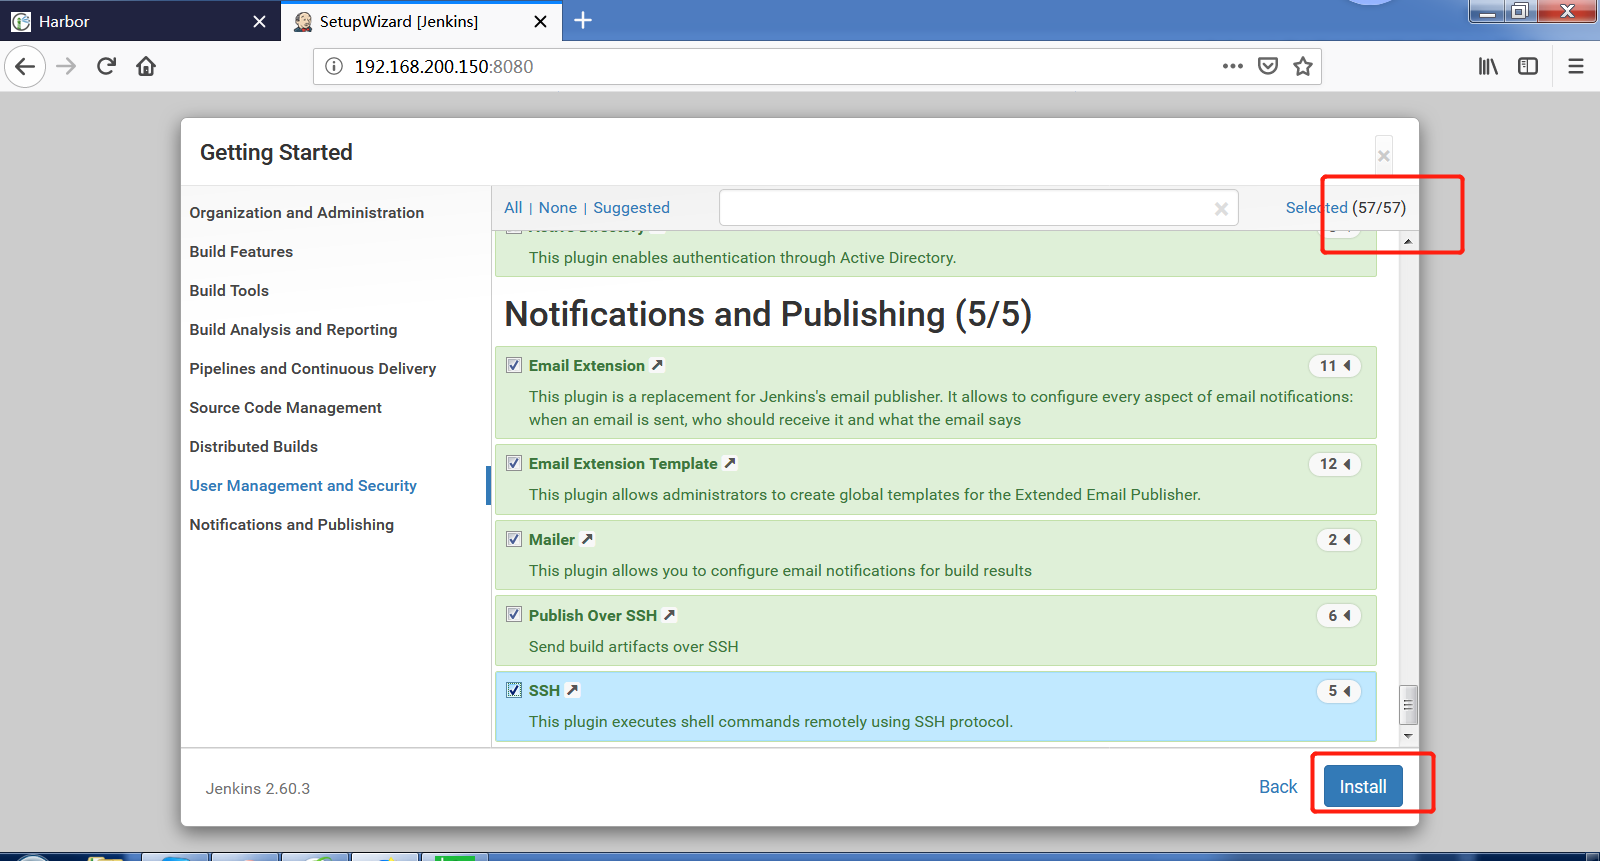
由于不好选,我们所有的插件都装一遍

我们现在创建一个可以运行solo的代码的tomcat的镜像
[root@jenkins jenkins]# mkdir -p /root/dockerfile/solo

[root@jenkins jenkins]# cd /root/dockerfile/solo/

[root@jenkins solo]# vim Dockerfile
[root@jenkins solo]# cat Dockerfile
FROM centos:7
MAINTAINER www.yunjisuan.com
RUN /usr/bin/yum -y install unzip iproute
ENV JAVA_HOME /usr/local/jdk
ADD apache-tomcat-8.0.46.tar.gz /usr/local
RUN mv /usr/local/apache-tomcat-8.0.46 /usr/local/tomcat
WORKDIR /usr/local/tomcat
EXPOSE 8080
ENTRYPOINT ["./bin/catalina.sh","run"]
[root@jenkins solo]# ls
apache-tomcat-8.0.46.tar.gz Dockerfile
[root@jenkins solo]# docker build -t tomcat:v1 .
[root@jenkins solo]# docker images
REPOSITORY TAG IMAGE ID CREATED SIZE
tomcat v1 eba33a67bb74 2 minutes ago 302MB
jenkins 1 60f11a4065d4 43 minutes ago 738MB
centos 7 1e1148e4cc2c 2 weeks ago 202MB
jenkins latest cd14cecfdb3a 5 months ago 696MB
#测试登陆harbor私有参考,用docker登陆
[root@jenkins solo]# docker login -uadmin -pHarbor12345 www.yunjisuan.com
WARNING! Using --password via the CLI is insecure. Use --password-stdin.
WARNING! Your password will be stored unencrypted in /root/.docker/config.json.
Configure a credential helper to remove this warning. See
https://docs.docker.com/engine/reference/commandline/login/#credentials-store
Login Succeeded
#推送镜像到harbor仓库(如果推送失败,查看docker是否登陆,或者查看ca证书)
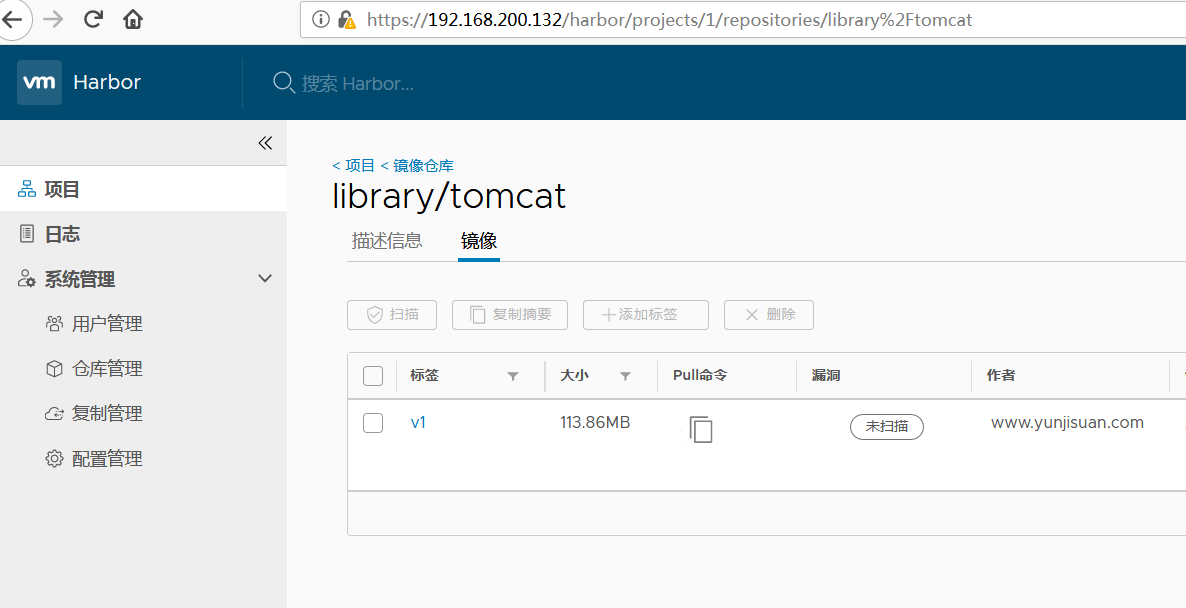
[root@jenkins solo]# docker tag tomcat:v1 www.yunjisuan.com/library/tomcat:v1
[root@jenkins solo]# docker push www.yunjisuan.com/library/tomcat:v1
The push refers to repository [www.yunjisuan.com/library/tomcat]
68c3eb65b757: Pushed
ff448c703734: Pushed
5a25c30f7a36: Pushed
071d8bd76517: Pushed
v1: digest: sha256:1e7203c1caeace697e8057f9b69f70e20dc744e1fea9ff9c36e9fd8c6720188f size: 1163
[root@jenkins solo]#
查看镜像仓库有没有
已经测试成功,现在开始配置Jenkins


设置Jenkins和docker的ssh免秘钥连接
[root@jenkins solo]# ll ~/.ssh/

total

-rw-------.  root root  Dec  : id_rsa

-rw-r--r--.  root root   Dec  : id_rsa.pub

-rw-r--r--.  root root   Dec  : known_hosts

[root@jenkins solo]# ssh-copy-id root@192.168.200.149

/usr/bin/ssh-copy-id: INFO: Source of key(s) to be installed: "/root/.ssh/id_rsa.pub"

The authenticity of host '192.168.200.149 (192.168.200.149)' can't be established.

ECDSA key fingerprint is SHA256:gm/RhqGrfDo5Rgcr/LmBAaqPv6tmni7cRpXjGEWZQpg.

ECDSA key fingerprint is MD5:ae:f6:0b:6e::::cf:bd:e8:f5:b5:c4:e0:da:.

Are you sure you want to continue connecting (yes/no)? yes

/usr/bin/ssh-copy-id: INFO: attempting to log in with the new key(s), to filter out any that are already installed

/usr/bin/ssh-copy-id: INFO:  key(s) remain to be installed -- if you are prompted now it is to install the new keys

root@192.168.200.149's password:

Number of key(s) added:

Now try logging into the machine, with:   "ssh 'root@192.168.200.149'"

and check to make sure that only the key(s) you wanted were added.

[root@jenkins solo]# ssh root@192.168.200.149

Last login: Sat Dec  ::  from 192.168.200.1

[root@docker ~]# exit
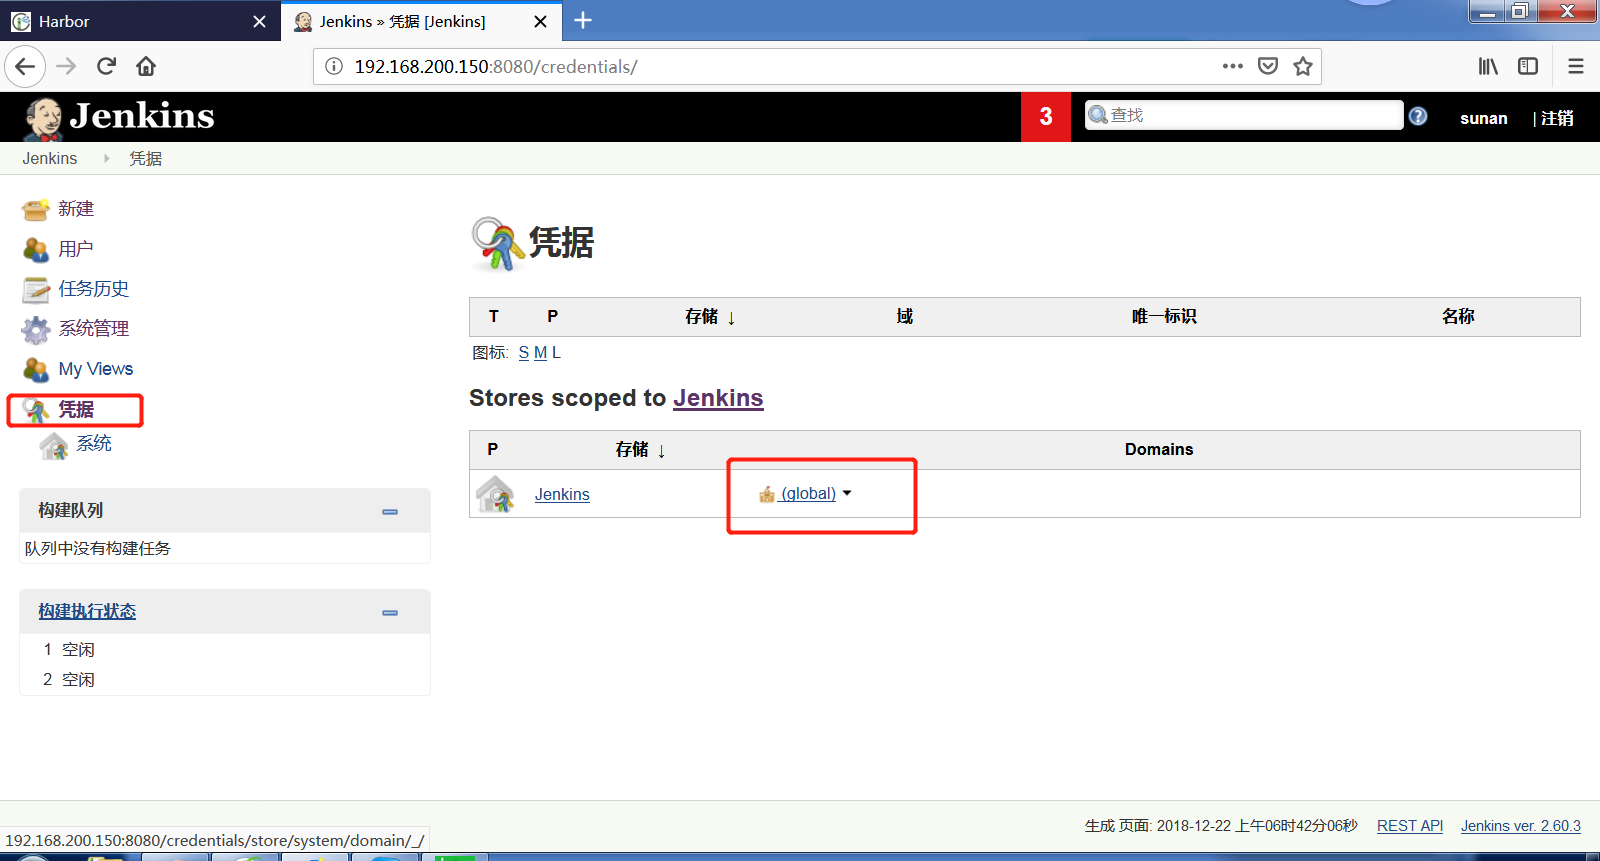
给Jenkins添加秘钥在web页面上
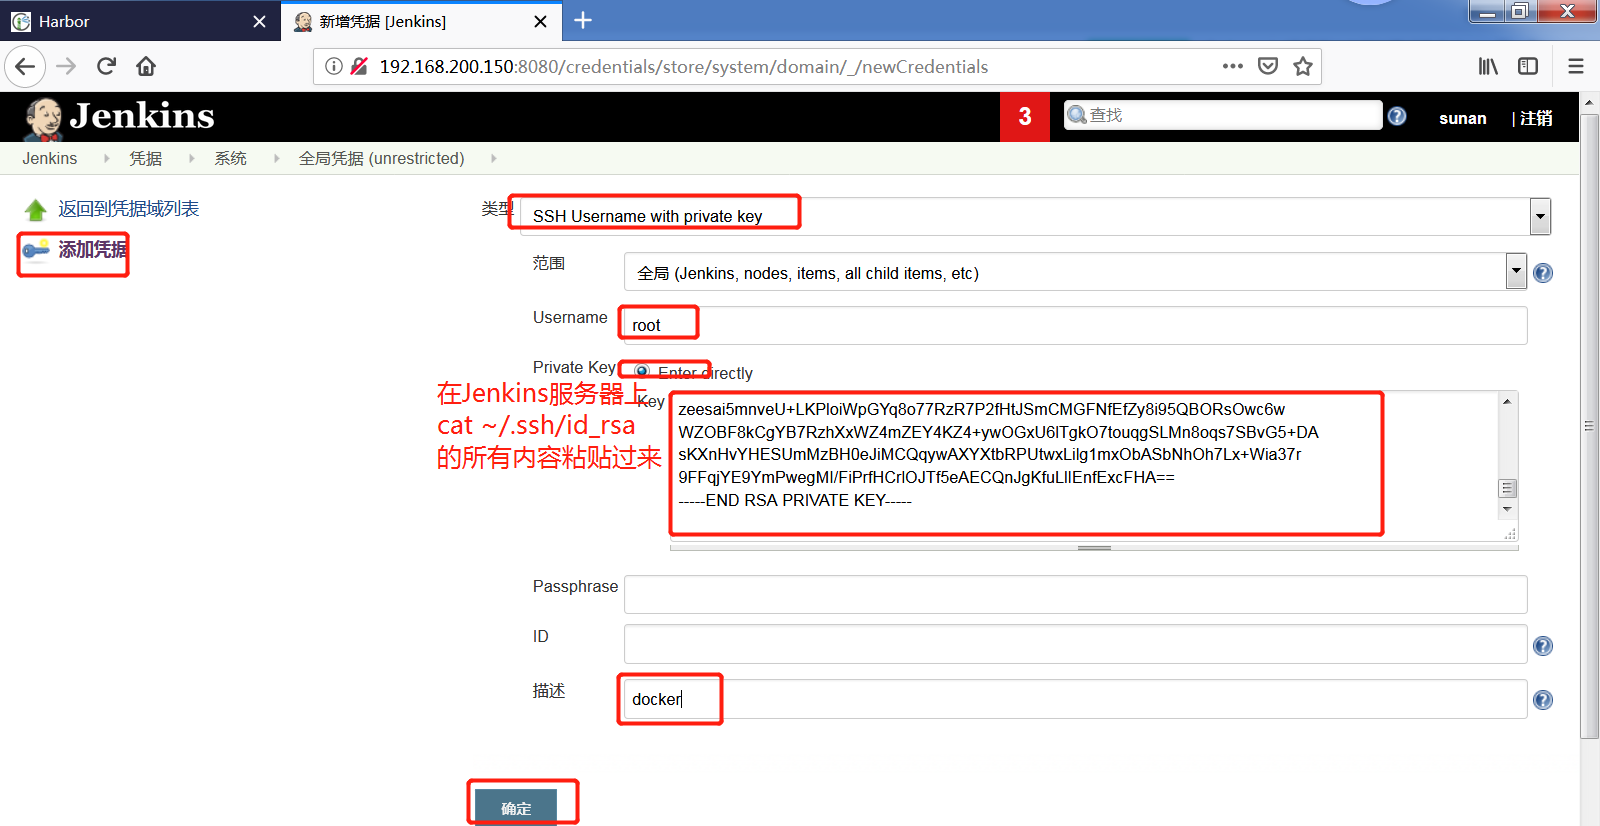
[root@jenkins solo]# cat ~/.ssh/id_rsa

-----BEGIN RSA PRIVATE KEY-----

MIIEpAIBAAKCAQEAyzG46DWQfUOpgoyaKPAYRsqYSdjqsaFHlQRO94Oo0y7anL1l

3EnCgGXkfnrQWgE9HKPQuiY00VFvfihOC1xUBd/N6I4F3pIF54vLCpSxbl477ibL

HgW/k8S4UQqihe+FTY1gOwiTxQREOqTCx0Gn0iXvWt/hP1AWeGy39u0+1Npg6yrs

x+9OWygYswHv4CrMKgzrxsIozOiw4+y+OmDbKcRwGAo+M1fbo+0Ryc/3rAq7Kmdi

CDm7V91kOs9t0DdvB7v5ZRXn4O9vFWqS1kORHGOssVuFVKbrLJCiPaT4YD3CI1KB

CSjBwOXJ7ur2YQWnIVuKJdiBMZL1C5JVjwEOzQIDAQABAoIBAQC/OsZY08BuA3XO

hWC4Um2mghict2b5UV264tkmnGQQjDH1/VGV5l0E1eAbIJ5hdnT7NTjFWBuxO0EA

rBH3Iyd4d86jpLXlZ+vipG+sP5BU3J7uXNggIyzPdv44VxfpkSgVeo4sQMBBVOiZ

gGJHgITehBElpzmnikn7f+YKn/DYBBatE7Wom79aJ/hVfdZBDykjZR4Agh4wTAd1

CqbqGL0rR/E7Eh3vbYnGB/fWdqaVY7hmcQkzo6jqTLGLzJ/1f74KzbwR/lSrLm6E

ljw9MYnXk7Knfqxlw+t6bC87xb6kr3B85X3ULkR8RwLtR+smOjTd2GYnJHz1t/yr

8iMRHVUBAoGBAPqNNNjW6T7VEKo/MLHw2w9Bt6qdjgN38CLfd0fh0JY+bMWfncUg

/NQawezKMWaYICqB8pKhUf3MucwALK+BpQwa/ky7pnJOLnpKjXDKeiOIcHYOx/sH

V4QDAbfRXq4GwQTX3dYrsRjcq8e6QjLqvTIItioDLfAed3n8qEEhCWMhAoGBAM+c

4e+p/jMYQM+P0yb6dD7ktFBWSXGZ9gpfdtUIzInvaejmPAGpQa5TKYJ+LVe1TFZT

Mn5YssbOy5YRle+ISoiI/rGm6QCaeCGZFBmW6lzhL6UgiGrH1Y+6kItO6MSEJYwb

35vGYaaKPnHa9iUzEjJFhnQihcJEPPMNU1ODaGItAoGBAIQDkNvL6NvNYdmCMAMh

2Bpi0wZXu7MCKAoH2o6KYeA4BhHetz9d0Tlk29cK9hqLfy9GhuxRiaUDkMX3NZRH

6BHHy0Pc/6dsoDqZO4s5dD9yrWbXBPG0fZ02BFq5O3zQXDVUFDO7k7V42B4Fesnf

O064nlrmj/bb5rHkuTaP1KVhAoGAZkCobrfVASlS0mfN4Ya9NjTCMkctSQxBR/6Y

snfw9Ya7LQAoUdEhDlDbQvAOOQKMJIA5gE0DUDONxc3HgQApZXHDr4+7dpad0D5q

zeesai5mnveU+LKPloiWpGYq8o77RzR7P2fHtJSmCMGFNfEfZy8i95QBORsOwc6w

WZOBF8kCgYB7RzhXxWZ4mZEY4KZ4+ywOGxU6lTgkO7touqgSLMn8oqs7SBvG5+DA

sKXnHvYHESUmMzBH0eJiMCQqywAXYXtbRPUtwxLilg1mxObASbNhOh7Lx+Wia37r

9FFqjYE9YmPwegMI/FiPrfHCrlOJTf5eAECQnJgKfuLlIEnfExcFHA==

-----END RSA PRIVATE KEY-----
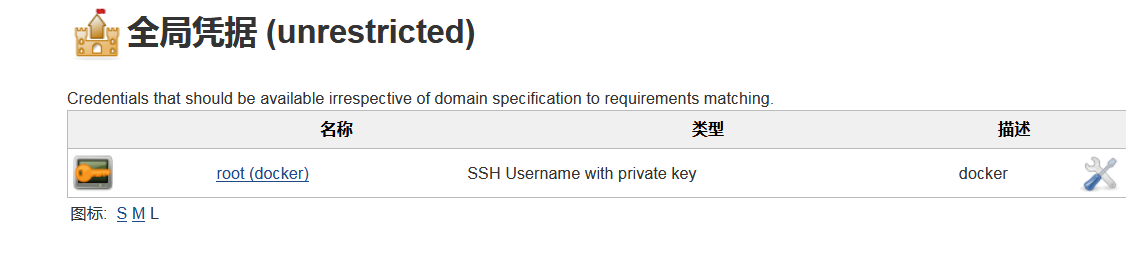
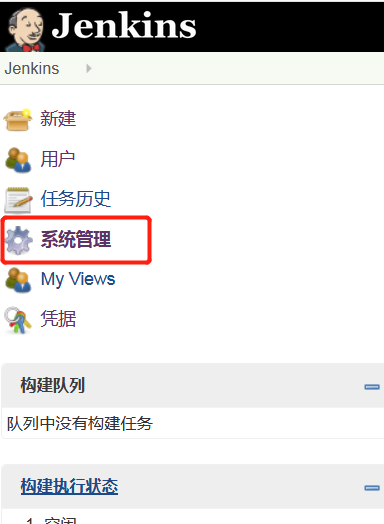
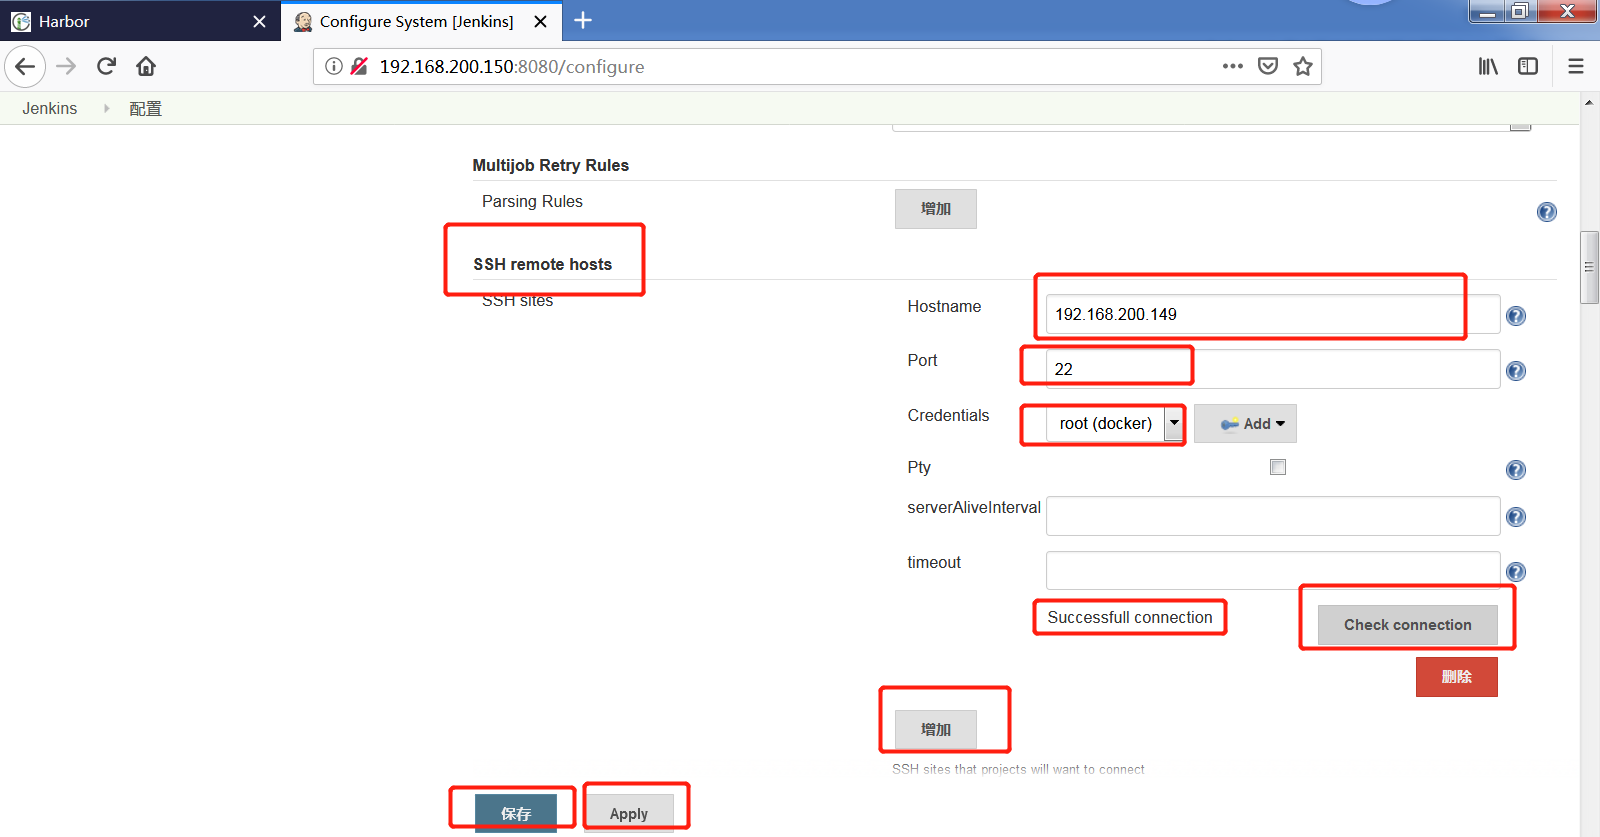
添加怎么连接docker在系统管理里边

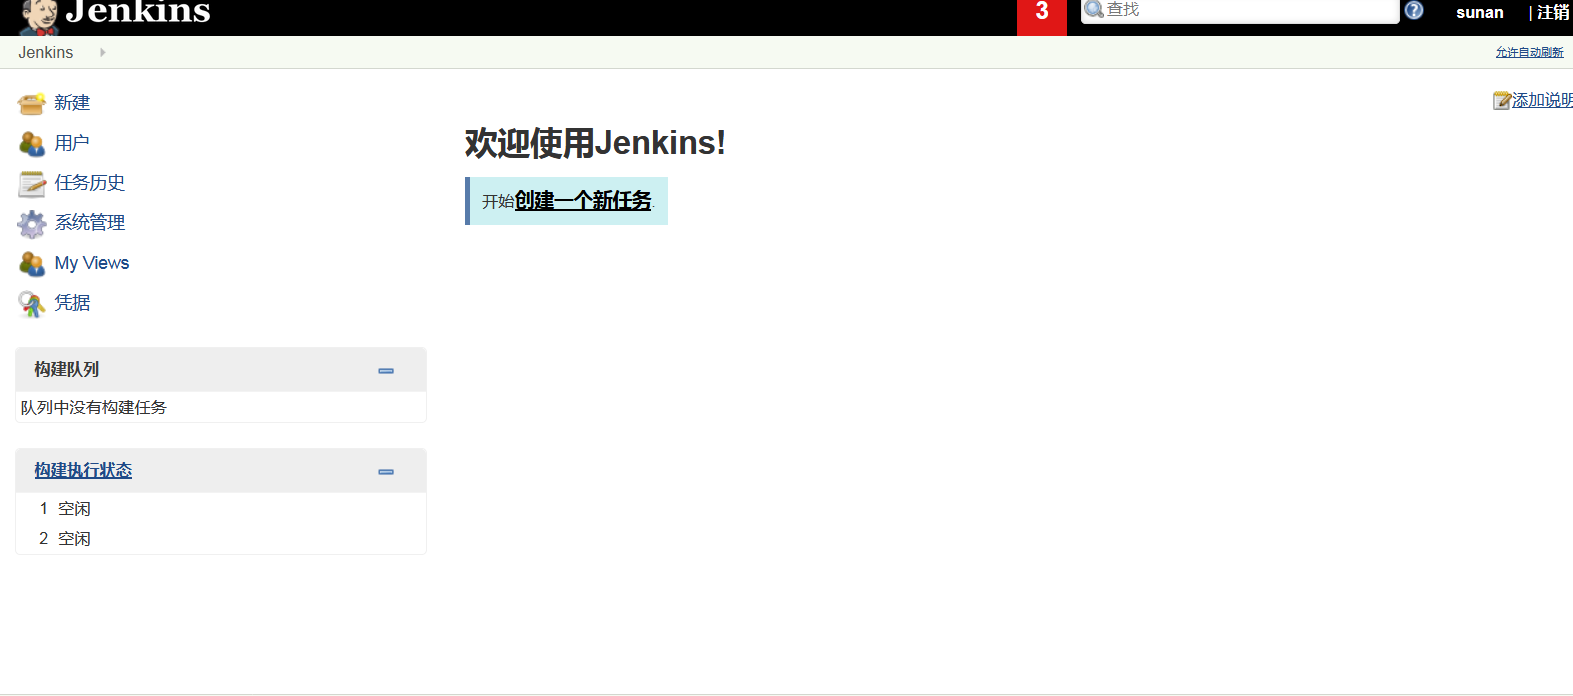
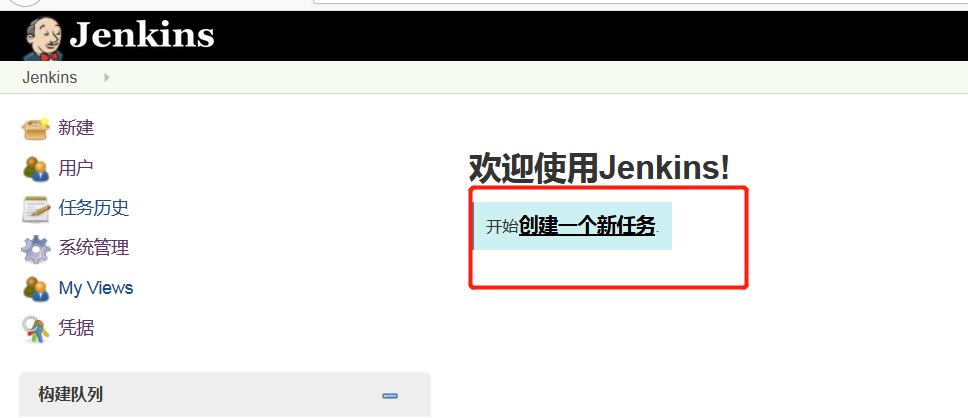
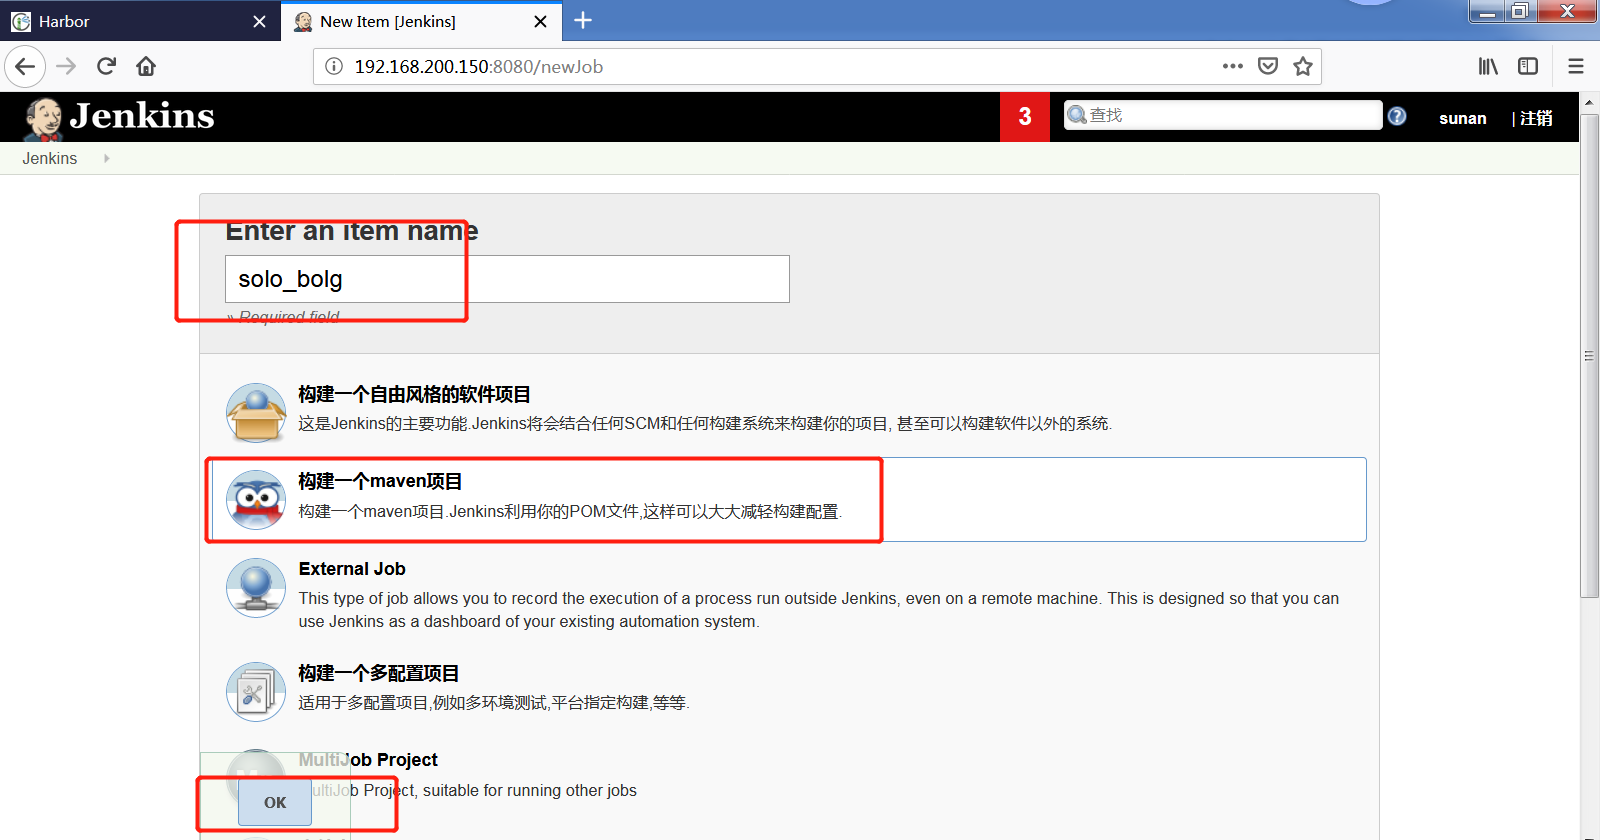
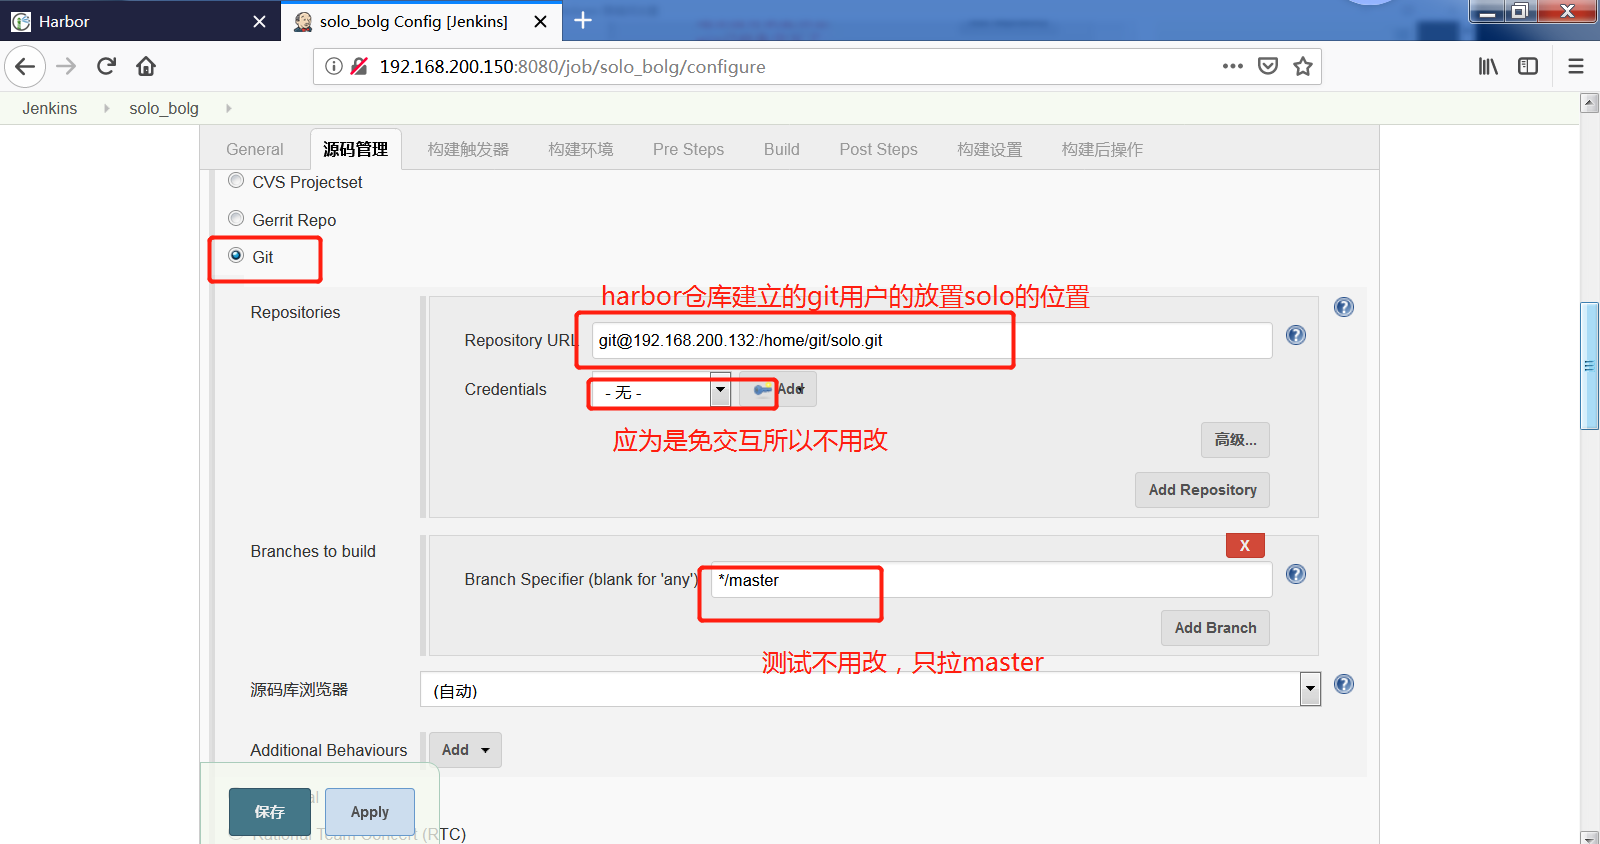
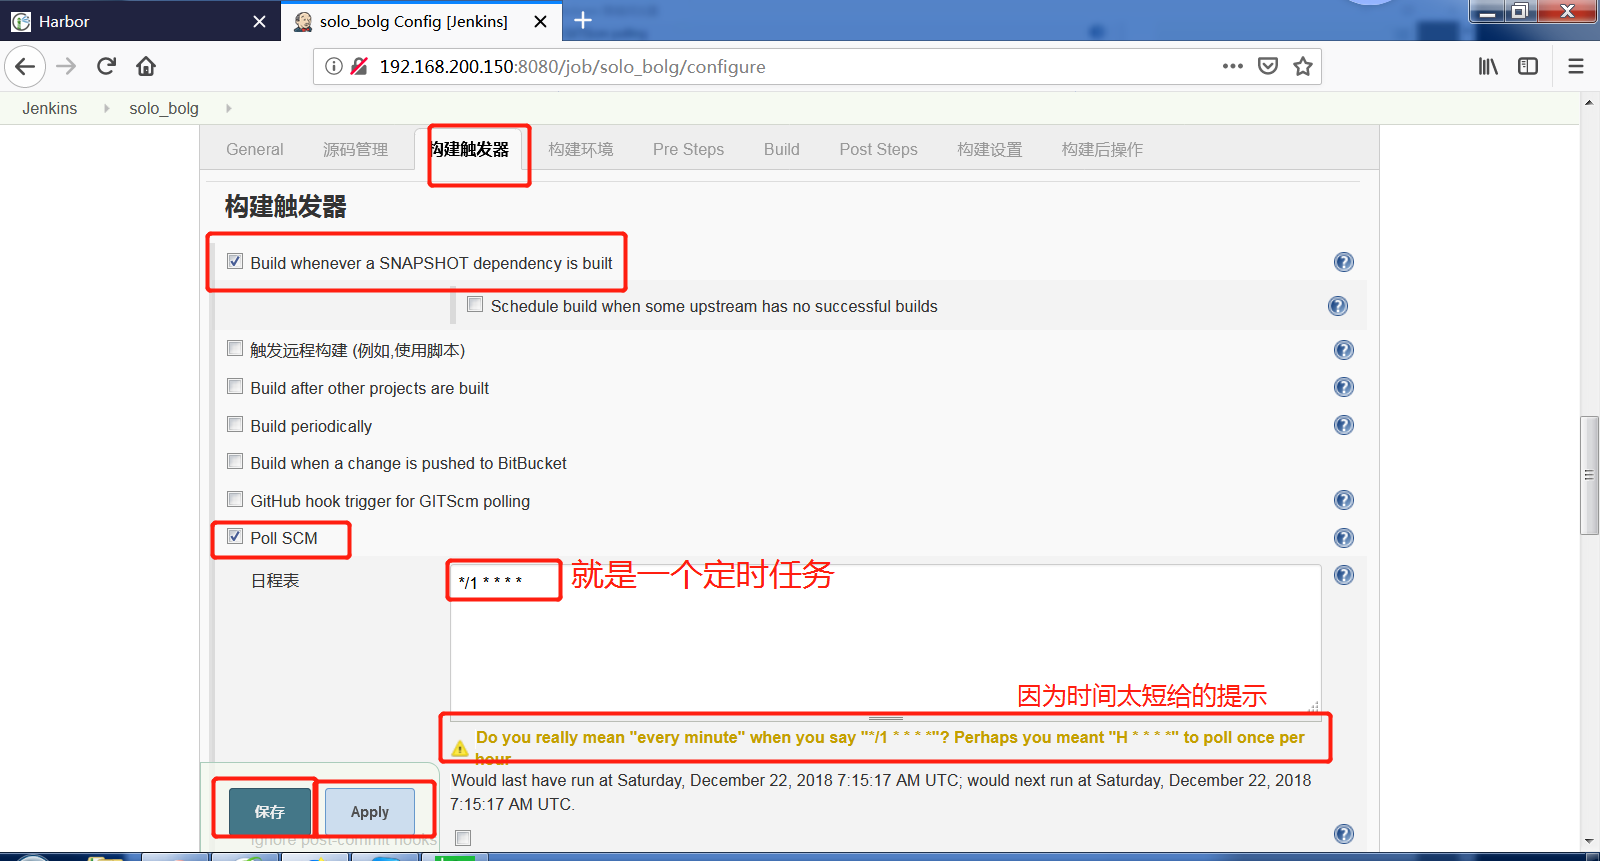
Jenkins创建项目

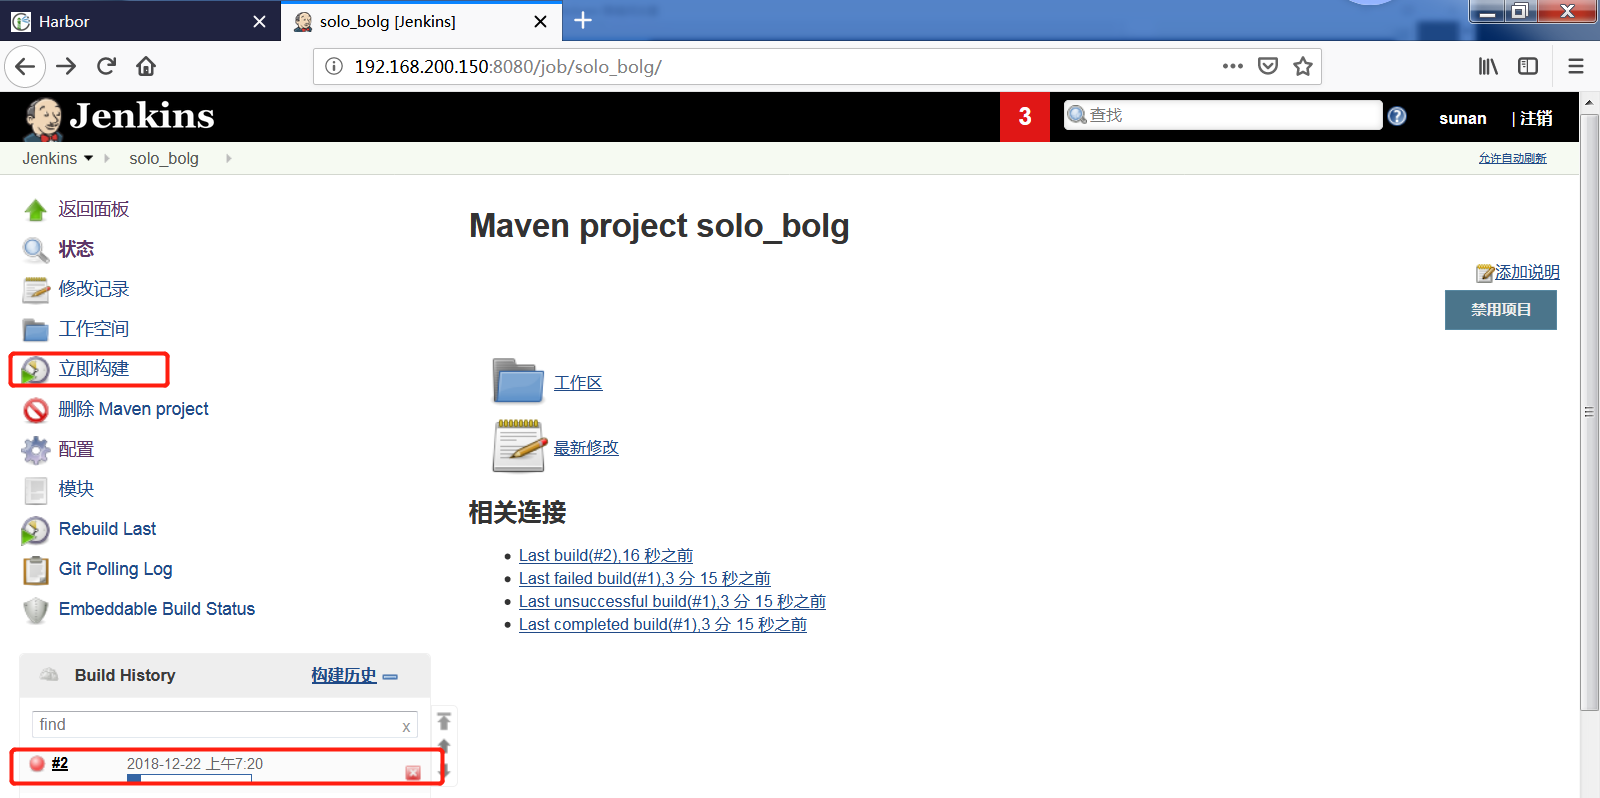
构建过程中的目录在Jenkins上看
[root@jenkins solo]# cd /var/jenkins_home/workspace/

[root@jenkins workspace]# ls

solo_bolg

[root@jenkins workspace]# cd solo_bolg/

[root@jenkins solo_bolg]# l

-bash: l: command not found

[root@jenkins solo_bolg]# ls

CHANGE_LOGS.html    Dockerfile   LICENSE       pom.xml    README_zh_CN.md  target

docker-compose.yml  gulpfile.js  package.json  README.md  src

[root@jenkins solo_bolg]# cd target/

[root@jenkins target]# ls

classes  generated-sources  generated-test-sources  maven-status  test-classes
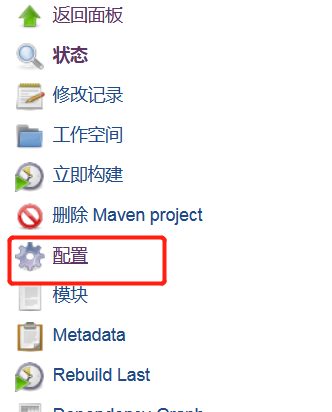
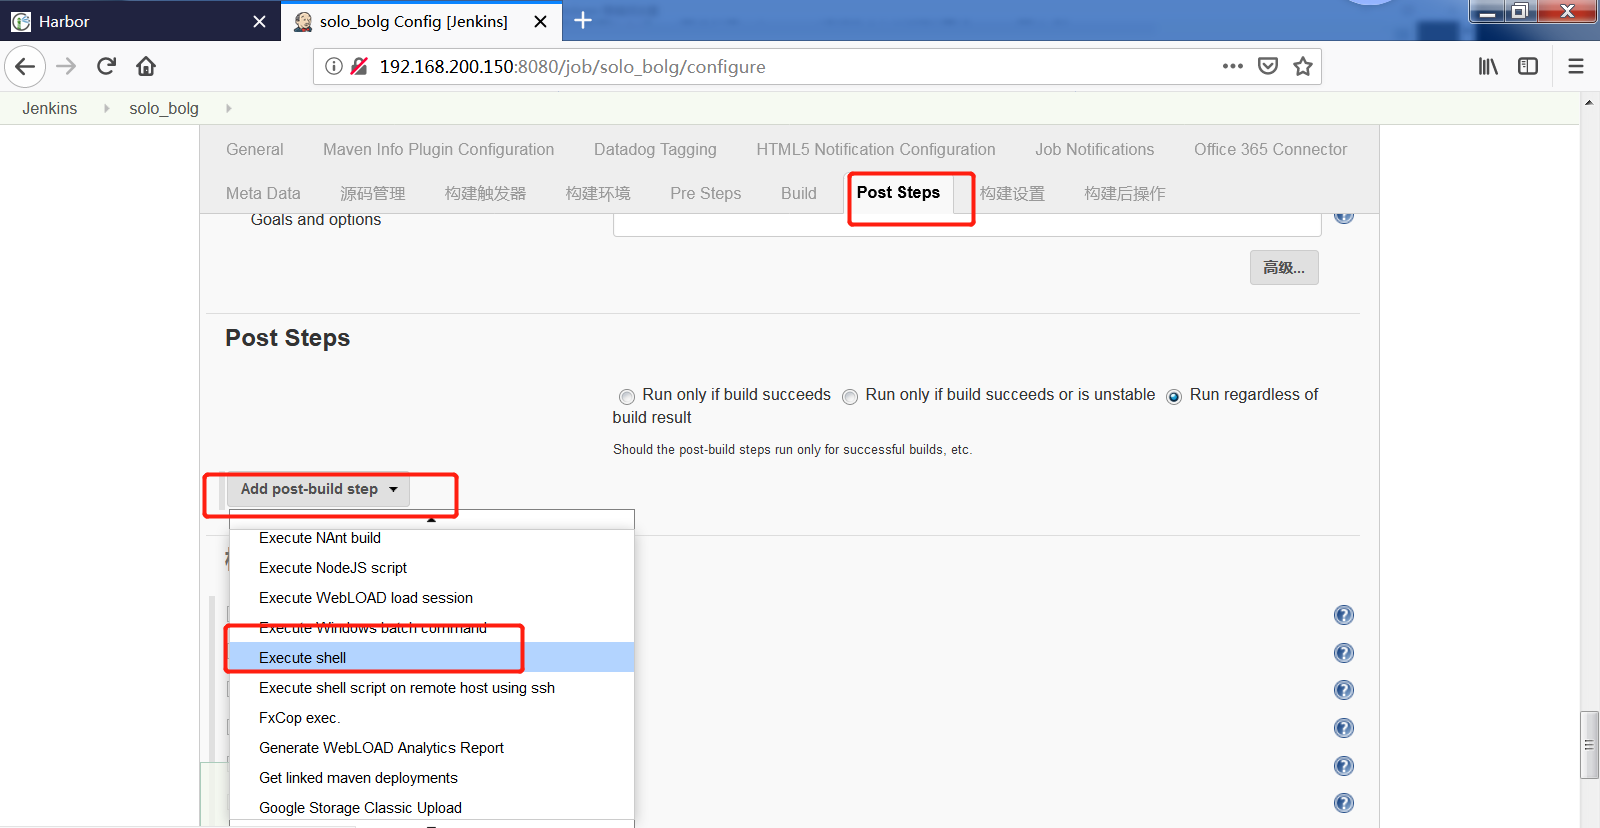
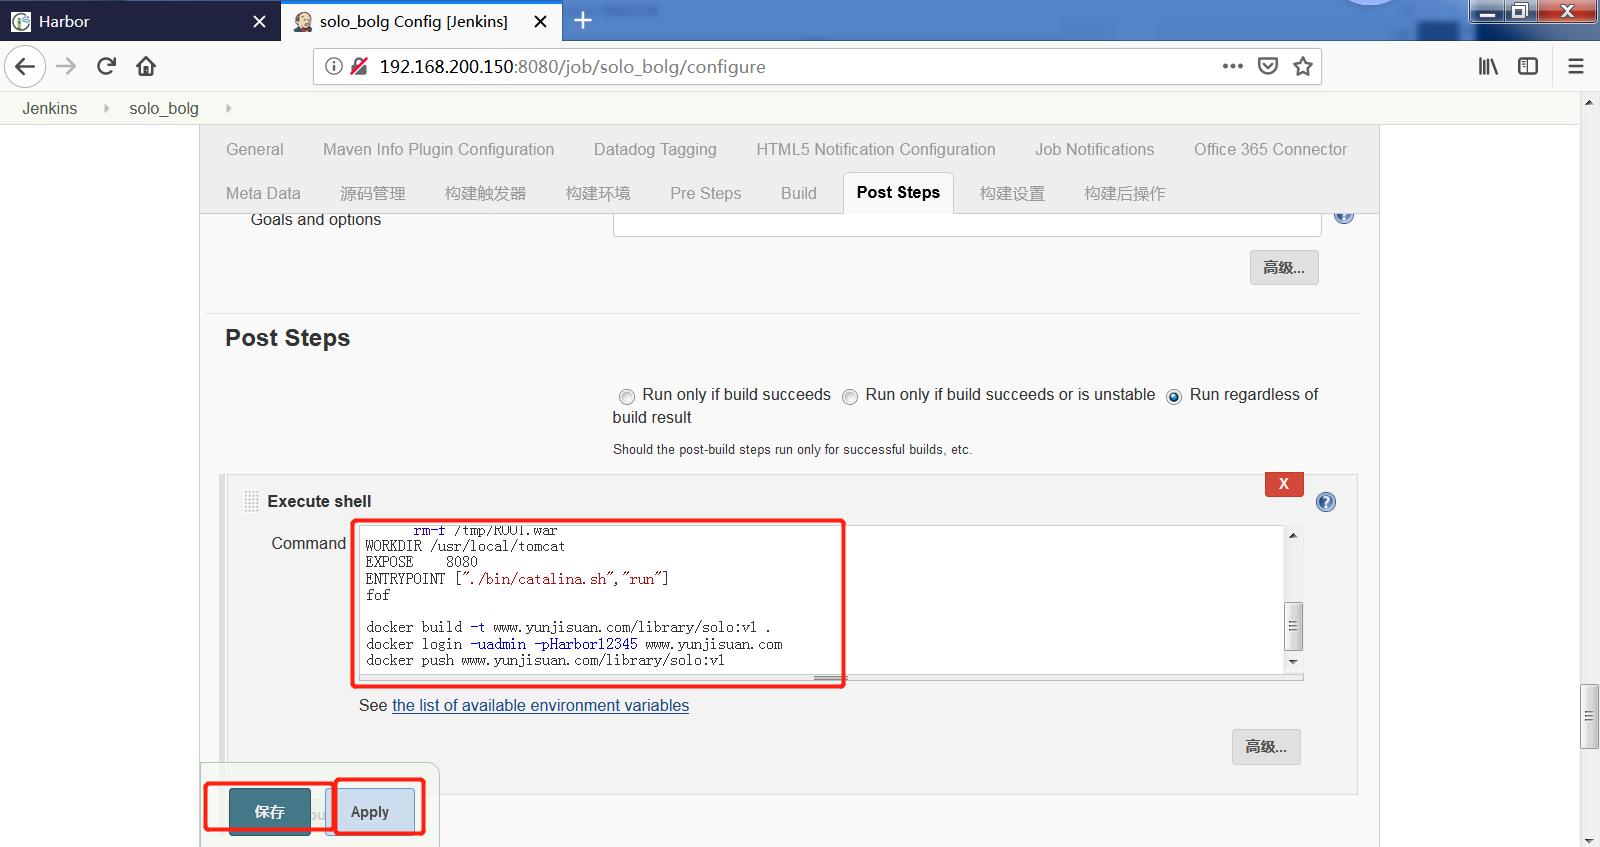
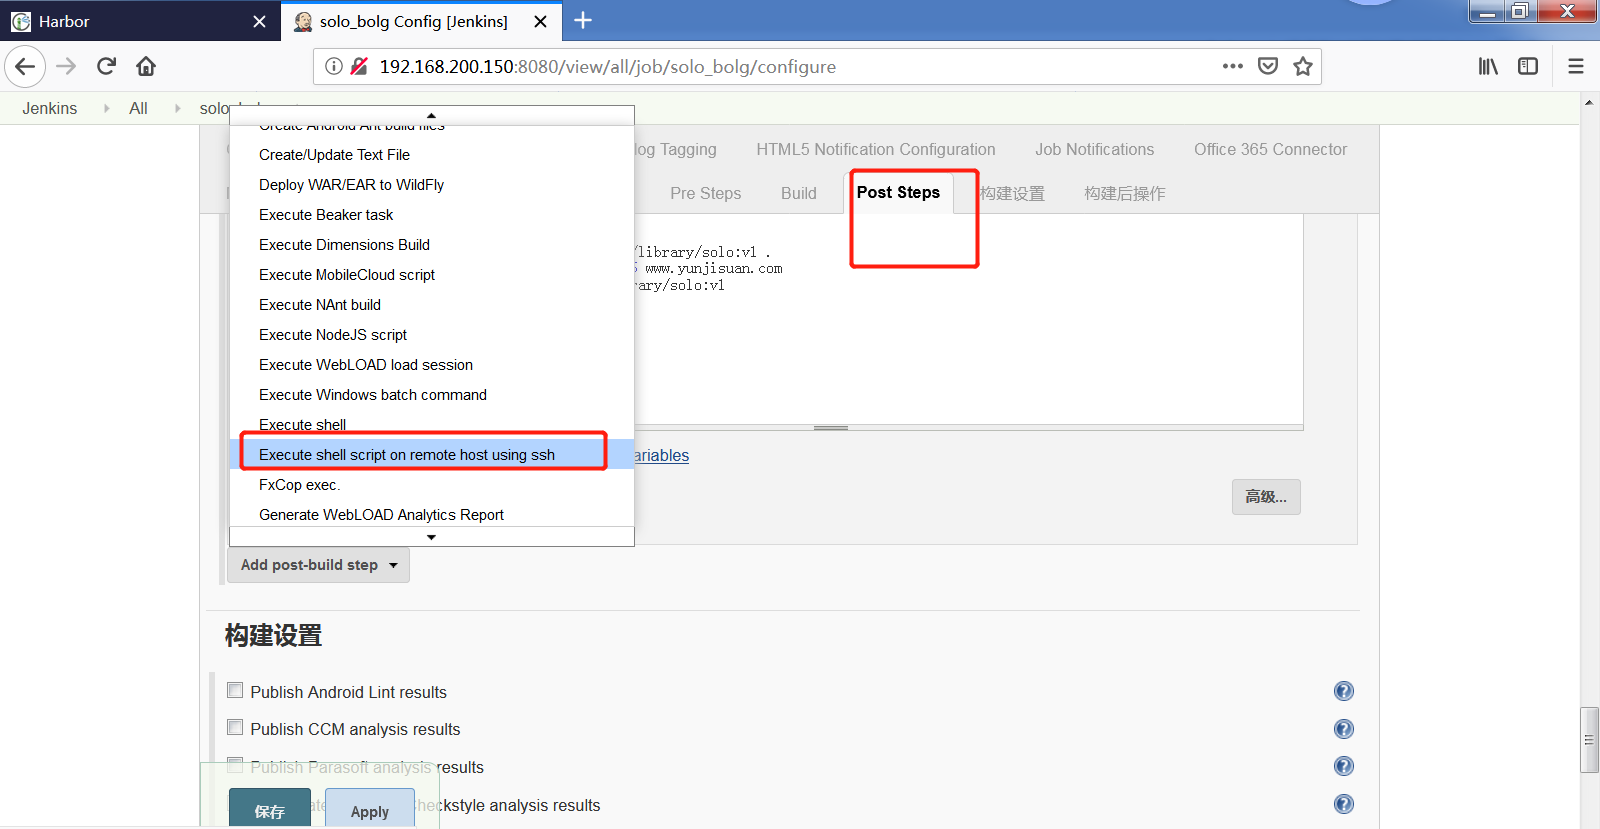
所以利用maven构建的java的源代码实际上就是生成可以在tomcat等容器中运行的warbao,现在我们重新修改一下项目配置,增加post steps(构建之后的操作)其实,构建之后,我们只需要通过脚本将warbao封装进一个tomcat的镜像中,然后推送到harbor里即可
cd $WORKSPACE

car > Dockerfile << fof

FROM www.yunjisuan.com/library/tomcat:v1

MAINTAINER www.yunjisuan.com

COPY target/solo.war /tmp/ROOT.war

RUN rm -rf /usr/local/tomcat/webapps/* &&\

     unzip /tmp/ROOT.war -d /usr/local//tomcat/webapps/ROOT && \

      rm-f /tmp/ROOT.war

WORKDIR /usr/local/tomcat

EXPOSE    8080

ENTRYPOINT ["./bin/catalina.sh","run"]

fof

docker build -t www.yunjisuan.com/library/solo:v1 .

docker login -uadmin -pHarbor12345 www.yunjisuan.com

docker push www.yunjisuan.com/library/solo:v1
测试构建成功后,我们继续在添加管理发送给docker服务器,
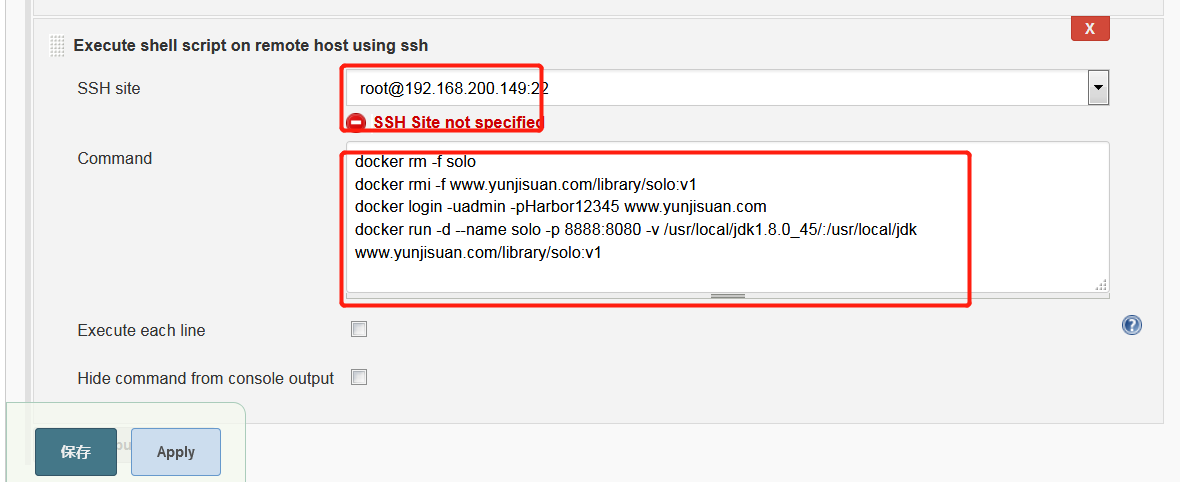
docker rm -f solo

docker rmi -f www.yunjisuan.com/library/solo:v1

docker login -uadmin -pHarbor12345 www.yunjisuan.com

docker run -d --name solo -p : -v /usr/local/jdk1..0_45/:/usr/local/jdk www.yunjisuan.com/library/solo:v1
jenkins+git+docker实验环境的搭建的更多相关文章
- Jenkins+Git+Docker+K8s部署
准备工作 Jenkins已安装 Docker和K8s部署运行成功 代码管理工具使用Git 最近公司项目使用Jenkins+Git+Docker+K8s进行持续化构建部署,这里笔者整理了一下构建部署的相 ...
- (一)jenkins+git+docker
目录 一.发布流程设计 1.工作流程 2.环境规划如下 二.部署Git仓库 1.创建Git用户并设置密码 2.创建仓库 3.免密访问 4.在jenkins那台机上做ssh认证 三.准备Jenkins环 ...
- Java实验环境的搭建
一.下载并安装JDK 1.官网下载安装 打开浏览器,输入http://www.oracle.com/index.html点击进入下载: 点击—>Downloads—>选择Java(JDK) ...
- TensorFlow实验环境搭建
初衷: 由于系统.平台的原因,网上有各种版本的tensorflow安装教程,基于linux的.mac的.windows的,各有不同,tensorflow的官网也给出了具体的安装命令.但实际上,即使te ...
- 个人环境搭建——搭建jenkins持续构建集成环境
---恢复内容开始--- 搭建jenkins持续构建集成环境 要搭建jenkins持续构建集成环境,首先要安装tomcat和JDK: 第一部分,基本说明: 敏捷(Agile) 在软件工程领域 ...
- Git及Github环境搭建(Windows系统)
一.github账号注册 1.打开网址https://github.com 注册账号: 二.本地安装Git 1.安装包下载地址:链接:https://pan.baidu.com/s/1smpnJL7 ...
- 实验一:JAVA实验环境搭建 ,JDK下载与安装及 Eclipse下载与安装
一.搭建JAVA实验环境 1.JDK的下载 (1)打开 IE 浏览器,输入网址“http://www.oracle.com/index.html”,浏览 Oracle 官方主页.鼠标双击Downloa ...
- python 实验环境
python 实验环境的搭建 刚开始在windows环境下尝试过komodo ,eclispse pydev,swing,spyder甚至limodou的编辑器,之后ipython,安装很多科学计算包 ...
- Docker——Jenkins + Git + Registry构建自动化持续集成环境(CI/CD)
前言 在互联网时代,对于每一家公司,软件开发和发布的重要性不言而喻,目前已经形成一套标准的流程,最重要的组成部分就是持续集成(CI)及持续部署.交付(CD). 本文基于Jenkins+Docker+G ...
随机推荐
- script 加载顺序问题的延展研究
今天群里有人问为什么会出现脚本的加载顺序与定义脚本顺序不一致的问题,这个问题引起了我的好奇,经过一番调研,有了这篇文章. 这是一个伪命题吗? 首先,W3C 推荐 script 脚本应该被立即加载和执行 ...
- 64bit ubuntu如何使能安装32bit软件
答:使用一下命令即可: sudo dpkg --add-architecture i386
- luogu P3387 【模板】缩点
题目 好久没法博客了 这次就水个板子题目吧 tarjan缩点之后重新建图 而且边权应该都是正的(要不我怎么能这么轻松水过去) 在新图上记忆化一下就好了 f[i] 表示 开头选i这个点 的 路径最大值 ...
- Https流程,openssl本地自建证书,抓包
HTTPS:超文本安全传输协议,和HTTP相比,多了一个SSL/TSL的认证过程,端口为443在http(超文本传输协议)基础上提出的一种安全的http协议,因此可以称为安全的超文本传输协议.http ...
- VS中自动选择x86或x64的dll
http://www.cnblogs.com/lzjsky/archive/2010/09/06/1819321.html 原来使用Win7的32位系统,进行C#工程的开发,后来重装系统,换成了win ...
- ThreadPoolExecutor执行过程分析
ThreadPoolExecutor public ThreadPoolExecutor(int corePoolSize, int maximumPoolSize, long keepAliveTi ...
- UVa 120 煎饼
https://vjudge.net/problem/UVA-120 题意:颠倒连续子序列,使之成为升序. 思路:按照从大到小的顺序,依次选择出一个数字进行分析: ①如果该数字已经在正确的位置上,则不 ...
- python 处理命令行参数--转载
标题写了那么久,现在现在才有时间,整理下自己的思路.首先先总结下自己对sys模块的理解.手册上对sys的描述是系统参数和系统函数,这里的系统实际上是python解释器.这个模块提供了用户可以访问的解释 ...
- 用python生成器实现杨辉三角
先看杨辉三角的形态: 1 1 1 1 2 1 1 3 3 1 1 4 6 4 1 1 5 10 10 5 1 上学的时候大多是用c语言的两层for循环在实现,现在我们尝试用生成器来实现. 先说思路:我 ...
- [ios][swift]文本框UITextField用法
参考:http://www.hangge.com/blog/cache/detail_530.html