VS2013(Win10X64)-配置编译Caffe
主要看这篇文章,有点小瑕疵,瑕不掩瑜。参考链接:http://www.bubuko.com/infodetail-902302.html
文中红色标记为文章小瑕疵的地方,在此文中标记出来,做为修改对上一文的补充。
参考原文链接:http://blog.csdn.net/joshua_1988/article/details/45048871
2014年4月的时候自己在公司就将Caffe移植到Windows系统了,今年自己换了台电脑,想在家里也随便跑跑,本来也装了Ubuntu可以很方便的配置好,无奈在家的风格是“娱乐的时候抽空学习”,所以移植到Windows还是很有必要的。但是,公司禁止将公司内部资料带出,很多地方又都忘记了,周末磨了一天终于移植完,本篇为记录将Caffe移植至Windows7 x64系统下的一些关键步骤。下面介绍如何从源码建立VS2013工程。
1. 从 https://github.com/BVLC/caffe 下载caffe源码,master或者dev版本都可以,本文中以dev为例
2. 新建一个空的控制台VS2013工程,起名为caffe-dev。
File --> New --> Project
选择Win32 Console Application
选择工程路径,比如D:\CODE\CXX
给项目命名caffe-dev
单击OK后选择Empty project
3. 将工程的Solution Platform改为x64
Build --> Configuration Manager --> Active solution platform --> new --> x64 --> OK
4. 设置CUDA编译
property--> Build dependencies --> Build Customizations... --> CUDA 6.5 --> OK
5. 设置一些工程下的路径,注意Debug和Release下都要设置
在Project --> Properties --> Configuration Properties --> VC++ Directories --> Include Directories中添加openblas、opencv、boost和cuda,例如
C:\Tools\boost_1_57\include;
C:\Tools\OpenBLAS_MinGW\include;
C:\Tools\opencv\build\include;
C:\Tools\opencv\build\include\opencv;
C:\Tools\opencv\build\include\opencv2;
C:\Program Files\NVIDIA GPU Computing Toolkit\CUDA\v7.5\include;
在Project --> Properties --> Configuration Properties --> VC++ Directories --> Library Directories中添加openblas、opencv、boost和cuda,例如
C:\Tools\OpenBLAS_MinGW\lib;
C:\Tools\opencv\build\x64\vc12\lib;
C:\Tools\boost_1_56\lib64-msvc-12.0;
C:\Program Files\NVIDIA GPU Computing Toolkit\CUDA\v6.5\lib\x64;
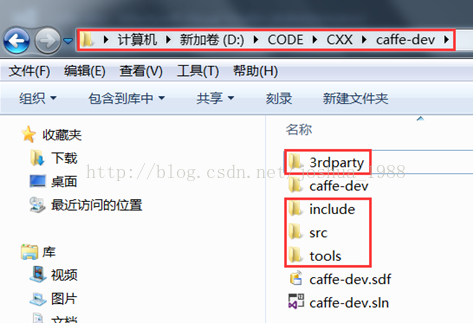
6. 将压缩包内的include、src和tools文件夹拷贝到工程根目录下,同时把整理好的3rdparty文件夹也拷贝到工程目录下
7. 添加caffe的路径和3rdparty中第三方依赖库的路径,同样Debug和Release都要设置
在Project --> Properties --> Configuration Properties --> C/C++ --> General --> Additional Include Directories中添加
../include;../src
../3rdparty/include
../3rdparty/include/hdf5
../3rdparty/include/lmdb
C:\Tools\Caffe-3rd\include;
在Project --> Properties --> Configuration Properties --> Linker --> General --> Additional Library Directories中添加
../3rdparty/libC:\Tools\Caffe-3rd\lib\LevelDB;
C:\Tools\Caffe-3rd\lib\lmdb;
C:\Tools\Caffe-3rd\lib\openblas;
C:\Tools\Caffe-3rd\lib\protobuf;
C:\Tools\Caffe-3rd\lib\snappy;
在Project --> Properties --> Configuration Properties --> Linker --> Input --> Additional Dependencies中添加
opencv_core2410.lib
opencv_highgui2410.lib
opencv_imgproc2410.libopencv_ts300.lib
opencv_world300.lib
cudart.lib
cublas.lib
curand.lib
gflags.lib
libglog.lib
libopenblas.dll.alibopenblas.lib
libprotobuf.lib
libprotoc.lib
leveldb.lib
lmdb.lib
libhdf5.lib
libhdf5_hl.lib
Shlwapi.lib
注意在Debug下应添加
xxxd.lib形式的自己确认一下debug命名 静态库
opencv_core2410d.lib
opencv_highgui2410d.lib
opencv_imgproc2410d.libopencv_ts300d.lib
opencv_world300d.lib
cudart.lib
cublas.lib
curand.lib
gflagsd.lib
libglogd.lib
libopenblas.dll.alibopenblas.lib
libprotobuf-gd.lib
libprotoc.lib
leveldbd.lib
lmdbd.lib
libhdf5.lib
libhdf5_hl.lib
Shlwapi.lib
8. 利用protoc.exe和caffe.proto生成caffe.pb.h和caffe.pb.cc文件
在编译protobuf的时候会生成一个可执行文件protoc.exe,在工程的D:\CODE\CXX\caffe-dev\src\caffe\proto路径下有一个文件叫caffe.proto,可以将protoc.exe拷贝到该路径下,在命令行中进入D:\CODE\CXX\caffe-dev\src\caffe\proto路径,输入命令
编译blob.cpp
直接编译时会报错,缺少文件”caffe\proto\caffe.pb.h”
这个时候需要将proto.exe放到../3rdparty/bin文件夹
将 GernaratePB.bat 放在../scripts文件夹,点击运行,可以生成文件
可以看到在该路径下会生成caffe.pb.h和caffe.pb.cc,在D:\CODE\CXX\caffe\include\caffe中新建一个文件夹proto,
将生成的两个文件移动到D:\CODE\CXX\caffe\include\caffe\proto中<del>cd C:\Tools\caffe-master\src\caffe\proto
protoc --cpp_out="." caffe.proto</del>
9. 准备mkstemp.h和mkstemp.cpp文件。
将mkstemp.h放在include/caffe/util/路径下,mkstemp.h中的内容为
 #include <windows.h>

 #include <io.h>

 int mkstemp(char *templates);
将mkstemp.cpp放在src/caffe/util/路径下,mkstemp.cpp中的内容为
/* mkstemp extracted from libc/sysdeps/posix/tempname.c.  Copyright

       (C) 1991-1999, 2000, 2001, 2006 Free Software Foundation, Inc.

       The GNU C Library is free software; you can redistribute it and/or

       modify it under the terms of the GNU Lesser General Public

       License as published by the Free Software Foundation; either

       version 2.1 of the License, or (at your option) any later version.  */

    #include "caffe/util/mkstemp.hpp"

    #include <errno.h>

    #include <fcntl.h>

    #include <sys/stat.h>

    static const char letters[] =

    "abcdefghijklmnopqrstuvwxyzABCDEFGHIJKLMNOPQRSTUVWXYZ0123456789";

    /* Generate a temporary file name based on TMPL.  TMPL must match the

       rules for mk[s]temp (i.e. end in "XXXXXX").  The name constructed

       does not exist at the time of the call to mkstemp.  TMPL is

       overwritten with the result.  */

    int mkstemp (char *tmpl)

    {

      int len;

      char *XXXXXX;

      static unsigned long long value;

      unsigned long long random_time_bits;

      unsigned int count;

      int fd = -1;

      int save_errno = errno;

      /* A lower bound on the number of temporary files to attempt to

         generate.  The maximum total number of temporary file names that

         can exist for a given template is 62**6.  It should never be

         necessary to try all these combinations.  Instead if a reasonable

         number of names is tried (we define reasonable as 62**3) fail to

         give the system administrator the chance to remove the problems.  */

    #define ATTEMPTS_MIN (62 * 62 * 62)

      /* The number of times to attempt to generate a temporary file.  To

         conform to POSIX, this must be no smaller than TMP_MAX.  */

    #if ATTEMPTS_MIN < TMP_MAX

      unsigned int attempts = TMP_MAX;

    #else

      unsigned int attempts = ATTEMPTS_MIN;

    #endif

      len = strlen (tmpl);

      if (len < 6 || strcmp (&tmpl[len - 6], "XXXXXX"))

        {

          errno = EINVAL;

          return -1;

        }

    /* This is where the Xs start.  */

      XXXXXX = &tmpl[len - 6];

      /* Get some more or less random data.  */

      {

        SYSTEMTIME      stNow;

        FILETIME ftNow;

        // get system time

        GetSystemTime(&stNow);

        stNow.wMilliseconds = 500;

        if (!SystemTimeToFileTime(&stNow, &ftNow))

        {

            errno = -1;

            return -1;

        }

        random_time_bits = (((unsigned long long)ftNow.dwHighDateTime << 32)

                            | (unsigned long long)ftNow.dwLowDateTime);

      }

      value += random_time_bits ^ (unsigned long long)GetCurrentThreadId ();

      for (count = 0; count < attempts; value += 7777, ++count)

        {

          unsigned long long v = value;

          /* Fill in the random bits.  */

          XXXXXX[0] = letters[v % 62];

          v /= 62;

          XXXXXX[1] = letters[v % 62];

          v /= 62;

          XXXXXX[2] = letters[v % 62];

          v /= 62;

          XXXXXX[3] = letters[v % 62];

          v /= 62;

          XXXXXX[4] = letters[v % 62];

          v /= 62;

          XXXXXX[5] = letters[v % 62];

          fd = open (tmpl, O_RDWR | O_CREAT | O_EXCL, _S_IREAD | _S_IWRITE);

          if (fd >= 0)

        {

          errno = save_errno;

          return fd;

        }

          else if (errno != EEXIST)

        return -1;

        }

      /* We got out of the loop because we ran out of combinations to try.  */

      errno = EEXIST;

      return -1;

    }
10. 将caffe的源文件添加到工程中
将D:\CODE\CXX\caffe-dev\src\caffe路径下除了test文件中的所有源文件添加到工程中,如果想要跑一些测试代码,也可以把test中的源文件加进去
将D:\CODE\CXX\caffe-dev\include\caffe\proto下的caffe.pb.cc添加到工程中
将D:\CODE\CXX\caffe-dev\tools下的caffe.cpp添加到工程中
11. 修改一些代码
在include/caffe/common.hpp中添加
#include <direct.h>
在include/caffe/util/io.hpp中添加
#include "mkstemp.hpp",并将close函数替换为_close,将
char* mkdtemp_result = mkdtemp(temp_dirname_cstr);替换为errno_t mkdtemp_result = _mktemp_s(temp_dirname_cstr, sizeof(temp_dirname_cstr));
将bnll_layer.cu中的
const float kBNLL_THRESHOLD = 50.;修改为#define kBNLL_THRESHOLD 50.
将util/db.cpp中的
mkdir(source.c_str(), 0744)修改为_mkdir(source.c_str())将util/io.cpp中的
open函数替换为_open,close函数替换为_close将util/io.cpp中
ReadProtoFromBinaryFile函数中的int fd = open(filename, O_RDONLY);替换为int fd = open(filename, O_RDONLY | O_BINARY);在util/math_functions.cpp中添加
#define __builtin_popcount __popcnt

#define __builtin_popcountl __popcnt
在common.cpp中添加
#include <process.h>将
pid = getpid();替换为pid = _getpid(); (这里本来有个笔误,谢谢dongb5lz的提醒)注释掉
::google::InstallFailureSignalHandler();将solver.cpp中的
snprintf函数替换为sprintf_s
编译吧!!!!
.....................
按照文章http://www.bubuko.com/infodetail-902302.html里面的顺序编译.....,排错逐个排除....
VS2013(Win10X64)-配置编译Caffe的更多相关文章
- VS2013配置编译Caffe-Win10_X64
原文链接:http://blog.csdn.net/joshua_1988/article/details/45036993 有少量修改................ 2014年4月的时候自己在公司 ...
- ubuntu14.04下安装cudnn5.1.3,opencv3.0,编译caffe及配置matlab和python接口过程记录
已有条件: ubuntu14.04+cuda7.5+anaconda2(即python2.7)+matlabR2014a 上述已经装好了,开始搭建caffe环境. 1. 装cudnn5.1.3,参照: ...
- vs2015编译caffe
有些时候,需要在python3的环境下import caffe,需要用vs2015在python3的环境下,编译pycaffe. microsoft的windows版本的caffe,依赖的库Nuget ...
- ubuntu下 编译Caffe的Matlab接口
一般情况下不愿意使用Caffe的Matlab接口,总觉得Linux版的Matlab很难配置,但是现在搞目标检测,得到的源码是使用的Caffe的Matlab接口,只能硬着头皮上了. (1)修改caffe ...
- windows下编译caffe报错:error MSB4062: 未能从程序集 E:\NugetPackages\OpenCV.2.4.10\......的解决办法
参考博客:http://blog.csdn.net/u013277656/article/details/75040459 在windows上编译caffe时,用vs打开后会自动加载还原NugetPa ...
- 在vs2013上的编译tesseract-ocr
在vs2013上的编译tesseract-ocr OCR(Optical Character Recognition):光学字符识别,是指对图片文件中的文字进行分析识别,获取的过程. Tesserac ...
- vs2013下配置opencv1.0.0
vs2013下配置opencv1.0.0 2019-4-25 17:13:13 原因 现在最新opencv已经到4.0.1版了.用opencv1.0原因: 小.源码包只有10M左右. 清晰.他的文档结 ...
- Ubuntu16.04安装编译caffe以及一些问题记录
前期准备: 最好是python虚拟环境 [anaconda的创建虚拟环境] 创建 conda create -n caffeEnv(虚拟环境名字) python=3.6 激活环境 source act ...
- 【Caffe】Ubuntu16.04上配置安装caffe(Only CPU)
一.首先看看自己的系统,Ubuntu16.04,cpu,没有Nvidia,没有opencv 二.安装依赖包 安装protobuf,leveldb,snappy,OpenCV,hdf5, protobu ...
随机推荐
- JavaSE 学习笔记之String字符串(十四)
API:(Application Programming Interface,应用程序编程接口)是一些预先定义的函数,目的是提供应用程序与开发人员基于某软件或硬件的以访问一组例程的能力,而又无需访问源 ...
- HDU - 3556 - Continued Fraction
先上题目: Continued Fraction Time Limit: 2000/1000 MS (Java/Others) Memory Limit: 131072/65536 K (Jav ...
- Sencha Touch中 xclass和xtype区别
1.xclass 就是 Ext.create(xclass) 和 xtype一样的性质,不一定非要是自己创建的. 2.xtype是xclass的简称. 3.使用xtype前,你要new的对象,先要re ...
- ZooKeeper是什么(转)
ZooKeeper是什么? ZooKeeper是一个分布式的,开放源码的分布式应用程序协调服务,是Google的Chubby一个开源的实现,是Hadoop和Hbase的重要组件.它是一个为分布式应用提 ...
- VBox虚拟机与主机(宿主)通讯原理以及socat(套接字猫)简单介绍
前言 尝试虚拟机使用socat建立服务器端接口转发时,发现对虚拟机接入网络原理不是非常了解,于是乎上网查找资料想搞明白是怎么回事,于是乎有了这篇总结博文.socat可以在服务器端口间建立全双工通信通道 ...
- WGS84坐标系图层转火星坐标系(是整个图层转哟,不是转单点坐标)
开篇唠叨(着急的略过) 大天朝“火星坐标系”小科普:是一种国家保密插件,对真实坐标系统进行人为的加偏处理,将真实的坐标加密成虚假的坐标,加密后的坐标被称为火星坐标系统.所有的电子地图所有的导航设备,都 ...
- VMware镜像文件下载
VMware镜像文件下载 http://blog.sina.com.cn/s/blog_517c21c00102x5ja.html 貌似Centos 6不能下载啊: 其他的没有测试:
- VC问题 IntelliSense:“没有可用的附加信息”,[请參见“C++项目 IntelliSense 疑难解答”,获得进一步的帮助]
在XP上安装VS2010 后发现 IntelliSense不能使用,但在Windows7上是能够正常使用这功能的.关于IntelliSense不能使用的问题已有网友提出了是由于KB2876217这个补 ...
- VMware Workstation 集群仲裁磁盘和数据共享磁盘的创建
近期项目须要对SQL Server建立集群服务,多个SQL Server数据库建立集群服务,对外提供唯一的URL訪问地址.当主节点断电.断网后,通过心跳线将消息传递到备用节点.备用节点在3秒内接管数据 ...
- jQuery总结04
1 JavaScript 中的 AJAX 的四个实现步骤分别是? 2 如何处理 XMLHttpRequest 对象的兼容问题? 3 jQuery 中的 AJAX 4 jQuery 选择器包括哪些? 5 ...