使用SwipeListView实现滑动效果
QQ的滑动删除效果很不错,要实现这种效果,可以使用SwipeListView。
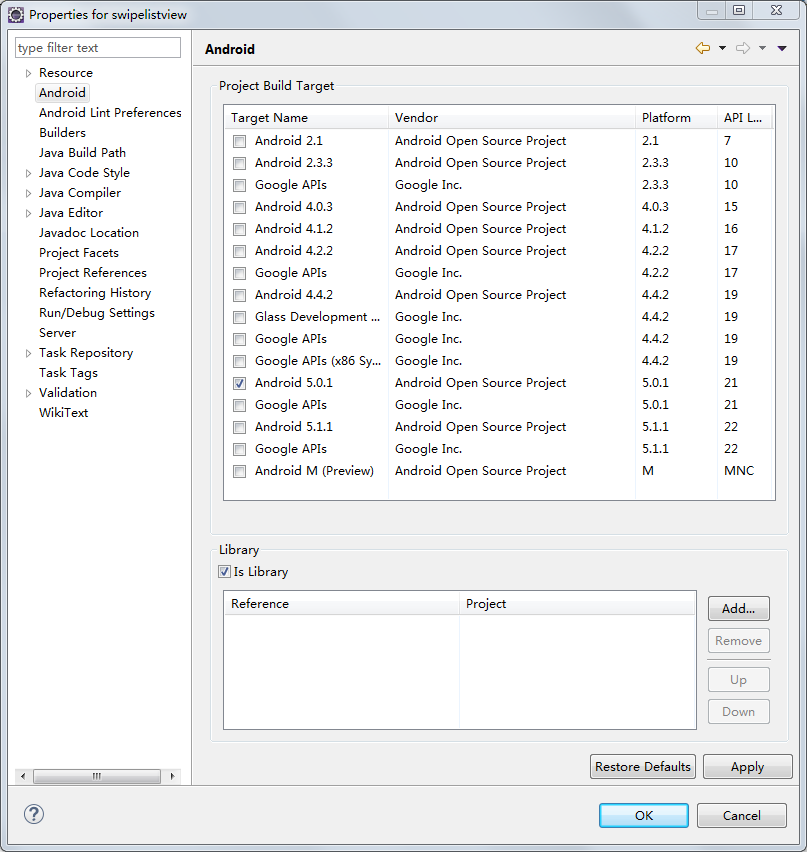
1. 下载com.fortysevendeg.swipelistview这个项目(以前GitHub上有,现在GitHub上没有了,百度了很多次才下载到的),导入Eclipse,右键单击,选择Properties->Android,选中Library下面的IsLibrary。
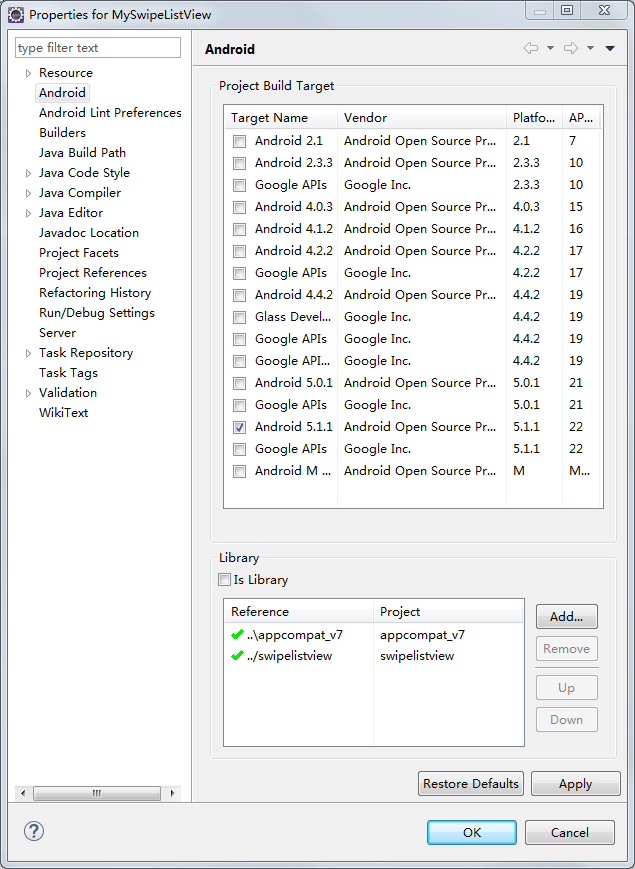
2. 新建一个项目MySwipeListView,加入SwipeListView这个库。
3. 在主窗体里面放入一个SwipeListView控件:
<LinearLayout xmlns:android="http://schemas.android.com/apk/res/android"

    xmlns:tools="http://schemas.android.com/tools"

    android:layout_width="match_parent"

    android:layout_height="match_parent"

    android:orientation="vertical"

    android:paddingBottom="@dimen/activity_vertical_margin"

    android:paddingLeft="@dimen/activity_horizontal_margin"

    android:paddingRight="@dimen/activity_horizontal_margin"

    android:paddingTop="@dimen/activity_vertical_margin"

    tools:context="com.hzhi.myswipelistview.MainActivity" >

        <com.fortysevendeg.swipelistview.SwipeListView

            xmlns:swipe="http://schemas.android.com/apk/res-auto"

            android:id="@+id/exampleSwipeListView"

            android:listSelector="#00000000"

            android:layout_width="fill_parent"

            android:layout_height="wrap_content"

            swipe:swipeBackView="@+id/back"

            swipe:swipeCloseAllItemsWhenMoveList="true"

            swipe:swipeDrawableChecked="@drawable/choice_selected"

            swipe:swipeDrawableUnchecked="@drawable/choice_unselected"

            swipe:swipeFrontView="@+id/front"

            swipe:swipeMode="both"

            swipe:swipeActionLeft="reveal"

            swipe:swipeActionRight="dismiss"

            swipe:swipeOpenOnLongPress="true"

        />

</LinearLayout>
其中两个重要的属性:
swipe:swipeFrontView:上面的View,即不滑动时显示的View。
swipe:swipeBackView:下面的View,即滑动后显示的View。
这两个View都定义在SwipeListView的行布局文件里面:
<?xml version="1.0" encoding="utf-8"?>

<FrameLayout xmlns:android="http://schemas.android.com/apk/res/android"

             android:layout_width="fill_parent"

             android:layout_height="fill_parent"

        >

    <LinearLayout

        android:id="@+id/back"

        android:layout_width="fill_parent"

        android:layout_height="wrap_content"

        android:background="#ffcccccc"

        android:gravity="right"

        android:tag="back" >

        <Button

                android:layout_width="wrap_content"

                android:layout_height="wrap_content"

                android:id="@+id/btn_delete"

                android:text="删除"/>

        <Button

                android:layout_width="wrap_content"

                android:layout_height="wrap_content"

                android:id="@+id/btn_update"

                android:text="更新"/>

    </LinearLayout>

    <RelativeLayout

            android:orientation="vertical"

            android:id="@+id/front"

            android:layout_width="fill_parent"

            android:layout_height="wrap_content"

            android:background="#ffffffff"

    >

        <ImageView

                android:layout_width="wrap_content"

                android:layout_height="wrap_content"

                android:id="@+id/example_row_iv_image"/>

        <TextView

                android:layout_width="fill_parent"

                android:layout_height="wrap_content"

                android:layout_toRightOf="@id/example_row_iv_image"

                android:id="@+id/example_row_tv_title"/>

        <TextView

                android:layout_width="fill_parent"

                android:layout_height="wrap_content"

                android:layout_toRightOf="@id/example_row_iv_image"

                android:layout_below="@id/example_row_tv_title"

                android:id="@+id/example_row_tv_description"/>

    </RelativeLayout>

</FrameLayout>
SwipeListView的行布局文件使用FrameLayout布局,FrameLayout里面所有的所有子元素都堆叠在FrameLayout的左上角。
4. SwipeListView和其他ListView一样,也需要Adapter,使用方法也是一样的。这里就不详细讲了。
5. 在主窗体Java文件中实现SwipeListView的功能,代码如下:
package com.hzhi.myswipelistview;

import android.support.v7.app.ActionBarActivity;

import android.util.Log;

import java.util.ArrayList;

import com.fortysevendeg.swipelistview.BaseSwipeListViewListener;

import com.fortysevendeg.swipelistview.SwipeListView;

import android.os.Bundle;

@SuppressWarnings("deprecation")

public class MainActivity extends ActionBarActivity {

    protected static final String TAG = "MySwipeListView";

    private ArrayList<String> mList;

    private MyAdapter mAdapter;

    private SwipeListView mSwipeListView;

    @Override

    protected void onCreate(Bundle savedInstanceState) {

        super.onCreate(savedInstanceState);

        setContentView(R.layout.activity_main);

        initData();

        mSwipeListView = (SwipeListView) findViewById(R.id.exampleSwipeListView);

        mAdapter = new MyAdapter(this, mList, mSwipeListView);

        mSwipeListView.setAdapter(mAdapter);

        mSwipeListView.setSwipeListViewListener(new BaseSwipeListViewListener(){

            @Override

            public void onChoiceChanged(int position, boolean selected)

            {

                Log.d(TAG, "onChoiceChanged:" + position + ", " + selected);

            }

            @Override

            public void onChoiceEnded()

            {

                Log.d(TAG, "onChoiceEnded");

            }

            @Override

            public void onChoiceStarted()

            {

                Log.d(TAG, "onChoiceStarted");

            }

            @Override

            public void onClickBackView(int position)

            {

                Log.d(TAG, "onClickBackView:" + position);

            }

            @Override

            public void onClickFrontView(int position)

            {

                Log.d(TAG, "onClickFrontView:" + position);

            }

            @Override

            public void onClosed(int position, boolean fromRight)

            {

                Log.d(TAG, "onClosed:" + position + "," + fromRight);

            }

            @Override

            public void onDismiss(int[] reverseSortedPositions)

            {

                Log.d(TAG, "onDismiss");

            }

            @Override

            public void onFirstListItem()

            {

                Log.d(TAG, "onFirstListItem");

            }

            @Override

            public void onLastListItem()

            {

                Log.d(TAG, "onLastListItem");

            }

            @Override

            public void onListChanged()

            {

                Log.d(TAG, "onListChanged");

                mSwipeListView.closeOpenedItems();

            }

            @Override

            public void onMove(int position, float x)

            {

                Log.d(TAG, "onMove:" + position + "," + x);

            }

            @Override

            public void onOpened(int position, boolean toRight)

            {

                Log.d(TAG, "onOpened:" + position + "," + toRight);

            }

            @Override

            public void onStartClose(int position, boolean right)

            {

                Log.d(TAG, "onStartClose:" + position + "," + right);

            }

            @Override

            public void onStartOpen(int position, int action, boolean right)

            {

                Log.d(TAG, "onStartOpen:" + position + "," + action + "," + right);

            }

        });

    }

    private void initData(){

        mList = new ArrayList<String>();

        for (int i = 0; i <= 10; i++)

            mList.add("这是第" + i +"条数据!");

    }

}
最主要的代码即mSwipeListView.setSwipeListViewListener(new BaseSwipeListViewListener(){}),通过这行代码,为SwipeListView控件设置了Listener,可以根据自己的需要重载BaseSwipeListViewListener的各种方法。
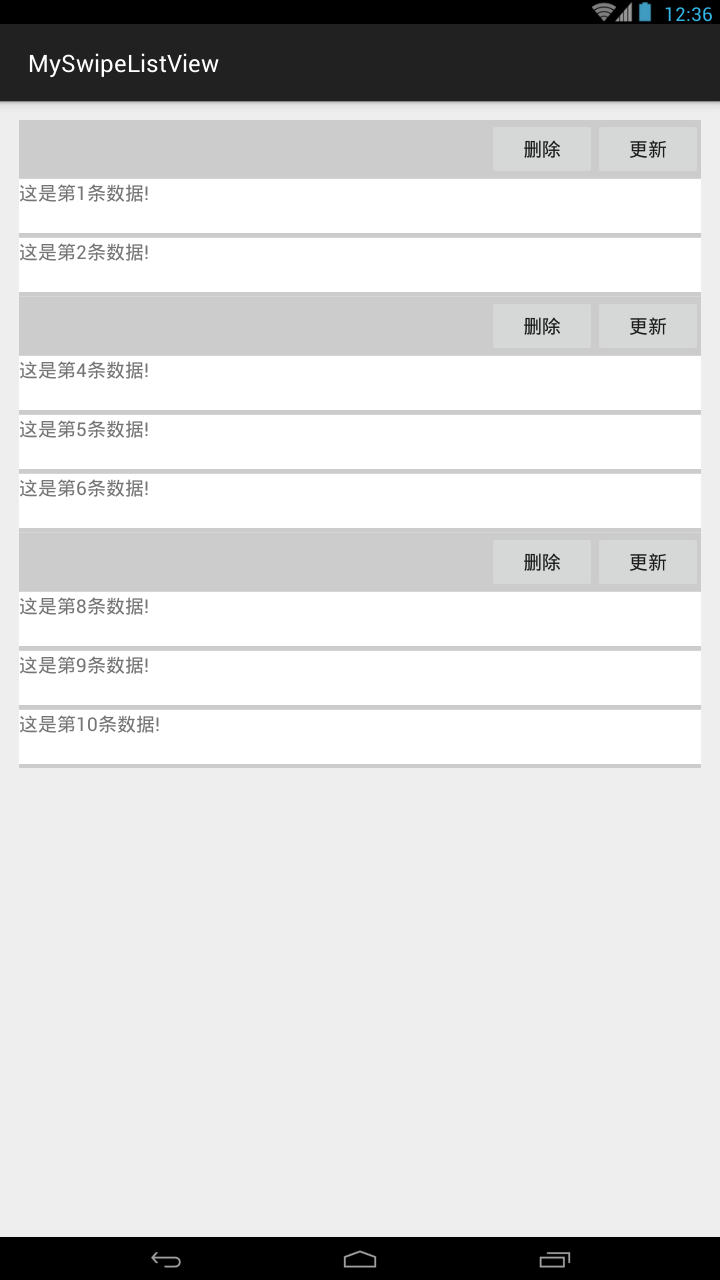
运行结果:
使用SwipeListView实现滑动效果的更多相关文章
- a 锚点跳转滑动效果
点击a链接时,跳转到相应id的位置处,有一个滑动效果. <a href="#my">我是跳转到div</a><div id="my" ...
- Android Scroll分析——滑动效果产生
相对于在Android2.x版本上出现的长按.点击事件的效果,不得不说,滑动操作具有更好的用户体验.因此,从Android 4.X版本开始,出现了更多滑动操作的效果.越来越多第三方应用模仿这样的效果, ...
- jquery左右滑动效果的实现
<!DOCTYPE html PUBLIC "-//W3C//DTD XHTML 1.0 Transitional//EN" "http://www.w3.org/ ...
- bootstrap实现 手机端滑动效果,滑动到下一页,jgestures.js插件
bootstrap能否实现 手机端滑动效果,滑动到下一页 jgestures.js插件可以解决,只需要引入一个JS文件<script src="js/jgestures.min.js& ...
- Android实现多页左右滑动效果,支持子view动态创建和cache
要实现多页滑动效果,主要是需要处理onTouchEvent和onInterceptTouchEvent,要处理好touch事件的子控件和父控件的传递问题. 滚动控制可以利用android的Scroll ...
- 【Android 界面效果27】利用ViewPager、Fragment、PagerTabStrip实现多页面滑动效果
本文主要介绍如何利用ViewPager.Fragment.PagerTabStrip实现多页面滑动效果.即google play首页.新浪微博消息(at.评论.私信.广播)页面的效果.ViewPage ...
- 十六、Android 滑动效果汇总
Android 滑动效果入门篇(一)—— ViewFlipper Android 滑动效果入门篇(二)—— Gallery Android 滑动效果基础篇(三)—— Gallery仿图像集浏览 And ...
- Android 滑动效果进阶篇(六)—— 倒影效果
上篇介绍了使用Animation实现3D动画旋转翻页效果,现在介绍图片倒影实现,先看效果图 本示例主要通过自定义Gallery和ImageAdapter(继承自BaseAdapter)实现 1.倒影绘 ...
- Android 滑动效果入门篇(二)—— Gallery
Gallery 是Android官方提供的一个View容器类,继承于AbsSpinner类,用于实现页面滑动效果. 从上面的继承关系可以看出,AbsSpinner类继承自AdapterView,因此我 ...
随机推荐
- 迷你MVVM框架 avalonjs 实现上的几个难点
经过两个星期的性能优化,avalon终于实现在一个页面绑定达到上万个的时候不卡顿的目标(angular的限制是2000).现在稍作休息,总结一下avalon遇到的一些难题. 首先是如何监控的问题.所有 ...
- [译]Asp.net MVC 之 Contorllers(二)
URL路由模块 取代URL重写 路由请求 URL路由模块的内部结构 应用程序路由 URL模式和路由 定义应用程序路由 处理路由 路由处理程序 处理物理文件请求 防止路由定义的URL 属性路由 书接上回 ...
- Azure PowerShell (7) 使用CSV文件批量设置Virtual Machine Endpoint
<Windows Azure Platform 系列文章目录> 请注意: - Azure不支持增加Endpoint Range - 最多可以增加Endpoint数量为150 http:// ...
- python数据类型详解
目录1.字符串2.布尔类型3.整数4.浮点数5.数字6.列表7.元组8.字典9.日期 1.字符串1.1.如何在Python中使用字符串a.使用单引号(')用单引号括起来表示字符串,例如:str='th ...
- 自制编程语言crowbar(v0.1)构建解析器时分配内存
crowbar中第一次申请内存是在生成解析器的时候: /* interface.c */CRB_Interpreter *CRB_create_interpreter(void) { MEM_Stor ...
- Neutron 物理部署方案 - 每天5分钟玩转 OpenStack(68)
前面我们讨论了 Neutron 的架构,本节讨论 Neutron 的物理部署方案:不同节点部署不同的 Neutron 服务组件. 方案1:控制节点 + 计算节点 在这个部署方案中,OpenStack ...
- Android启动icon切图大小
我们在给app切图的时候不知道告诉ui启动图标切多大,其实你新建一个android项目就知道应该切多大了.新建一个项目会产生几种大小的启动图标. 我把各个文件夹下的ic_launcher.png文件都 ...
- jQuery之on
在jQuery1.9版本中,已经去掉了live和delegate方法,从而将on方法的地位进一步提升. jQuery如此推崇on方法,必有其牛逼的地方.那么我们就有必要了解这个on,并在代码中利用它, ...
- iOS开发之窥探UICollectionViewController(二) --详解CollectionView各种回调
UICollectionView的布局是可以自己定义的,在这篇博客中先在上篇博客的基础上进行扩充,我们先使用UICollectionViewFlowLayout,然后好好的介绍一下UICollecti ...
- Sublime写MarkDown实时预览
[TOC] Sublime写MarkDown实时预览 Sublime作为神器,实至名归. 首先 1.安装Sublime,并安装Package Control,这里不多说. 2.安装MarkDown P ...