vue-cli脚手架——2.0版本项目案例
一、【准备工作】
Node.js 安装包及源码下载地址为:https://nodejs.org/en/download/。
Git 各平台安装包下载地址为:http://git-scm.com/downloads
1.node -v
npm -v // 更新:npm update -g
npm config set registry https://registry.npm.taobao.org
//设置代理 可以用npm config get registry/npm info express 验证
//恢复设置:npm config set registry https://registry.npmjs.org/
$ npm install -g cnpm --registry=https://registry.npm.taobao.org
$ cnpm -v
//单独使用
npm init
// 创建 package.json 文件。之后,还需要创建模块的入口文件。默认文件名是 index.js。
2.git --version
// git init 保存你的每一次修改,并推送到远程仓库(需要设置令牌才能推送,如:github、码云 、腾讯云)
二、【vue-cli2.0项目案例】
cnpm install -g vue-cli 或 cnpm update vue-cli
vue -v
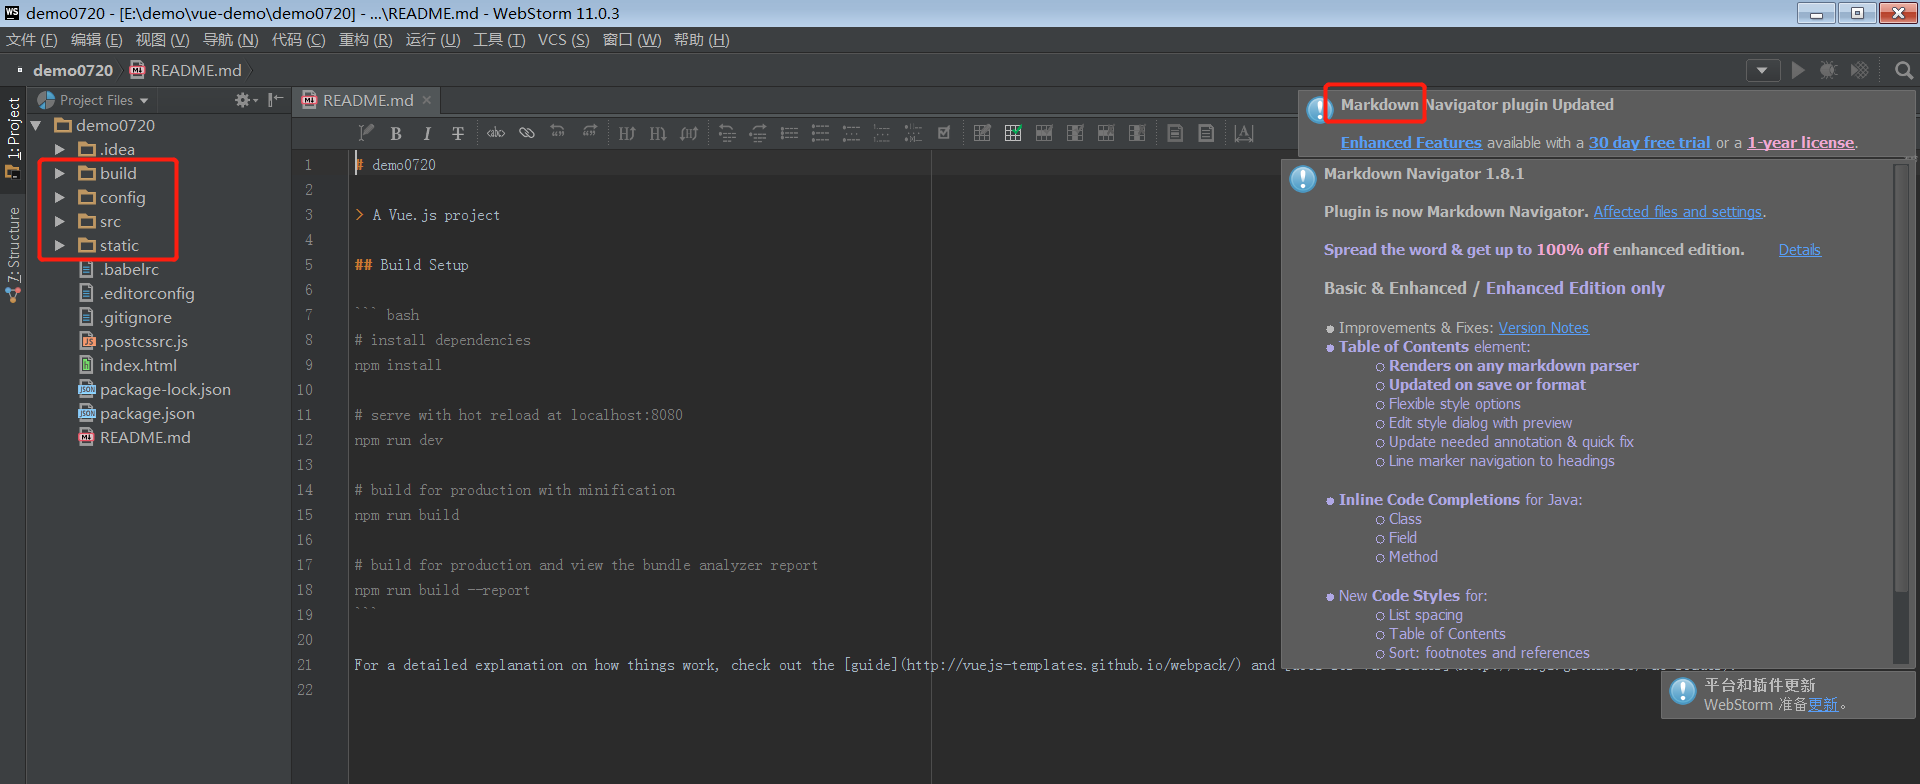
vue init webpack demo0720
//demo尽量不安装多余内容,一键搞定: enter
//ps:ESLint(一个javascript代码检测工具)、unit tests(单元测试)、Nightwatch(一个e2e用户界面测试工具)。
//webpack4.0中文文档:https://github.com/wallstreetcn/webpack-and-spa-guide
//项目文件结构如下:各种插件自行安装,如markdown、eslint(项目+编辑器)
使用npm init 搭建的项目结构
├── dist                      打包输出目录,只需部署这个目录到生产环境

├── package.json              项目配置信息

├── node_modules              npm 安装的依赖包都在这里面

├── src                       我们的源代码

│   ├── components            可以复用的模块放在这里面

│   ├── index.html            入口 html

│   ├── index.js              入口 js

│   ├── shared                公共函数库

│   └── views                 页面放这里

└── webpack.config.js         webpack 配置文件
使用vue-cli搭建的项目结构
.

├── build/                      # webpack config files / webpack 配置文件,通常,您不需要触摸这些文件,除非您想要自定义Webpack加载器,在这种情况下您应该查看

│   └── ...

├── config/

│   ├── index.js                # main project config / 项目主要配置

│   └── ...

├── src/                        # 主要的项目开发文件都在这个目录下:

│   ├── main.js                 # app entry file / 应用入口文件

│   ├── App.vue                 # main app component / App 父组件

│   ├── components/             # ui components / 可复用的 ui 组件

│   │   └── ...

│   ├── assets/                 # module assets (processed by webpack) / 模块资源(经过 webpack 处理,如文件合并,图片压缩等)

│   │   └── ...

│   ├── page/                   ## 以页面为单位的 .vue 文件

│   │   ├── index.vue           ## 一级 router-view,顶部导航栏和左侧侧边导航栏

│   │   ├── 404.vue             ## 404 页面

│   │   ├── menu1/              ## 二级 router-view,导航切换后的页面内容

│   │   │   └── ...

│   │   └── menu2/              ## 按照菜单项创建文件夹对文件进行组织管理

│   │       └── ...

│   └── router/

│       └── index.js            # 路由配置文件

├── static/                     # pure static assets (directly copied) / 纯静态资源(直接拷贝使用,不经过 webpack 处理)

├── .babelrc                    # babel config

├── .eslintrc.js                # eslint config

├── .editorconfig               # editor config

├── index.html                  # index.html template

├── package.json                # build scripts and dependencies

└── ...

在实际开发中发现,自定义buld文件会带来很大的收益,如设置通配符来代替绝对路径的引用、配置eslint动态校验、less等插件编译设置、动态构建不同环境的开发版本(开发、测试、上线):
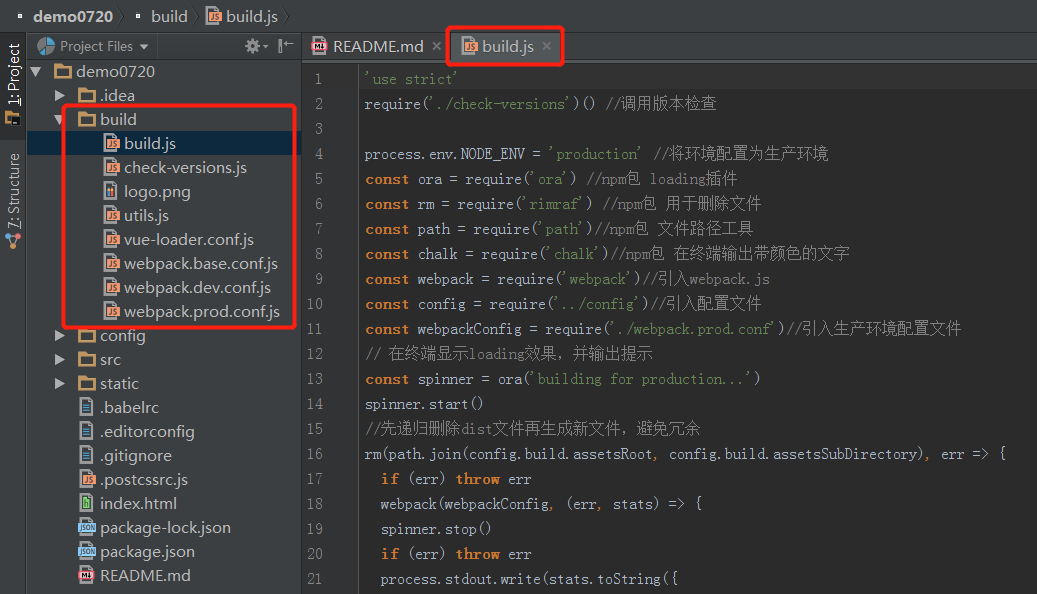
1、build文件夹:
(1)build.js
require/export是一种nodeJs(commonJs规范)的依赖注入的方法,import/export是ES6语法,用于引入模块,在nodeJs中使用的ES6语法最终会使用babel工具(babel-loader)转化为ES5
define() 和 require() 的区别是,define() 必须要在回调函数中返回一个值作为导出的东西,CommoeJS使用require() 不需要导出东西,因此回调函数中不需要返回值(return xxx)
'use strict'

require('./check-versions')() //调用版本检查

process.env.NODE_ENV = 'production' //将环境配置为生产环境

const ora = require('ora') //npm包 loading插件

const rm = require('rimraf') //npm包 用于删除文件

const path = require('path')//npm包 文件路径工具

const chalk = require('chalk')//npm包 在终端输出带颜色的文字

const webpack = require('webpack')//引入webpack.js

const config = require('../config')//引入配置文件

const webpackConfig = require('./webpack.prod.conf')//引入生产环境配置文件

// 在终端显示loading效果,并输出提示

const spinner = ora('building for production...')

spinner.start()

//先递归删除dist文件再生成新文件,避免冗余

rm(path.join(config.build.assetsRoot, config.build.assetsSubDirectory), err => {

  if (err) throw err

  webpack(webpackConfig, (err, stats) => {

    spinner.stop()

    if (err) throw err

    process.stdout.write(stats.toString({

      colors: true,

      modules: false,

      children: false,

      chunks: false,

      chunkModules: false

    }) + '\n\n')

    if (stats.hasErrors()) {

      console.log(chalk.red('  Build failed with errors.\n'))

      process.exit(1)

    }

    console.log(chalk.cyan('  Build complete.\n'))

    console.log(chalk.yellow(

      '  Tip: built files are meant to be served over an HTTP server.\n' +

      '  Opening index.html over file:// won\'t work.\n'

    ))

  })

})
(2)check-version.js:检测node和npm的版本,实现版本依赖
'use strict'

const chalk = require('chalk')

const semver = require('semver')//检查版本

const packageConfig = require('../package.json')

const shell = require('shelljs')//shelljs 模块重新包装了 child_process,调用系统命令更加方便

function exec (cmd) {//返回通过child_process模块的新建子进程,执行 Unix 系统命令后转成没有空格的字符串

  return require('child_process').execSync(cmd).toString().trim()

}

const versionRequirements = [

  {

    name: 'node',

    currentVersion: semver.clean(process.version),//使用semver格式化版本

    versionRequirement: packageConfig.engines.node //获取package.json中设置的node版本

  }

]

if (shell.which('npm')) {

  versionRequirements.push({

    name: 'npm',

    currentVersion: exec('npm --version'),// 自动调用npm --version命令,并且把参数返回给exec函数,从而获取纯净的版本号

    versionRequirement: packageConfig.engines.npm

  })

}

module.exports = function () {

  const warnings = []

  for (let i = 0; i < versionRequirements.length; i++) {

    const mod = versionRequirements[i]

    //若版本号不符合package.json文件中指定的版本号,就报错

    if (!semver.satisfies(mod.currentVersion, mod.versionRequirement)) {

      warnings.push(mod.name + ': ' +

        chalk.red(mod.currentVersion) + ' should be ' +

        chalk.green(mod.versionRequirement)

      )

    }

  }

  if (warnings.length) {

    console.log('')

    console.log(chalk.yellow('To use this template, you must update following to modules:'))

    console.log()

    for (let i = 0; i < warnings.length; i++) {

      const warning = warnings[i]

      console.log('  ' + warning)

    }

    console.log()

    process.exit(1)

  }

}
(3)utils.js:utils是工具的意思,是一个用来处理css的文件,这个文件包含了三个工具函数:
生成静态资源的路径
生成 ExtractTextPlugin对象或loader字符串
生成 style-loader的配置
var path = require('path')// node自带的文件路径工具

var config = require('../config')// 配置文件

var ExtractTextPlugin = require('extract-text-webpack-plugin')// 提取css的插件

/** @method assertsPath  生成静态资源的路径(判断开发环境和生产环境,为config文件中index.js文件中定义assetsSubDirectory)

 * @param  {String}    _path 相对于静态资源文件夹的文件路径

 * @return {String}          静态资源完整路径

 */

exports.assetsPath = function (_path) {

  var assetsSubDirectory = process.env.NODE_ENV === 'production'

    ? config.build.assetsSubDirectory

    : config.dev.assetsSubDirectory

  //nodeJs path提供用于处理文件路径的工具;path.posix提供对路径方法的POSIX(可移植性操作系统接口)特定实现的访问(可跨平台); path.posix.join与path.join一样,不过总是以 posix 兼容的方式交互

  return path.posix.join(assetsSubDirectory, _path)

}

/**@method cssLoaders  生成处理css的loaders配置,使用css-loader和postcssLoader,通过options.usePostCSS属性来判断是否使用postcssLoader中压缩等方法

 * @param  {Object} option = {sourceMap: true,// 是否开启 sourceMapextract: true // 是否提取css}生成配置

 * @return {Object} 处理css的loaders配置对象

 */

exports.cssLoaders = function (options) {

  options = options || {}

  var cssLoader = {

    loader: 'css-loader',

    options: {

      minimize: process.env.NODE_ENV === 'production',

      sourceMap: options.sourceMap

    }

  }

  /**@method generateLoaders  生成 ExtractTextPlugin对象或loader字符串

   * @param  {Array}        loaders loader名称数组

   * @return {String|Object}        ExtractTextPlugin对象或loader字符串

   */

  function generateLoaders (loader, loaderOptions) {

    var loaders = [cssLoader]

    if (loader) {

      loaders.push({

        loader: loader + '-loader',

        options: Object.assign({}, loaderOptions, {

          sourceMap: options.sourceMap

        })

      })

    }

    // ExtractTextPlugin提取css(当上面的loaders未能正确引入时,使用vue-style-loader)

    if (options.extract) {// 生产环境中,默认为true

      return ExtractTextPlugin.extract({

        use: loaders,

        fallback: 'vue-style-loader'

      })

    } else {//返回vue-style-loader连接loaders的最终值

      return ['vue-style-loader'].concat(loaders)

    }

  }

  return {

    css: generateLoaders(),//需要css-loader 和 vue-style-loader

    postcss: generateLoaders(),//需要css-loader、postcssLoader 和 vue-style-loader

    less: generateLoaders('less'),//需要less-loader 和 vue-style-loader

    sass: generateLoaders('sass', { indentedSyntax: true }),//需要sass-loader 和 vue-style-loader

    scss: generateLoaders('sass'),//需要sass-loader 和 vue-style-loader

    stylus: generateLoaders('stylus'),//需要stylus-loader 和 vue-style-loader

    styl: generateLoaders('stylus')//需要stylus-loader 和 vue-style-loader

  }

}

/**@method styleLoaders 生成 style-loader的配置

 * @param  {Object}     options 生成配置

 * @return {Array}      style-loader的配置

 */

exports.styleLoaders = function (options) {

  var output = []

  var loaders = exports.cssLoaders(options)

  //将各种css,less,sass等综合在一起得出结果输出output

  for (var extension in loaders) {

    var loader = loaders[extension]

    output.push({

      test: new RegExp('\\.' + extension + '$'),

      use: loader

    })

  }

  return output

}
(4)vue-loader.conf.js:处理.vue文件,解析这个文件中的每个语言块(template、script、style),转换成js可用的js模块。
'use strict'

const utils = require('./utils')

const config = require('../config')

const isProduction = process.env.NODE_ENV === 'production'

//生产环境,提取css样式到单独文件

const sourceMapEnabled = isProduction

  ? config.build.productionSourceMap

  : config.dev.cssSourceMap

module.exports = {

  loaders: utils.cssLoaders({

    sourceMap: sourceMapEnabled,

    extract: isProduction

  }),

  cssSourceMap: sourceMapEnabled,

  cacheBusting: config.dev.cacheBusting,

  //编译时将“引入路径”转换为require调用,使其可由webpack处理

  transformToRequire: {

    video: ['src', 'poster'],

    source: 'src',

    img: 'src',

    image: 'xlink:href'

  }

}
(5)webpack.base.conf.js:开发、测试、生产环境的公共基础配置文件,配置输出环境,配置模块resolve和插件等
'use strict'

const path = require('path')// node自带的文件路径工具

const utils = require('./utils')// 工具函数集合

const config = require('../config')// 配置文件

const vueLoaderConfig = require('./vue-loader.conf')// 工具函数集合

/**

 * 获取"绝对路径"

 * @method resolve

 * @param  {String} dir 相对于本文件的路径

 * @return {String}     绝对路径

 */

function resolve(dir) {

  return path.join(__dirname, '..', dir)

}

module.exports = {

  context: path.resolve(__dirname, '../'),

  //入口js文件(默认为单页面所以只有app一个入口)

  entry: {

    app: './src/main.js'

  },

  //配置出口

  output: {

    path: config.build.assetsRoot,//打包编译的根路径(dist)

    filename: '[name].js',

    publicPath: process.env.NODE_ENV === 'production'

      ? config.build.assetsPublicPath

      : config.dev.assetsPublicPath//发布路径

  },

  resolve: {

    extensions: ['.js', '.vue', '.json'],// 自动补全的扩展名

    //别名配置

    alias: {

      'vue$': 'vue/dist/vue.esm.js',

      '@': resolve('src'),// eg:"src/components" => "@/components"

    }

  },

  module: {

    rules: [

      //使用vue-loader将vue文件编译转换为js

      {

        test: /\.vue$/,

        loader: 'vue-loader',

        options: vueLoaderConfig

      },

      //通过babel-loader将ES6编译压缩成ES5

      {

        test: /\.js$/,

        loader: 'babel-loader',

        include: [resolve('src'), resolve('test'), resolve('node_modules/webpack-dev-server/client')]

      },

      //使用url-loader处理(图片、音像、字体),超过10000编译成base64

      {

        test: /\.(png|jpe?g|gif|svg)(\?.*)?$/,

        loader: 'url-loader',

        options: {

          limit: 10000,

          name: utils.assetsPath('img/[name].[hash:7].[ext]')

        }

      },

      {

        test: /\.(mp4|webm|ogg|mp3|wav|flac|aac)(\?.*)?$/,

        loader: 'url-loader',

        options: {

          limit: 10000,

          name: utils.assetsPath('media/[name].[hash:7].[ext]')

        }

      },

      {

        test: /\.(woff2?|eot|ttf|otf)(\?.*)?$/,

        loader: 'url-loader',

        options: {

          limit: 10000,

          name: utils.assetsPath('fonts/[name].[hash:7].[ext]')

        }

      }

    ]

  },

  //nodeJs全局变量/模块,防止webpack注入一些nodeJs的东西到vue中

  node: {

    setImmediate: false,

    dgram: 'empty',

    fs: 'empty',

    net: 'empty',

    tls: 'empty',

    child_process: 'empty'

  }

}
(6)webpack.dev.conf.js:webpack配置开发环境中的入口
'use strict'

const utils = require('./utils')

const webpack = require('webpack')

const config = require('../config')

const merge = require('webpack-merge')//webpack-merge实现合并

const path = require('path')

const baseWebpackConfig = require('./webpack.base.conf')

const CopyWebpackPlugin = require('copy-webpack-plugin')

const HtmlWebpackPlugin = require('html-webpack-plugin')

const FriendlyErrorsPlugin = require('friendly-errors-webpack-plugin')//webpack的提示错误和日志信息的插件

const portfinder = require('portfinder')// 查看空闲端口位置,默认情况下搜索8000这个端口

const HOST = process.env.HOST

const PORT = process.env.PORT && Number(process.env.PORT)

const devWebpackConfig = merge(baseWebpackConfig, {

  module: {

    rules: utils.styleLoaders({ sourceMap: config.dev.cssSourceMap, usePostCSS: true })

  },

  devtool: config.dev.devtool,//调试模式

  devServer: {

    clientLogLevel: 'warning',

    historyApiFallback: {//使用 HTML5 History API 时, 404 响应替代为 index.html

      rewrites: [

        { from: /.*/, to: path.posix.join(config.dev.assetsPublicPath, 'index.html') },

      ],

    },

    hot: true,//热重载

    contentBase: false, // 提供静态文件访问

    compress: true,//压缩

    host: HOST || config.dev.host,

    port: PORT || config.dev.port,

    open: config.dev.autoOpenBrowser,//npm run dev 时自动打开浏览器

    overlay: config.dev.errorOverlay

      ? { warnings: false, errors: true }

      : false,// 显示warning 和 error 信息

    publicPath: config.dev.assetsPublicPath,

    proxy: config.dev.proxyTable,//api代理

    quiet: true, //控制台打印警告和错误(用FriendlyErrorsPlugin 为 true)

    watchOptions: {// 检测文件改动

      poll: config.dev.poll,

    }

  },

  plugins: [

    new webpack.DefinePlugin({

      'process.env': require('../config/dev.env')

    }),

    new webpack.HotModuleReplacementPlugin(),//模块热替换插件,修改模块时不需要刷新页面

    new webpack.NamedModulesPlugin(), // HMR shows correct file names in console on update.

    new webpack.NoEmitOnErrorsPlugin(),//webpack编译错误的时候,中断打包进程,防止错误代码打包到文件中

    // 将打包编译好的代码插入index.html

    new HtmlWebpackPlugin({

      filename: 'index.html',

      template: 'index.html',

      inject: true

    }),

    // 提取static assets 中css 复制到dist/static文件

    new CopyWebpackPlugin([

      {

        from: path.resolve(__dirname, '../static'),

        to: config.dev.assetsSubDirectory,

        ignore: ['.*']//忽略.*的文件

      }

    ])

  ]

})

module.exports = new Promise((resolve, reject) => {

  portfinder.basePort = process.env.PORT || config.dev.port

  portfinder.getPort((err, port) => { //查找端口号

    if (err) {

      reject(err)

    } else {

      //端口被占用时就重新设置evn和devServer的端口

      process.env.PORT = port

      devWebpackConfig.devServer.port = port

      // npm run dev成功的友情提示

      devWebpackConfig.plugins.push(new FriendlyErrorsPlugin({

        compilationSuccessInfo: {

          messages: [`Your application is running here: http://${devWebpackConfig.devServer.host}:${port}`],

        },

        onErrors: config.dev.notifyOnErrors

        ? utils.createNotifierCallback()

        : undefined

      }))

      resolve(devWebpackConfig)

    }

  })

})
(7)webpack.dev.prod.js:webpack配置生产环境中的入口
'use strict'

const path = require('path')

const utils = require('./utils')

const webpack = require('webpack')

const config = require('../config')

const merge = require('webpack-merge')

const baseWebpackConfig = require('./webpack.base.conf')

const CopyWebpackPlugin = require('copy-webpack-plugin')

const HtmlWebpackPlugin = require('html-webpack-plugin')

const ExtractTextPlugin = require('extract-text-webpack-plugin')

const OptimizeCSSPlugin = require('optimize-css-assets-webpack-plugin')

const UglifyJsPlugin = require('uglifyjs-webpack-plugin')

const env = require('../config/prod.env')

const webpackConfig = merge(baseWebpackConfig, {

  module: {

    rules: utils.styleLoaders({

      sourceMap: config.build.productionSourceMap,

      extract: true,

      usePostCSS: true

    })

  },

  devtool: config.build.productionSourceMap ? config.build.devtool : false,//是否开启调试模式

  output: {

    path: config.build.assetsRoot,

    filename: utils.assetsPath('js/[name].[chunkhash].js'),

    chunkFilename: utils.assetsPath('js/[id].[chunkhash].js')

  },

  plugins: [

    new webpack.DefinePlugin({

      'process.env': env

    }),

    new UglifyJsPlugin({//压缩js

      uglifyOptions: {

        compress: {

          warnings: false

        }

      },

      sourceMap: config.build.productionSourceMap,

      parallel: true

    }),

    new ExtractTextPlugin({//提取静态文件,减少请求

      filename: utils.assetsPath('css/[name].[contenthash].css'),

      allChunks: true,

    }),

    new OptimizeCSSPlugin({//提取优化压缩后(删除来自不同组件的冗余代码)的css

      cssProcessorOptions: config.build.productionSourceMap

        ? { safe: true, map: { inline: false } }

        : { safe: true }

    }),

    new HtmlWebpackPlugin({ //html打包压缩到index.html

      filename: config.build.index,

      template: 'index.html',

      inject: true,

      minify: {

        removeComments: true,//删除注释

        collapseWhitespace: true,//删除空格

        removeAttributeQuotes: true//删除属性的引号

      },

      chunksSortMode: 'dependency'//模块排序,按照我们需要的顺序排序

    }),

    new webpack.HashedModuleIdsPlugin(),

    new webpack.optimize.ModuleConcatenationPlugin(),

    new webpack.optimize.CommonsChunkPlugin({   // node_modules中的任何所需模块都提取到vendor

      name: 'vendor',

      minChunks (module) {

        return (

          module.resource &&

          /\.js$/.test(module.resource) &&

          module.resource.indexOf(

            path.join(__dirname, '../node_modules')

          ) === 0

        )

      }

    }),

    new webpack.optimize.CommonsChunkPlugin({

      name: 'manifest',

      minChunks: Infinity

    }),

    new webpack.optimize.CommonsChunkPlugin({

      name: 'app',

      async: 'vendor-async',

      children: true,

      minChunks: 3

    }),

    new CopyWebpackPlugin([//复制static中的静态资源(默认到dist里面)

      {

        from: path.resolve(__dirname, '../static'),

        to: config.build.assetsSubDirectory,

        ignore: ['.*']

      }

    ])

  ]

})

if (config.build.productionGzip) {

  const CompressionWebpackPlugin = require('compression-webpack-plugin')

  webpackConfig.plugins.push(

    new CompressionWebpackPlugin({

      asset: '[path].gz[query]',

      algorithm: 'gzip',

      test: new RegExp(

        '\\.(' +

        config.build.productionGzipExtensions.join('|') +

        ')$'

      ),

      threshold: 10240,

      minRatio: 0.8

    })

  )

}

if (config.build.bundleAnalyzerReport) {

  const BundleAnalyzerPlugin = require('webpack-bundle-analyzer').BundleAnalyzerPlugin

  webpackConfig.plugins.push(new BundleAnalyzerPlugin())

}

module.exports = webpackConfig
2、config文件夹:

(1) dev.env.js和prod.env.js:分别配置:开发环境和生产环境。这个可以根据公司业务结合后端需求配置需要区分开发环境和测试环境的属性
// dev.env,js

'use strict'

const merge = require('webpack-merge') //合并对象插件

const prodEnv = require('./prod.env')

module.exports = merge(prodEnv, {

  NODE_ENV: '"development"' //访问(获取值)时直接用:process.env.xxx

})

//prod.env.js

'use strict'

module.exports = {

  NODE_ENV: '"production"' //*注意属性值要用“‘’”双层引住

}
webpack-merge用于实现合并类似于ES6的对象合并Object.assign()
process(进程)是nodejs的一个全局变量,process.env 属性返回一个用户环境信息的对象
(2)index.js配置解析:
'use strict';

const path = require('path');

module.exports = {

  // ===================开发环境配置

  dev: {

    assetsSubDirectory: 'static',//静态资源文件夹(一般存放css、js、image等文件)

    assetsPublicPath: '/',//根目录

    proxyTable: {},//配置API代理,可利用该属性解决跨域的问题

    host: 'localhost', // 可以被 process.env.HOST 覆盖

    port: 3030, // 可以被 process.env.PORT 覆盖

    autoOpenBrowser: true,//编译后自动打开浏览器页面 http://localhost:3030/("port + host",默认"false"),设置路由重定向自动打开您的默认页面

    errorOverlay: true,//浏览器错误提示

    notifyOnErrors: true,//跨平台错误提示

    poll: false, //webpack提供的使用文件系统(file system)获取文件改动的通知devServer.watchOptions(监控文件改动)

    devtool: 'cheap-module-eval-source-map',//webpack提供的用来调试的模式,有多个不同值代表不同的调试模式

    cacheBusting: true,// 配合devtool的配置,当给文件名插入新的hash导致清除缓存时是否生成source-map

    cssSourceMap: true //记录代码压缩前的位置信息,当产生错误时直接定位到未压缩前的位置,方便调试

  },

// ========================生产环境配置

  build: {

    index: path.resolve(__dirname, '../dist/index.html'),//编译后"首页面"生成的绝对路径和名字

    assetsRoot: path.resolve(__dirname, '../dist'),//打包编译的根路径(默认dist,存放打包压缩后的代码)

    assetsSubDirectory: 'static',//静态资源文件夹(一般存放css、js、image等文件)

    assetsPublicPath: '/',//发布的根目录(dist文件夹所在路径)

    productionSourceMap: true,//是否开启source-map

    devtool: '#source-map',//(详细参见:https://webpack.docschina.org/configuration/devtool)

    productionGzip: false,//是否压缩

    productionGzipExtensions: ['js', 'css'],//unit的gzip命令用来压缩文件(gzip模式下需要压缩的文件的扩展名有js和css)

    bundleAnalyzerReport: process.env.npm_config_report //是否开启打包后的分析报告

  }

};
3、src文件夹:
我们需要在src文件夹中开发代码,打包时webpack会根据build中的规则(build规则依赖于config中的配置)将src打包压缩到dist文件夹在浏览器中运行
(1)assets文件:用于存放静态资源(css、image),assets打包时路径会经过webpack中的file-loader编译(因此,assets需要使用绝对路径)成js
(2)components文件夹:用来存放 .vue 组件(实现复用等功能,如:过滤器,列表项等)
(3)router文件夹:在router/index.js文件中配置页面路由
(4)App.vue:是整个项目的主组件,所有页面都是通过使用<router-view/>开放入口在App.vue下进行切换的(所有的路由都是App.vue的子组件)
(5)main.js:入口js文件(全局js,你可以在这里:初始化vue实例、require/import需要的插件、注入router路由、引入store状态管理)
4、static文件夹:
webpack默认存放静态资源(css、image)的文件夹,与assets不同的是:static在打包时会直接复制一个同名文件夹到dist文件夹里(不会经过编译,可使用相对路径)
5、项目根目录下的配置文件:
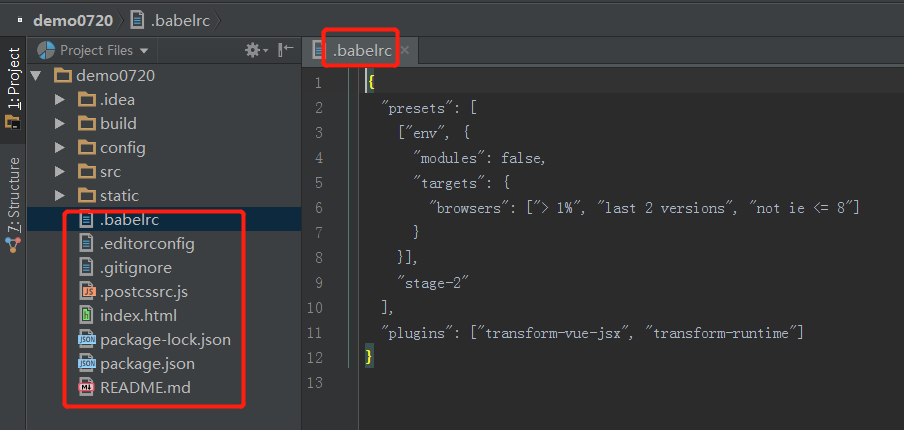
(1).babelrc:浏览器解析的兼容配置,该文件主要是对预设(presets)和插件(plugins)进行配置,因此不同的转译器作用不同的配置项,大致可分为:语法转义器、补丁转义器、sx和flow插件
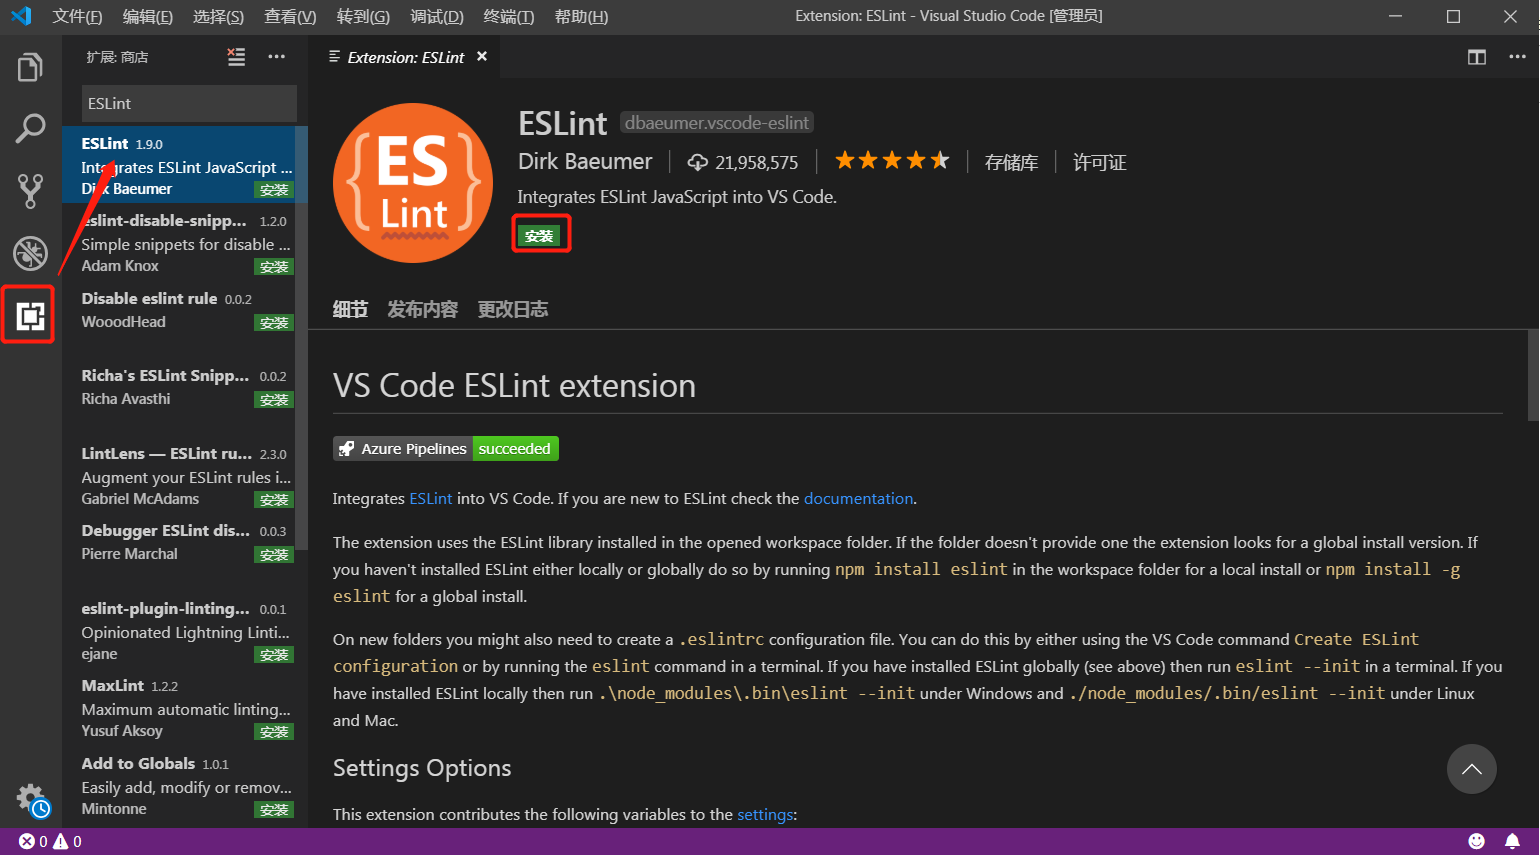
(2).editorconfig:用于配置代码格式(配合代码检查工具使用,如:ESLint,团队开发时可统一代码风格),这里配置的代码规范规则优先级高于编辑器默认的代码格式化规则 。
(3).gitignore:配置git提交时需要忽略的文件
(4)postcssrc.js: autoprefixer(自动补全css样式的浏览器前缀);postcss-import(@import引入语法)、CSS Modules(规定样式作用域)
(5)index.html:项目入口页面,编译之后所有代码将插入到这来
(6)package.json:npm的配置文件(npm install根据package.json下载对应版本的安装包)
(7)package.lock.json:npm install(安装)时锁定各包的版本号
(8)README.md:项目使用说明
参考:
https://yq.aliyun.com/articles/646536
https://github.com/wallstreetcn/webpack-and-spa-guide
https://vuejs-templates.github.io/webpack/structure.html
vue-cli脚手架——2.0版本项目案例的更多相关文章
- vue-cli脚手架——3.0版本项目案例
一.[准备工作] node与git部分见vue-cli2.0搭建案例 vue-cli3.0是一个基于 Vue.js 进行快速开发的完整系统.有三个组件: CLI:@vue/cli 全局安装的 npm ...
- vue.js---利用vue cli脚手架工具+webpack创建项目遇到的坑
1.Eslint js代码规范报错 WARNING Compiled with 2 warnings 10:43:26 ✘ http://eslint.org/docs/rules/quotes St ...
- 使用Vue CLI脚手架搭建vue项目
本次是使用@vue/cli 3.11.0版本搭建的vue项目 1. 首先确保自己的电脑上的Node.js的版本是8.9版本或者以上 2. 全局安装vue/cli npm install @vue/cl ...
- 更新到@vue/cli 4.1.1版本的前端开发前的准备
一.概念简述 1.node.js目的是提供一个JS的运行环境. 2.npm(node package manager)是一个JS包管理器. 二.检查自己的电脑是否已安装相关配置 1.查看node.js ...
- 13. Vue CLI脚手架
一. Vue CLI 介绍 1. 什么是Vue CLI? Vue CLI 是一个基于 Vue.js 进行快速开发的完整系统.Vue CLI 致力于将 Vue 生态中的工具基础标准化.它确保了各种构建工 ...
- [Vue 牛刀小试]:第十七章 - 优化 Vue CLI 3 构建的前端项目模板(1)- 基础项目模板介绍
一.前言 在上一章中,我们开始通过 Vue CLI 去搭建属于自己的前端 Vue 项目模板,就像我们 .NET 程序员在使用 asp.net core 时一样,我们更多的会在框架基础上按照自己的开发习 ...
- 使用vue/cli 创建一个简单的项目
首先,电脑安装了node.js官方要求8.9 或更高版本 (推荐 8.11.0+) npm install -g @vue/cli # OR yarn global add @vue/cli 全局安装 ...
- vue cli脚手架使用
1.安装nodejs,npm https://www.cnblogs.com/xidianzxm/p/12036880.html 2.安装vue cli sudo npm install -g @vu ...
- node.js和vue cli脚手架下载安装配置方法
一.node.js安装以及环境配置 1.下载vue.js 下载地址: https://nodejs.org/en/ 2.安装node.js 下载完成后,双击安装包开始安装.安装地址最好换成自己指定的地 ...
随机推荐
- cookie加载不正确的问题
华为系统更新后安装了一个谷歌6月安全补丁的东西,然后之前写的调h5页面的部分就出现了问题,后台查过发现是Android端调h5页面时cookie没能带过去,导致了登录失败.于是对setCookie部分 ...
- SpringCloud学习成长之十四 服务注册(consul)
这篇文章主要介绍 spring cloud consul 组件,它是一个提供服务发现和配置的工具.consul具有分布式.高可用.高扩展性. 一.consul 简介 consul 具有以下性质: 服务 ...
- springboot 项目基本目录包结构
1.基本目录结构 controller service impl mapper utils domain config interceoter(拦截器) dto
- curl命令测试网络请求中DNS解析、响应时间
https://blog.csdn.net/dreamer2020/article/details/78152576
- 清除 sql server 记住密码
引用:https://www.cnblogs.com/zengbin/p/4307013.html SQL Server 2005 Management Studio %AppData%\Micros ...
- 最简单的策略模式代替if-else实战
一.需求 根据用户vip等级来返回不同的价格,vip等级是不固定的,随时可能要增加,价格也不是固定的. 二.常规的写法 /** * 如果有新增类型,就需要频繁的修改此处的代码! * 不符合开闭原则! ...
- windows强大的快捷键
1 电脑锁屏 有些时候,需要暂时离开座位去处理其他事,可是电脑还有数据再跑. 关掉的话,数据就白跑了,不关的话,又不想让别人看到我电脑的资料. 那么就按住windows键后,再按L键. 这样电脑就直接 ...
- Select 查询语句
1.1 查询语句 1.1.1 select select 用于从数据看查询数据.语法 select field1,filed2,.. . from tablename [where cond ...
- 树莓派上跑.NET的segment fault错误
答案:树莓派1和树莓派zero是不支持的,原因是.net需要arm v7 详情看这里 可以用 cat /proc/cpuinfo | grep 'model name' |uniq 看一下cpu
- Linux基础-11-rpm管理软件包
1. 使用RPM安装及移除软件 1) RPM的定义:RPM就是Red Hat Package Manger(红帽软件包管理工具)的缩写. 2) rpm的文件名分为5部分,其中: 第1部分是name,表 ...