lamt环境搭建
lamt环境搭建
环境说明:
| 系统 | IP | 需要安装的服务 |
|---|---|---|
| centos7 | 192.168.32.125 | httpd-2.4 mysql-5.7 tomcat9.0 |
安装apache
//创建apache服务的用户和组

[root@localhost ~]# groupadd -r apache

[root@localhost ~]# useradd -r -M -s /sbin/nologin -g apache apache

//安装依赖包

[root@localhost ~]# yum -y install openssl-devel pcre-devel expat-devel libtool wget gcc gcc-c++

//下载和安装apr以及apr-util

[root@localhost ~]# wget http://mirror.bit.edu.cn/apache/apr/apr-1.7.0.tar.gz http://mirror.bit.edu.cn/apache/apr/apr-util-1.6.1.tar.gz

[root@localhost ~]# tar xf apr-1.7.0.tar.gz

[root@localhost ~]# tar xf apr-util-1.6.1.tar.gz

[root@localhost ~]# cd apr-1.7.0

[root@localhost apr-1.7.0]# ./configure --prefix=/usr/local/apr

[root@localhost apr-1.7.0]# make && make install

......

[root@localhost apr-1.7.0]# cd ../apr-util-1.6.1

[root@localhost apr-util-1.6.1]# ./configure --prefix=/usr/local/apr-util --with-apr=/usr/local/apr

[root@localhost apr-util-1.6.1]# make && make install

......

//编译安装httpd

[root@localhost apr-util-1.6.1]# cd

[root@localhost ~]# wget http://mirror.bit.edu.cn/apache/httpd/httpd-2.4.43.tar.gz

[root@localhost ~]# tar xf httpd-2.4.43.tar.gz

[root@localhost ~]# cd httpd-2.4.43

[root@localhost httpd-2.4.43]# ./configure --prefix=/usr/local/apache \

> --sysconfdir=/etc/httpd24 \

> --enable-so \

> --enable-ssl \

> --enable-cgi \

> --enable-rewrite \

> --with-zlib \

> --with-pcre \

> --with-apr=/usr/local/apr \

> --with-apr-util=/usr/local/apr-util/ \

> --enable-modules=most \

> --enable-mpms-shared=all \

> --with-mpm=prefork

[root@localhost httpd-2.4.43]#  make && make install

//安装后配置

[root@localhost ~]# echo 'export PATH=/usr/local/apache/bin:$PATH' > /etc/profile.d/httpd.sh

[root@localhost ~]# source /etc/profile.d/httpd.sh

[root@localhost ~]# ln -s /usr/local/apache/include/ /usr/include/httpd

[root@localhost ~]# echo 'MANPATH /usr/local/apache/man' >> /etc/man_db.conf

////取消ServerName前面的注释

[root@localhost ~]# sed -i '/#ServerName/s/#//g' /etc/httpd24/httpd.conf

//启动apache

[root@localhost httpd-2.4.43]# apachectl start

[root@localhost httpd-2.4.43]# ss -tanl

State      Recv-Q Send-Q Local Address:Port               Peer Address:Port

LISTEN     0      100    127.0.0.1:25                       *:*

LISTEN     0      128          *:22                       *:*

LISTEN     0      100      [::1]:25                    [::]:*

LISTEN     0      128       [::]:80                    [::]:*

LISTEN     0      128       [::]:22                    [::]:*
安装mysql
//安装依赖包

[root@localhost ~]# yum -y install libaio ncurses-devel openssl-devel openssl cmake mariadb-devel

//创建用户和组

[root@localhost src]# groupadd -r -g 306 mysql

[root@localhost src]# useradd -r -M -s /sbin/nologin -g 306 -u 306 mysql

//下载二进制格式的mysql软件包

[root@localhost ~]# wget https://dev.mysql.com/get/Downloads/MySQL-5.7/mysql-5.7.30-linux-glibc2.12-x86_64.tar.gz

[root@localhost ~]# tar xf mysql-5.7.30-linux-glibc2.12-x86_64.tar.gz

[root@localhost ~]# mv mysql-5.7.30-linux-glibc2.12-x86_64 /usr/local/mysql

//修改目录/usr/local/mysql的属主属组

[root@localhost ~]# chown -R mysql.mysql /usr/local/mysql

[root@localhost ~]# ll /usr/local/mysql -d

drwxr-xr-x 9 mysql mysql 129 Aug  1 00:11 /usr/local/mysql

//添加环境变量

[root@localhost ~]# ls /usr/local/mysql

bin  COPYING  docs  include  lib  man  README  share  support-files

[root@localhost ~]# echo 'export PATH=/usr/local/mysql/bin:$PATH' > /etc/profile.d/mysql.sh

[root@localhost ~]# . /etc/profile.d/mysql.sh

[root@localhost ~]# echo $PATH

/usr/local/mysql/bin:/usr/local/sbin:/usr/local/bin:/usr/sbin:/usr/bin:/root/bin

//建立数据存放目录

[root@localhost ~]# mkdir /opt/data

[root@localhost ~]# chown -R mysql.mysql /opt/data/

//初始化数据库

[root@localhost ~]# /usr/local/mysql/bin/mysqld --initialize-insecure --user=mysql --datadir=/opt/data/

2020-08-01T04:15:55.095736Z 0 [Warning] TIMESTAMP with implicit DEFAULT value is deprecated. Please use --explicit_defaults_for_timestamp server option (see documentation for more details).

2020-08-01T04:15:55.294922Z 0 [Warning] InnoDB: New log files created, LSN=45790

2020-08-01T04:15:55.321013Z 0 [Warning] InnoDB: Creating foreign key constraint system tables.

2020-08-01T04:15:55.392545Z 0 [Warning] No existing UUID has been found, so we assume that this is the first time that this server has been started. Generating a new UUID: b1cb74fe-d3ad-11ea-9e43-000c29f66cbc.

2020-08-01T04:15:55.402345Z 0 [Warning] Gtid table is not ready to be used. Table 'mysql.gtid_executed' cannot be opened.

2020-08-01T04:15:55.773892Z 0 [Warning] CA certificate ca.pem is self signed.

2020-08-01T04:15:55.992681Z 1 [Warning] root@localhost is created with an empty password ! Please consider switching off the --initialize-insecure option.

//配置mysql

[root@localhost ~]#  ln -sv /usr/local/mysql/include/ /usr/local/include/mysql

‘/usr/local/include/mysql’ -> ‘/usr/local/mysql/include/’

[root@localhost ~]# echo '/usr/local/mysql/lib' > /etc/ld.so.conf.d/mysql.conf

[root@localhost ~]# ldconfig

//生成配置文件

[root@localhost ~]# cat > /etc/my.cnf <<EOF

[mysqld]

basedir = /usr/local/mysql

datadir = /opt/data

socket = /tmp/mysql.sock

port = 3306

pid-file = /opt/data/mysql.pid

user = mysql

skip-name-resolve

EOF

//配置服务启动脚本

[root@localhost ~]# cp -a /usr/local/mysql/support-files/mysql.server /etc/init.d/mysqld

[root@localhost ~]# sed -ri 's#^(basedir=).*#\1/usr/local/mysql#g' /etc/init.d/mysqld

[root@localhost ~]# sed -ri 's#^(datadir=).*#\1/opt/data#g' /etc/init.d/mysqld

//设置开机自启

[root@localhost ~]# chkconfig --add mysqld

[root@localhost ~]# chkconfig --list

//启动mysql

[root@localhost ~]# service mysqld start

Starting MySQL. SUCCESS!

[root@localhost ~]# ss -tanl

State      Recv-Q Send-Q Local Address:Port               Peer Address:Port

LISTEN     0      100      127.0.0.1:25                           *:*

LISTEN     0      128              *:22                           *:*

LISTEN     0      100          [::1]:25                        [::]:*

LISTEN     0      80            [::]:3306                      [::]:*

LISTEN     0      128           [::]:80                        [::]:*

LISTEN     0      128           [::]:22                        [::]:*

//修改密码

[root@localhost ~]#  mysql

Welcome to the MySQL monitor.  Commands end with ; or \g.

Your MySQL connection id is 2

Server version: 5.7.30 MySQL Community Server (GPL)

Copyright (c) 2000, 2020, Oracle and/or its affiliates. All rights reserved.

Oracle is a registered trademark of Oracle Corporation and/or its

affiliates. Other names may be trademarks of their respective

owners.

Type 'help;' or '\h' for help. Type '\c' to clear the current input statement.

mysql> set password=password('qwer!@#$');

Query OK, 0 rows affected, 1 warning (0.00 sec)

mysql> flush privileges;

Query OK, 0 rows affected (0.00 sec)

mysql> quit

Bye
安装tomcat
#安装JDK

[root@localhost ~]# yum -y install java-1.8.0-openjdk java-1.8.0-openjdk-devel

#安装tomcat

[root@localhost ~]# wget https://archive.apache.org/dist/tomcat/tomcat-9/v9.0.37/bin/apache-tomcat-9.0.37.tar.gz

[root@localhost ~]# tar xf apache-tomcat-9.0.37.tar.gz

[root@localhost ~]# mv apache-tomcat-9.0.37 /usr/local/tomcat

#启动tomcat

[root@localhost ~]# /usr/local/tomcat/bin/startup.sh

Using CATALINA_BASE:   /usr/local/tomcat

Using CATALINA_HOME:   /usr/local/tomcat

Using CATALINA_TMPDIR: /usr/local/tomcat/temp

Using JRE_HOME:        /usr

Using CLASSPATH:       /usr/local/tomcat/bin/bootstrap.jar:/usr/local/tomcat/bin/tomcat-juli.jar

Tomcat started.

[root@localhost ~]# ss -tanl

State      Recv-Q Send-Q Local Address:Port               Peer Address:Port

LISTEN     0      100      127.0.0.1:25                           *:*

LISTEN     0      128              *:22                           *:*

LISTEN     0      100          [::1]:25                        [::]:*

LISTEN     0      1       [::ffff:127.0.0.1]:8005                      [::]:*

LISTEN     0      80            [::]:3306                      [::]:*

LISTEN     0      100           [::]:8080                      [::]:*

LISTEN     0      128           [::]:80                        [::]:*

LISTEN     0      128           [::]:22                        [::]:*


修改配置文件
修改apache的httpd.conf配置文件,取消如下两行的注释:

#LoadModule proxy_http_module modules/mod_proxy_http.so

#LoadModule proxy_module modules/mod_proxy.so
//启用httpd的相关模块

[root@localhost ~]# vim /etc/httpd24/httpd.conf

LoadModule proxy_module modules/mod_proxy.so

LoadModule proxy_http_module modules/mod_proxy_http.so

//配置虚拟主机

[root@localhost ~]# vim /etc/httpd24/httpd.conf

#在最后添加

<VirtualHost *:80>

    DocumentRoot "/usr/local/apache/htdocs"

    ProxyPass / http://192.168.32.125:8080/

    ProxyPassReverse / http://192.158.32.125:8080/

    <Directory "/usr/local/apache/htdocs">

        Options none

        AllowOverride none

        Require all granted

    </Directory>

</VirtualHost>

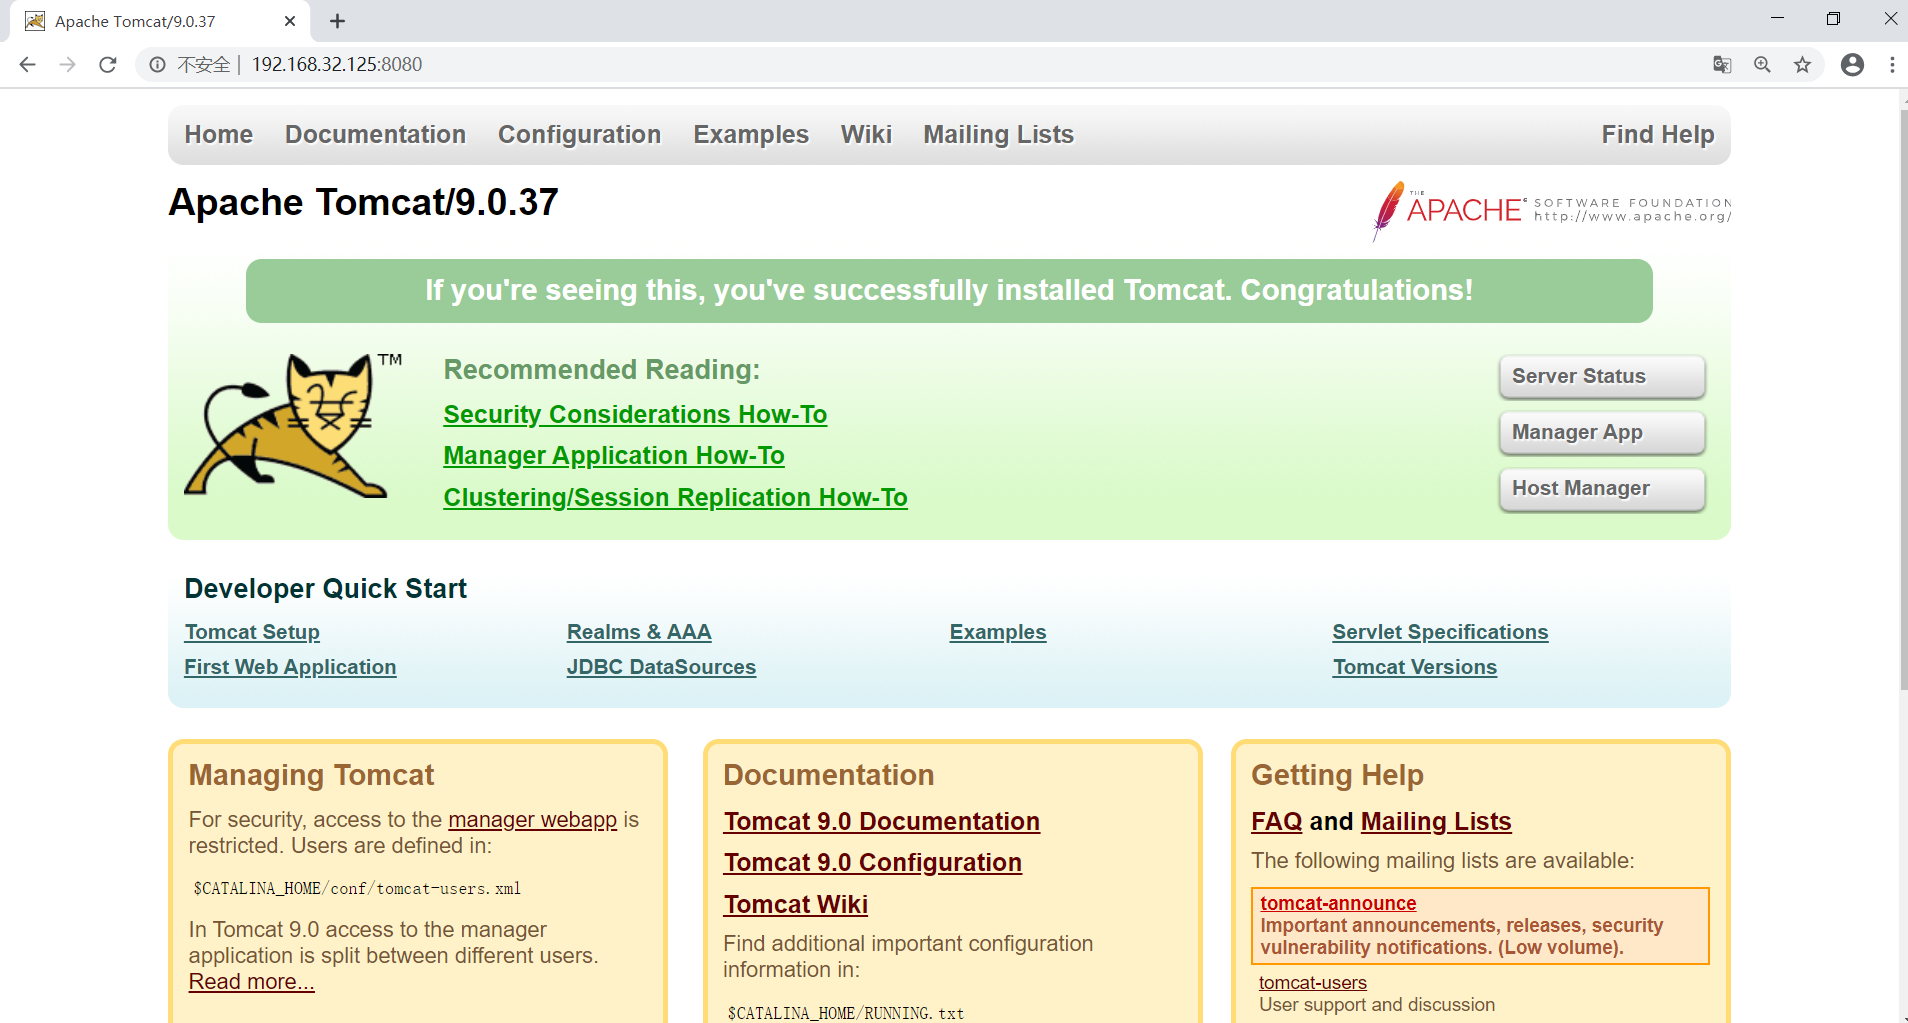
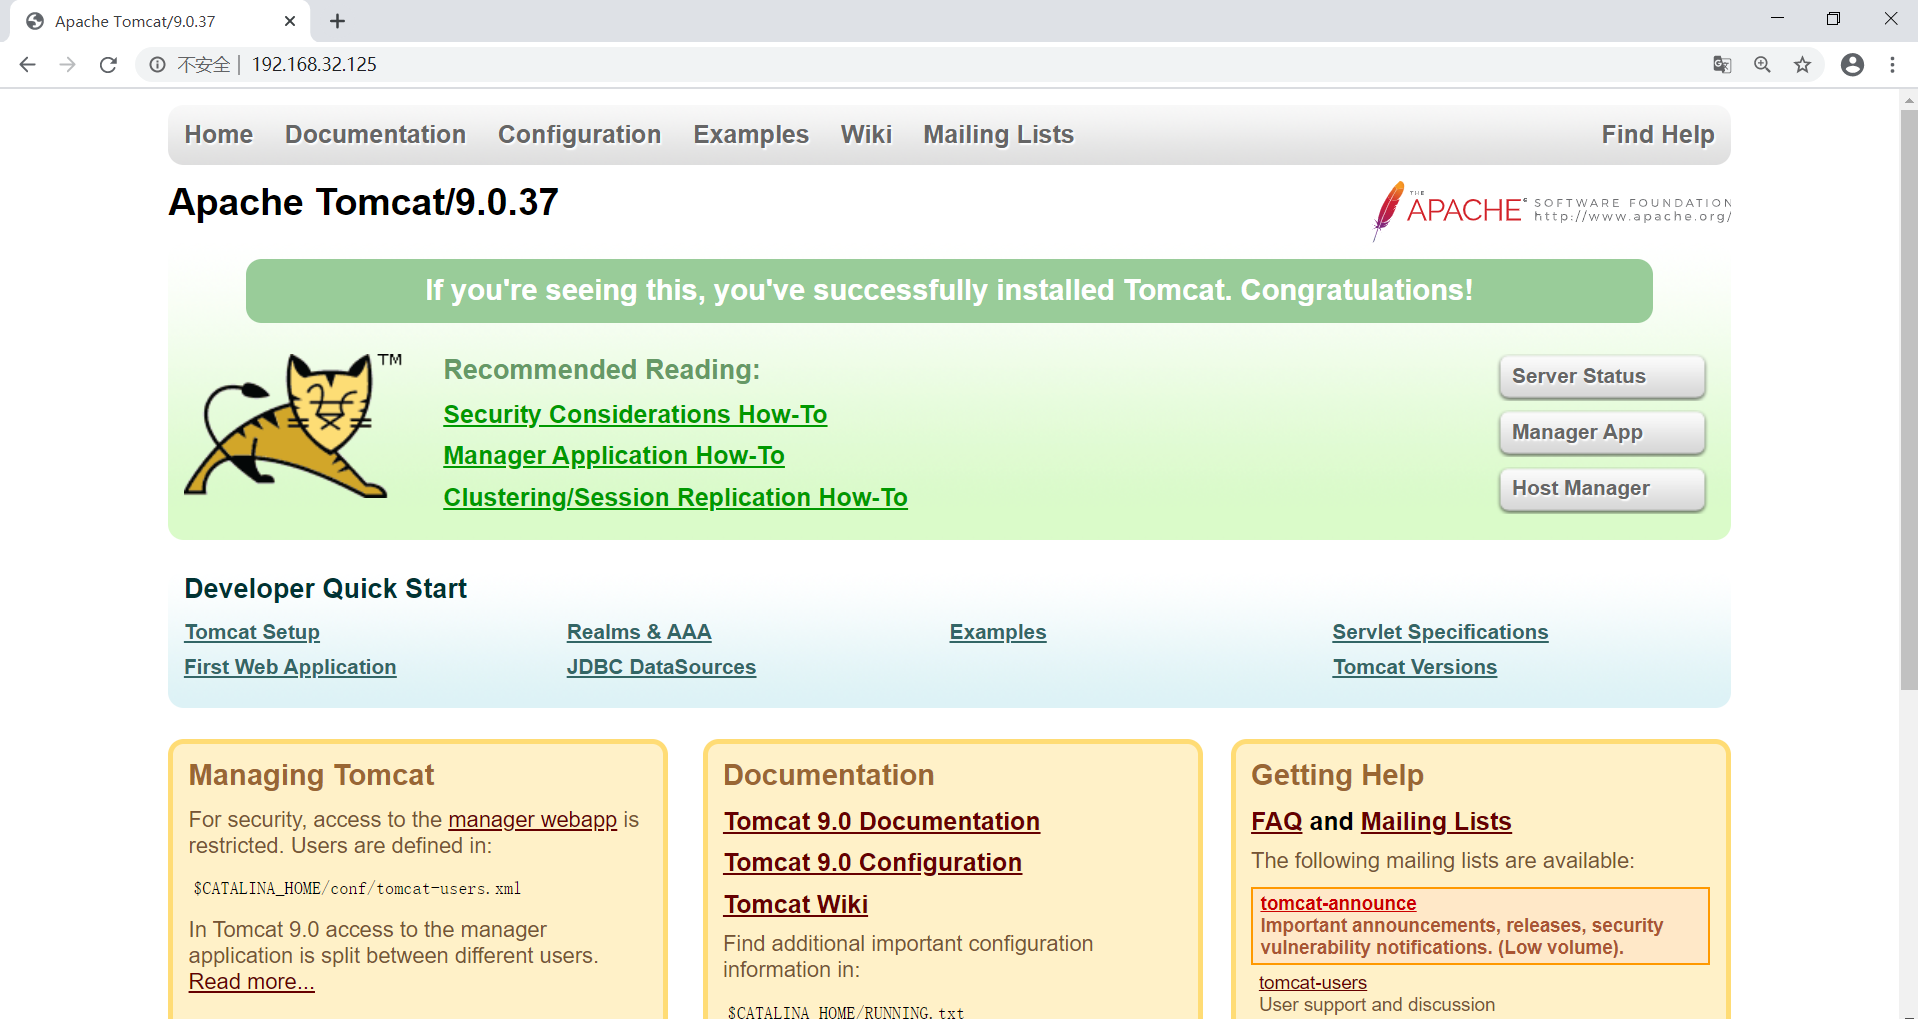
把所有http的请求代理到 http://192.168.32.125:8080/ ,也就是 Tomcat 的访问地址,

可以加如 ProxyPass /images !  表示除了images目录之外不转发,可以实现静态内容不转给tomcat

#重启apache

[root@localhost ~]# apachectl restart

[root@localhost ~]# ss -tanl

State      Recv-Q Send-Q Local Address:Port               Peer Address:Port

LISTEN     0      100      127.0.0.1:25                           *:*

LISTEN     0      128              *:22                           *:*

LISTEN     0      100          [::1]:25                        [::]:*

LISTEN     0      1       [::ffff:127.0.0.1]:8005                      [::]:*

LISTEN     0      80            [::]:3306                      [::]:*

LISTEN     0      100           [::]:8080                      [::]:*

LISTEN     0      128           [::]:80                        [::]:*

LISTEN     0      128           [::]:22                        [::]:*
访问80端口时,转到了8080

lamt环境搭建的更多相关文章
- .NET Core系列 : 1、.NET Core 环境搭建和命令行CLI入门
2016年6月27日.NET Core & ASP.NET Core 1.0在Redhat峰会上正式发布,社区里涌现了很多文章,我也计划写个系列文章,原因是.NET Core的入门门槛相当高, ...
- Azure Service Fabric 开发环境搭建
微服务体系结构是一种将服务器应用程序构建为一组小型服务的方法,每个服务都按自己的进程运行,并通过 HTTP 和 WebSocket 等协议相互通信.每个微服务都在特定的界定上下文(每服务)中实现特定的 ...
- rnandroid环境搭建
react-native 环境搭建具体步骤这个大家已经玩烂了,这个主要是记录下来自己做win7系统遇到的坑 1.com.android.ddmlib.installexception 遇到这个问题,在 ...
- python开发环境搭建
虽然网上有很多python开发环境搭建的文章,不过重复造轮子还是要的,记录一下过程,方便自己以后配置,也方便正在学习中的同事配置他们的环境. 1.准备好安装包 1)上python官网下载python运 ...
- springMVC初探--环境搭建和第一个HelloWorld简单项目
注:此篇为学习springMVC时,做的笔记整理. MVC框架要做哪些事情? a,将url映射到java类,或者java类的方法上 b,封装用户提交的数据 c,处理请求->调用相关的业务处理—& ...
- 【定有惊喜】android程序员如何做自己的API接口?php与android的良好交互(附环境搭建),让前端数据动起来~
一.写在前面 web开发有前端和后端之分,其实android还是有前端和后端之分.android开发就相当于手机app的前端,一般都是php+android或者jsp+android开发.androi ...
- Nexus(一)环境搭建
昨天,成功搭建了自己的 Maven 环境(详见:Maven(一)环境搭建),今天就来研究和探讨下 Nexus 的搭建! 使用背景: 安装环境:Windows 10 -64位 JDK版本:1.7 Mav ...
- 「译」JUnit 5 系列:环境搭建
原文地址:http://blog.codefx.org/libraries/junit-5-setup/ 原文日期:15, Feb, 2016 译文首发:Linesh 的博客:环境搭建 我的 Gith ...
- appium+robotframework环境搭建
appium+robotframework环境搭建步骤(Windows系统的appium自动化测试,只适用于测试安卓机:ios机需要在mac搭建appium环境后测试) 搭建步骤,共分为3部分: 一. ...
随机推荐
- 线性dp打鼹鼠
题目大意 鼹鼠是一种很喜欢挖洞的动物,但每过一定的时间,它还是喜欢把头探出到地面上来透透气的.根据这个特点阿Q编写了一个打鼹鼠的游戏:在一个 的网格中,在某些时刻鼹鼠会在某一个网格探出头来透透气.你可 ...
- JSOI2015 Salesman(树型DP)
[luogu6082] [题目描述] 某售货员小T要到若干城镇去推销商品,由于该地区是交通不便的山区,任意两个城镇之间都只有唯一的可能经过其它城镇的路线. 小T 可以准确地估计出在每个城镇停留的净收益 ...
- C#几种单例模式
/** * 单例模式-饿汉式 */ public class Singleton { // 在定义的时候就初始化_instance, private static Singleton _instanc ...
- mysql 时间自动更新问题
万恶的根据当前时间戳更新,有时候会自动更新,有时候又不会. 通过navicat 创建datetime类型的字段时,会自动勾选上根据当前时间戳更新.当更新数据的时候勾上这个的字段时间就会更改为当前的时间 ...
- MySQL和PHP中以整型存储IP地址
正文:将IP地址以整型存储 一般我们在数据库中会用到ip地址用来查记录的等等,而ip地址是分为四段的,一般是用varchar或char类型存储.但是其实有更好的存储方法就是以整型存储IP地址. 因为c ...
- 05 drf源码剖析之认证
05 drf源码剖析之认证 目录 05 drf源码剖析之认证 1. 认证简述 2. 认证的使用 3. 源码剖析 4. 总结 1. 认证简述 当我们通过Web浏览器与API进行交互时,我们可以登录,然后 ...
- 用Vue实现一个简单的图片轮播
本文已收录至https://github.com/likekk/studyBlog欢迎大家star,共同学习,共同进步.如果文章有错误的地方,欢迎大家指出.后期将在将GitHub上规划前端学习的路线和 ...
- Eclipse点击空格总是自动补全代码怎么办,如何自动补全代码,代码提示
Eclipse点击空格总是自动补全不想要的代码说明大家配置的时候出现了一点错误,下面的步骤将会解决它, 网上部分经验需要大家更改代码非常繁琐,下面是一个简单的步骤方法 步骤一:打开eclipse依次点 ...
- [spring] -- MVC篇
流程: 客户端(浏览器)发送请求,直接请求到 DispatcherServlet. DispatcherServlet 根据请求信息调用 HandlerMapping,解析请求对应的 Handler. ...
- abp vnext 开发快速入门 2 实现基本增删改查
上篇说了abp vnext 的大体框架结构,本篇说下如何实现基础的增删改查.实现增删改查有以下几个步骤: 1.配置数据库连接 2.领域层(Domain)创建实体,Ef core 层配置Dbset( 用 ...
