从零开始,做一个简单的Vuetify项目,图标安装成功
安装Vuefity的时候,碰到一些坑,经过一番折腾,终于成功,记录正确的姿势如下:
创建一个Vue项目:
vue init webpack-simple vular-admin
进入项目目录:
cd vular-admin
选择:Webpack 安装方式
npm install
npm install vue-router
npm install vuetify
npm install css-loader
npm install material-design-icons-iconfont
npm install vuex --save
npm install stylus-loader stylus --save-dev
npm install sassnpm install sass sass-loader fibers deepmerge -D
src目录下新建文件
import 'material-design-icons-iconfont/dist/material-design-icons.css'
import Vue from 'vue'
import Vuetify from 'vuetify'
import 'vuetify/dist/vuetify.min.css'

Vue.use(Vuetify)

const opts = {
  icons: {
    iconfont: 'md',
  },
}

export default new Vuetify(opts)
在 main.js中添加
import vuetify from './plugins/vuetify'
webpack.config.js 的rules下添加:
module.exports = {
  rules: [
    {
      test: /\.s(c|a)ss$/,
      use: [
        'vue-style-loader',
        'css-loader',
        {
          loader: 'sass-loader',
          // Requires sass-loader@^7.0.0
          options: {
            implementation: require('sass'),
            fiber: require('fibers'),
            indentedSyntax: true // optional
          },
          // Requires sass-loader@^8.0.0
          options: {
            implementation: require('sass'),
            sassOptions: {
              fiber: require('fibers'),
              indentedSyntax: true // optional
            },
          },
        },
      ],
    },
  ],
}
按照Vuetify官方文档,现在就安装完成了
这时候运行:
npm run dev
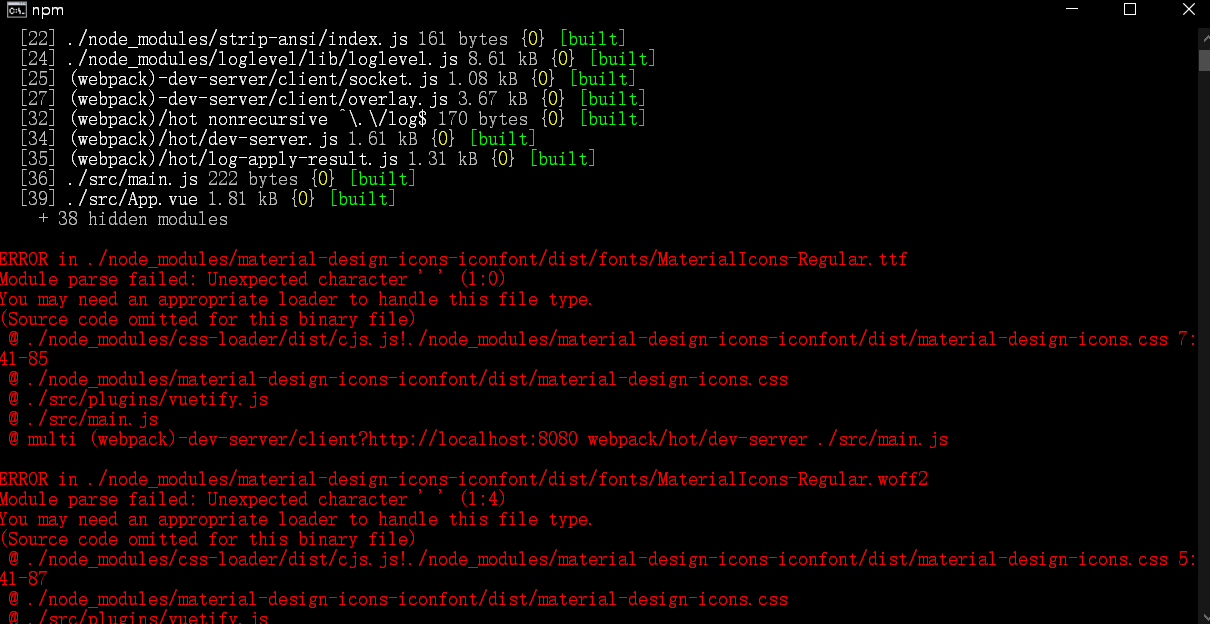
会出现如下错误:
ERROR in ./node_modules/material-design-icons-iconfont/dist/fonts/MaterialIcons-Regular.ttf
Module parse failed: Unexpected character ' ' (1:0)
You may need an appropriate loader to handle this file type.
(Source code omitted for this binary file)
@ ./node_modules/css-loader/dist/cjs.js!./node_modules/material-design-icons-iconfont/dist/material-design-icons.css 7:41-85
@ ./node_modules/material-design-icons-iconfont/dist/material-design-icons.css
@ ./src/plugins/vuetify.js
@ ./src/main.js
@ multi (webpack)-dev-server/client?http://localhost:8080 webpack/hot/dev-server ./src/main.js
ERROR in ./node_modules/material-design-icons-iconfont/dist/fonts/MaterialIcons-Regular.woff2
Module parse failed: Unexpected character ' ' (1:4)
You may need an appropriate loader to handle this file type.
(Source code omitted for this binary file)
@ ./node_modules/css-loader/dist/cjs.js!./node_modules/material-design-icons-iconfont/dist/material-design-icons.css 5:41-87
@ ./node_modules/material-design-icons-iconfont/dist/material-design-icons.css
@ ./src/plugins/vuetify.js
webpack.config.js 的rules下添加:
module.exports = {
    module: {
        rules: [
           {
               test: /\.(woff2?|eot|ttf|otf)$/,
               loader: 'file-loader',
               options: {
                   limit: 10000,
                   name: '[name].[hash:7].[ext]'
               }
            }
        ]
    }
}
到现在为止,才算真正的安装完成
修改App.vue文件:
<template>
<div id="app">
<v-app>
<v-navigation-drawer
v-model="primaryDrawer.model"
:clipped="primaryDrawer.clipped"
:floating="primaryDrawer.floating"
:mini-variant="primaryDrawer.mini"
:permanent="primaryDrawer.type === 'permanent'"
:temporary="primaryDrawer.type === 'temporary'"
app
overflow
>
<v-toolbar color="primary darken-1" dark>
<img src="data:images/logo.png" height="36" alt="Vular Amazing Framework" />
<v-toolbar-title class="ml-0 pl-3">
<span class="hidden-sm-and-down">Vue Material</span>
</v-toolbar-title>
<v-spacer></v-spacer>
<v-btn icon class="hidden-xs-only" >
<v-icon>chevron_right</v-icon>
</v-btn>
</v-toolbar>
<v-list dense>
<v-list-item link>
<v-list-item-action>
<v-icon>mdi-home</v-icon>
</v-list-item-action>
<v-list-item-content>
<v-list-item-title>Home</v-list-item-title>
</v-list-item-content>
</v-list-item>
<v-list-item link>
<v-list-item-action>
<v-icon>mdi-contact-mail</v-icon>
</v-list-item-action>
<v-list-item-content>
<v-list-item-title>Contact</v-list-item-title>
</v-list-item-content>
</v-list-item>
</v-list>
</v-navigation-drawer>
<v-app-bar
:clipped-left="primaryDrawer.clipped"
color="primary"
dark
app
>
<v-app-bar-nav-icon
v-if="primaryDrawer.type !== 'permanent'"
@click.stop="primaryDrawer.model = !primaryDrawer.model"
/>
<v-toolbar-title>Vuetify</v-toolbar-title>
</v-app-bar>
<v-content>
<v-container fluid>
<v-row
align="center"
justify="center"
>
<v-col cols="10">
<v-card>
<v-card-text>
<v-row>
<v-col
cols="12"
md="6"
>
<span>Scheme</span>
<v-switch
v-model="$vuetify.theme.dark"
primary
label="Dark"
/>
</v-col>
<v-col
cols="12"
md="6"
>
<span>Drawer</span>
<v-radio-group
v-model="primaryDrawer.type"
column
>
<v-radio
v-for="drawer in drawers"
:key="drawer"
:label="drawer"
:value="drawer.toLowerCase()"
primary
/>
</v-radio-group>
<v-switch
v-model="primaryDrawer.clipped"
label="Clipped"
primary
/>
<v-switch
v-model="primaryDrawer.floating"
label="Floating"
primary
/>
<v-switch
v-model="primaryDrawer.mini"
label="Mini"
primary
/>
</v-col>
<v-col
cols="12"
md="6"
>
<span>Footer</span>
<v-switch
v-model="footer.inset"
label="Inset"
primary
/>
</v-col>
</v-row>
</v-card-text>
<v-card-actions>
<v-spacer />
<v-btn text>Cancel</v-btn>
<v-btn
text
color="primary"
>Submit</v-btn>
</v-card-actions>
</v-card>
</v-col>
</v-row>
</v-container>
</v-content>
<v-footer
:inset="footer.inset"
app
>
<span class="px-4">© {{ new Date().getFullYear() }}</span>
</v-footer>
</v-app>
</div>
</template>
<script>
export default {
name: 'app',
data: () => ({
drawers: ['Default (no property)', 'Permanent', 'Temporary'],
primaryDrawer: {
model: null,
type: 'default (no property)',
clipped: false,
floating: false,
mini: false,
},
footer: {
inset: false,
},
}),
}
</script>
<style>
#app {
font-family: 'Avenir', Helvetica, Arial, sans-serif;
-webkit-font-smoothing: antialiased;
-moz-osx-font-smoothing: grayscale;
text-align: center;
color: #2c3e50;
margin-top: 60px;
}
h1, h2 {
font-weight: normal;
}
ul {
list-style-type: none;
padding: 0;
}
li {
display: inline-block;
margin: 0 10px;
}
a {
color: #42b983;
}
</style>
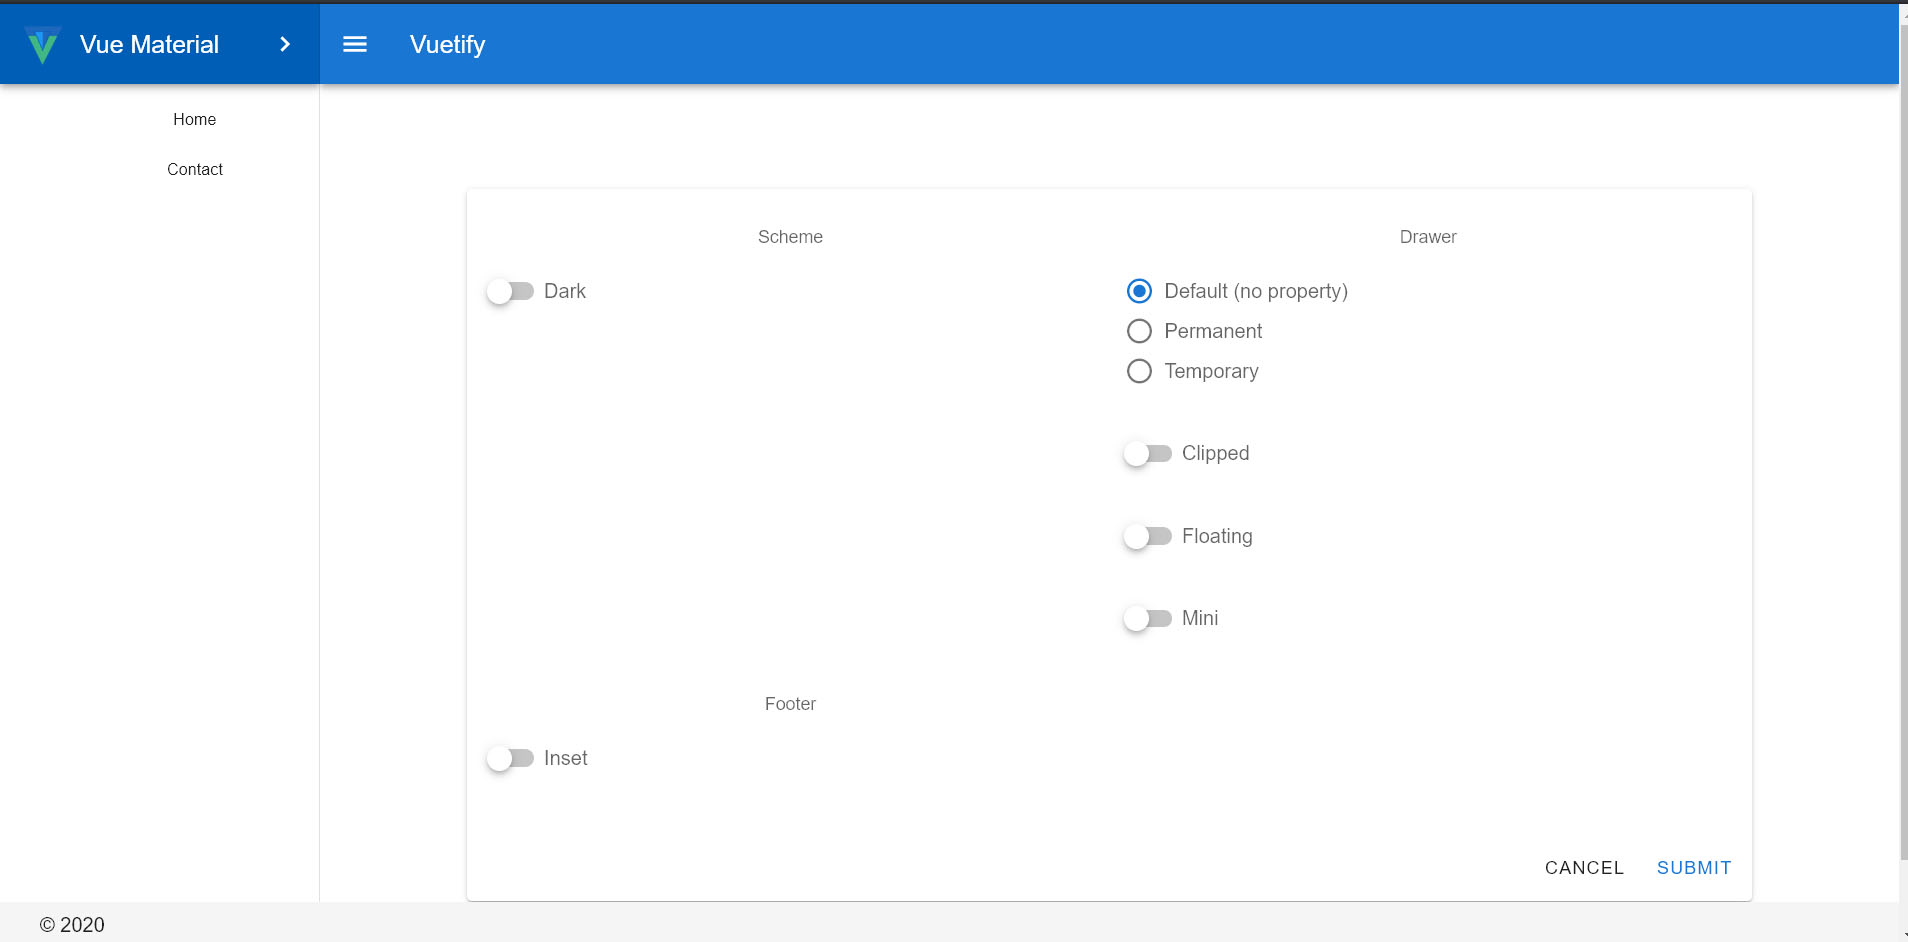
运行npm run dev, 完成:
代码地址:
https://github.com/vularsoft/vular-admin
这个代码以后会当作我一个框架的界面,想看空白项目,直接拉取历史版本

从零开始,做一个简单的Vuetify项目,图标安装成功的更多相关文章
- 《从零开始做一个MEAN全栈项目》(2)
欢迎关注本人的微信公众号"前端小填填",专注前端技术的基础和项目开发的学习. 上一节简单介绍了什么是MEAN全栈项目,这一节将简要介绍三个内容:(1)一个通用的MEAN项目的技 ...
- 《从零开始做一个MEAN全栈项目》(3)
欢迎关注本人的微信公众号"前端小填填",专注前端技术的基础和项目开发的学习. 上一篇文章给大家讲了一下本项目的开发计划,这一章将会开始着手搭建一个MEAN项目.千里之行,始于足下, ...
- 《从零开始做一个MEAN全栈项目》(1)
欢迎关注本人的微信公众号"前端小填填",专注前端技术的基础和项目开发的学习. 在本系列的开篇,我打算讲一下全栈项目开发的优势,以及MEAN项目各个模块的概览. 为什么选择全栈开发? ...
- 《从零开始做一个MEAN全栈项目》(4)
欢迎关注本人的微信公众号"前端小填填",专注前端技术的基础和项目开发的学习. 在上一篇中,我们讲了如何去构建第一个Express项目,总结起来就是使用两个核心工具,express和 ...
- 第四章 .net core做一个简单的登录
项目目标部署环境:CentOS 7+ 项目技术点:.netcore2.0 + Autofac +webAPI + NHibernate5.1 + mysql5.6 + nginx 开源地址:https ...
- Vue.js 入门:从零开始做一个极简 To-Do 应用
Vue.js 入门:从零开始做一个极简 To-Do 应用 写作时间:2019-12-10版本信息:Vue.js 2.6.10官网文档:https://cn.vuejs.org/ 前言 学习 Vue ...
- 使用React并做一个简单的to-do-list
1. 前言 说到React,我从一年之前就开始试着了解并且看了相关的入门教程,而且还买过一本<React:引领未来的用户界面开发框架 >拜读.React的轻量组件化的思想及其virtual ...
- 用EF DataBase First做一个简单的MVC3报名页面
使用EF DataBase First做一个简单的MVC3报名网站 ORM(Object Relational Mapping)是面向对象语言中的一种数据访问技术,在ASP.NET中,可以通过ADO. ...
- MUI框架-05-用MUI做一个简单App
MUI框架-05-用MUI做一个简单App MUI 是一个前端框架,前端框架就像 Bootstrap,EasyUI,Vue ,为了做 app 呢,就有了更加高效的 MUI,我觉得前端框架有很多,也没有 ...
随机推荐
- 什么是FHS,Linux的文件系统目录标准是怎样的
Filesystem Hierarchy Standard(文件系统目录标准)的缩写,多数Linux版本采用这种文件组织形式,类似于Windows操作系统中c盘的文件目录,FHS采用树形结构组织文件. ...
- 深入理解React key
一 react 组件元素的 diff 算法 二 key 的理解 概述 react 中的key 属性,它是一个特殊的属性,它的出现不是给开发者用的(例如你为一个组件设置key之后不能获取组件的这个key ...
- php里面的一些面试经典的函数
<?php /* 这是一个多线程的读取解决的函数 @param1 $fle 传入要读取的文件名 */ function filelock($fle){ $fp=fopen($fls,'w+'); ...
- js 面向对象 打气球小游戏
<!DOCTYPE html PUBLIC "-//W3C//DTD XHTML 1.0 Transitional//EN" "http://www.w3.org/ ...
- 两个div,高度都是100% 用 display:flex; 和 min-height 一边撑高了,另一边自动走 (不加flex不自动撑开)
两个div,高度都是100% 用 display:flex; 和 min-height 一边撑高了,另一边自动走
- JS排序算法--冒泡排序和选择排序
在我们JS语法当中,数据类型中的复杂数据类型,有一项我们常用的数组数据类型,其中存储的数据有时是乱序的,需要排序,我们有多种方法,最简单的肯定是 :变量.sort(fonction(a,b){a> ...
- java -封装一个类。(姓名、年龄、性别)
//定义一个类. public class Maopao1{ //创建私有的对象. private String name; private int age; private String sex; ...
- oracle去除重复数据与oracle分页
一.去除oracle中重复数据,可以使用rowid列,rowid列是一个伪列,该列在数据库中灭一个表中都有,但是我们查询数据库的时候,默认都没有给我们返回这一列,这一列用来区分数据库中的每一行时间,可 ...
- Linux定时备份
#!/bin/bash. /etc/profile. ~/.bash_profile# Shell script to backup MySql database # To backup Nysql ...
- [暴力] Educational Codeforces Round 71 (Rated for Div. 2) B. Square Filling (1207B)
题目:http://codeforces.com/contest/1207/problem/B B. Square Filling time limit per test 1 second mem ...