Ubuntu16.04下Mongodb(离线安装方式|非apt-get)安装部署步骤(图文详解)(博主推荐)
不多说,直接上干货!
说在前面的话
首先,查看下你的操作系统的版本。

root@zhouls-virtual-machine:~# cat /etc/issue

Ubuntu 16.04. LTS \n \l

root@zhouls-virtual-machine:~#
我的是Ubuntu 16.04.4
我的环境在Ubuntu16.04下搭建,注意:不同版本之间可能存在兼容性(其他的如14.04,我也暂时测试过)
Ubuntu14.04下Mongodb安装部署步骤(图文详解)

root@zhouls-virtual-machine:~# mongo

The program 'mongo' is currently not installed. You can install it by typing:

apt-get install mongodb-clients

root@zhouls-virtual-machine:~#
这里,建议大家不要直接就输入apt-get install mongodb-clients来安装。
这样有两点问题:
1.安装的是客户端
2.版本问题,这个很重要,项目中mongo数据库用的是2.6,而apt-get自动安装的根本不知道是什么版本,而mongodb不同版本之间是不能兼容的。所以如果根据需要是迁移数据库之类的,这样到后面会有超级一大堆的错误。
Mongodb安装包的下载
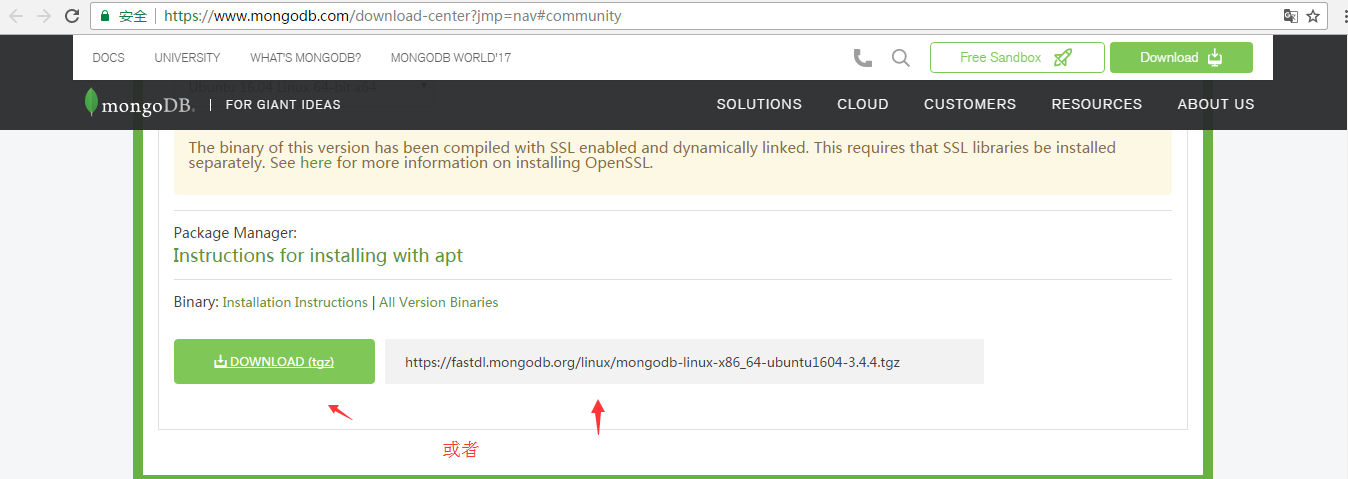
mongo官网下载地址 (进入)
根据自己的需要选择版本下载,需要注意亮点:
1.大版本保持一致,因为大版本之间不兼容
2.mongodb亦按照基数版本不稳定的规则,一般用于生产环境的都是偶数版本,如果安装的是基数(例如2.7),进入时会出现一下提示。
我这里,就选择最简单的和免费的,社区服务版本。
我一般喜欢用tar.gz来下载安装,当然大家也可以选择用rpm方式来安装。

我这里,就选择最简单的和免费的,社区服务版本。
https://fastdl.mongodb.org/linux/mongodb-linux-x86_64-ubuntu1604-3.4.4.tgz

我一般喜欢用tar.gz来下载安装,当然大家也可以选择用rpm方式来安装。
https://fastdl.mongodb.org/linux/mongodb-linux-x86_64-ubuntu1604-3.4.4.tgz

或者
大家,也可以安装最新的稳定版 MongoDB 或指定版本的 MongoDB。
安装MongoDB最新的稳定版本
使用下列命令:
sudo apt-get install -y mongodb-org
如果你想安装指定版本的MongoDB,请按照下面的方法。
下面的例子安装 3.2.0 版本的 MongoDB:
MongoDB的不同组件都可以指定相应的版本号
sudo apt-get install -y mongodb-org=3.2. mongodb-org-server=3.2. mongodb-org-shell=3.2. mongodb-org-mongos=3.2. mongodb-org-tools=3.2.
mongodb的安装部署
下载解压
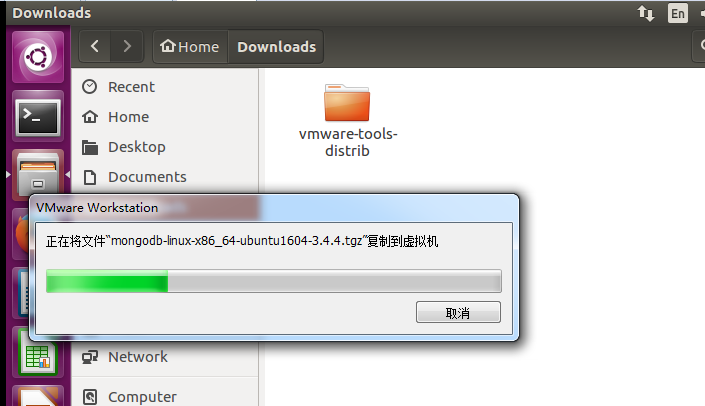
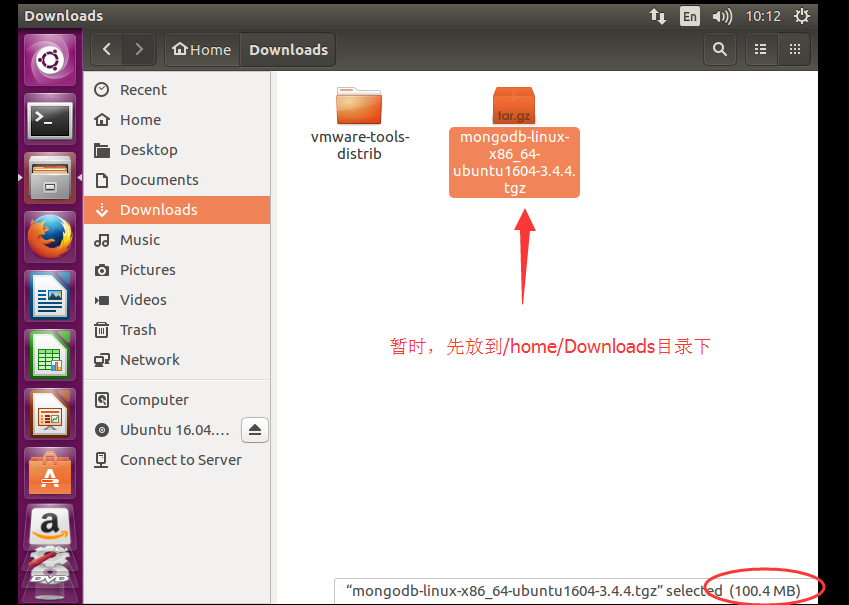
我这里,先暂时是,放在/home/zhouls/Downloads/下


zhouls@zhouls-virtual-machine:~/Downloads$ sudo -s

[sudo] password for zhouls:

root@zhouls-virtual-machine:~/Downloads# pwd

/home/zhouls/Downloads

root@zhouls-virtual-machine:~/Downloads# ls

mongodb-linux-x86_64-ubuntu1604-3.4..tgz  vmware-tools-distrib

root@zhouls-virtual-machine:~/Downloads# tar -zxvf mongodb-linux-x86_64-ubuntu1604-3.4.4.tgz

mongodb-linux-x86_64-ubuntu1604-3.4./README

mongodb-linux-x86_64-ubuntu1604-3.4./THIRD-PARTY-NOTICES

mongodb-linux-x86_64-ubuntu1604-3.4./MPL-

mongodb-linux-x86_64-ubuntu1604-3.4./GNU-AGPL-3.0

mongodb-linux-x86_64-ubuntu1604-3.4./bin/mongodump

mongodb-linux-x86_64-ubuntu1604-3.4./bin/mongorestore

mongodb-linux-x86_64-ubuntu1604-3.4./bin/mongoexport

mongodb-linux-x86_64-ubuntu1604-3.4./bin/mongoimport

mongodb-linux-x86_64-ubuntu1604-3.4./bin/mongostat

mongodb-linux-x86_64-ubuntu1604-3.4./bin/mongotop

mongodb-linux-x86_64-ubuntu1604-3.4./bin/bsondump

mongodb-linux-x86_64-ubuntu1604-3.4./bin/mongofiles

mongodb-linux-x86_64-ubuntu1604-3.4./bin/mongooplog

mongodb-linux-x86_64-ubuntu1604-3.4./bin/mongoreplay

mongodb-linux-x86_64-ubuntu1604-3.4./bin/mongoperf

mongodb-linux-x86_64-ubuntu1604-3.4./bin/mongod

mongodb-linux-x86_64-ubuntu1604-3.4./bin/mongos

mongodb-linux-x86_64-ubuntu1604-3.4./bin/mongo

root@zhouls-virtual-machine:~/Downloads#
mongodb不需要像别的数据库那样配置解压后放到/usr/local
但是为了方便管理,最好还是放到usr/local下面。
命令如下:

root@zhouls-virtual-machine:~/Downloads# ls

mongodb-linux-x86_64-ubuntu1604-3.4.      vmware-tools-distrib

mongodb-linux-x86_64-ubuntu1604-3.4..tgz

root@zhouls-virtual-machine:~/Downloads# mv mongodb-linux-x86_64-ubuntu1604-3.4.4  /usr/local/mongodb

root@zhouls-virtual-machine:~/Downloads# cd /usr/local

root@zhouls-virtual-machine:/usr/local# pwd

/usr/local

root@zhouls-virtual-machine:/usr/local# ls

bin  etc  games  include  lib  man  mongodb  sbin  share  src

root@zhouls-virtual-machine:/usr/local#
初步认识下,mongdb的目录结构

root@zhouls-virtual-machine:/usr/local/mongodb# pwd

/usr/local/mongodb

root@zhouls-virtual-machine:/usr/local/mongodb# ls

bin  GNU-AGPL-3.0  MPL-  README  THIRD-PARTY-NOTICES

root@zhouls-virtual-machine:/usr/local/mongodb#
然后为了mongodb创建存储数据的文件目录和日志文件目录

root@zhouls-virtual-machine:/usr/local/mongodb# pwd

/usr/local/mongodb

root@zhouls-virtual-machine:/usr/local/mongodb# ls

bin  GNU-AGPL-3.0  MPL-  README  THIRD-PARTY-NOTICES

root@zhouls-virtual-machine:/usr/local/mongodb# mkdir data

root@zhouls-virtual-machine:/usr/local/mongodb# mkdir log

root@zhouls-virtual-machine:/usr/local/mongodb# ls

bin  data  GNU-AGPL-3.0  log  MPL-  README  THIRD-PARTY-NOTICES

root@zhouls-virtual-machine:/usr/local/mongodb#
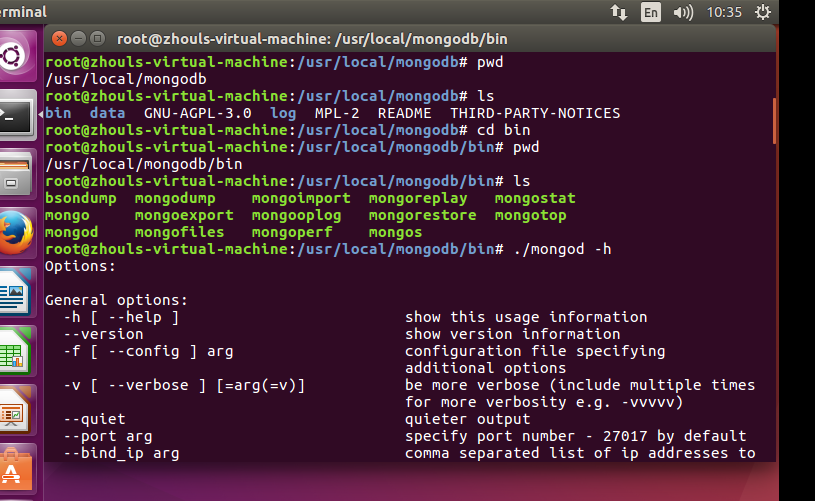
进入到mongodb下面的bin里面查看mongodb帮助文档

root@zhouls-virtual-machine:/usr/local/mongodb# pwd
/usr/local/mongodb
root@zhouls-virtual-machine:/usr/local/mongodb# ls
bin data GNU-AGPL-3.0 log MPL- README THIRD-PARTY-NOTICES
root@zhouls-virtual-machine:/usr/local/mongodb# cd bin
root@zhouls-virtual-machine:/usr/local/mongodb/bin# pwd
/usr/local/mongodb/bin
root@zhouls-virtual-machine:/usr/local/mongodb/bin# ls
bsondump mongodump mongoimport mongoreplay mongostat
mongo mongoexport mongooplog mongorestore mongotop
mongod mongofiles mongoperf mongos
root@zhouls-virtual-machine:/usr/local/mongodb/bin# ./mongod -h
Options: General options:
-h [ --help ] show this usage information
--version show version information
-f [ --config ] arg configuration file specifying
additional options
-v [ --verbose ] [=arg(=v)] be more verbose (include multiple times
for more verbosity e.g. -vvvvv)
--quiet quieter output
--port arg specify port number - by default
--bind_ip arg comma separated list of ip addresses to
listen on - all local ips by default
--ipv6 enable IPv6 support (disabled by
default)
--maxConns arg max number of simultaneous connections
- by default
--logpath arg log file to send write to instead of
stdout - has to be a file, not
directory
--syslog log to system's syslog facility instead
of file or stdout
--syslogFacility arg syslog facility used for mongodb syslog
message
--logappend append to logpath instead of
over-writing
--logRotate arg set the log rotation behavior
(rename|reopen)
--timeStampFormat arg Desired format for timestamps in log
messages. One of ctime, iso8601-utc or
iso8601-local
--pidfilepath arg full path to pidfile (if not set, no
pidfile is created)
--keyFile arg private key for cluster authentication
--noauth run without security
--setParameter arg Set a configurable parameter
--httpinterface enable http interface
--transitionToAuth For rolling access control upgrade.
Attempt to authenticate over outgoing
connections and proceed regardless of
success. Accept incoming connections
with or without authentication.
--clusterAuthMode arg Authentication mode used for cluster
authentication. Alternatives are
(keyFile|sendKeyFile|sendX509|x509)
--nounixsocket disable listening on unix sockets
--unixSocketPrefix arg alternative directory for UNIX domain
sockets (defaults to /tmp)
--filePermissions arg permissions to set on UNIX domain
socket file - by default
--fork fork server process
--networkMessageCompressors arg Comma-separated list of compressors to
use for network messages
--auth run with security
--jsonp allow JSONP access via http (has
security implications)
--rest turn on simple rest api
--slowms arg (=) value of slow for profile and console
log
--profile arg =off =slow, =all
--cpu periodically show cpu and iowait
utilization
--sysinfo print some diagnostic system
information
--noIndexBuildRetry don't retry any index builds that were
interrupted by shutdown
--noscripting disable scripting engine
--notablescan do not allow table scans
--shutdown kill a running server (for init
scripts) Replication options:
--oplogSize arg size to use (in MB) for replication op
log. default is % of disk space (i.e.
large is good) Master/slave options (old; use replica sets instead):
--master master mode
--slave slave mode
--source arg when slave: specify master as
<server:port>
--only arg when slave: specify a single database
to replicate
--slavedelay arg specify delay (in seconds) to be used
when applying master ops to slave
--autoresync automatically resync if slave data is
stale Replica set options:
--replSet arg arg is <setname>[/<optionalseedhostlist
>]
--replIndexPrefetch arg specify index prefetching behavior (if
secondary) [none|_id_only|all]
--enableMajorityReadConcern enables majority readConcern Sharding options:
--configsvr declare this is a config db of a
cluster; default port ; default
dir /data/configdb
--shardsvr declare this is a shard db of a
cluster; default port SSL options:
--sslOnNormalPorts use ssl on configured ports
--sslMode arg set the SSL operation mode
(disabled|allowSSL|preferSSL|requireSSL
)
--sslPEMKeyFile arg PEM file for ssl
--sslPEMKeyPassword arg PEM file password
--sslClusterFile arg Key file for internal SSL
authentication
--sslClusterPassword arg Internal authentication key file
password
--sslCAFile arg Certificate Authority file for SSL
--sslCRLFile arg Certificate Revocation List file for
SSL
--sslDisabledProtocols arg Comma separated list of TLS protocols
to disable [TLS1_0,TLS1_1,TLS1_2]
--sslWeakCertificateValidation allow client to connect without
presenting a certificate
--sslAllowConnectionsWithoutCertificates
allow client to connect without
presenting a certificate
--sslAllowInvalidHostnames Allow server certificates to provide
non-matching hostnames
--sslAllowInvalidCertificates allow connections to servers with
invalid certificates
--sslFIPSMode activate FIPS - mode at startup Storage options:
--storageEngine arg what storage engine to use - defaults
to wiredTiger if no data files present
--dbpath arg directory for datafiles - defaults to
/data/db
--directoryperdb each database will be stored in a
separate directory
--noprealloc disable data file preallocation - will
often hurt performance
--nssize arg (=) .ns file size (in MB) for new databases
--quota limits each database to a certain
number of files ( default)
--quotaFiles arg number of files allowed per db, implies
--quota
--smallfiles use a smaller default file size
--syncdelay arg (=) seconds between disk syncs (=never,
but not recommended)
--upgrade upgrade db if needed
--repair run repair on all dbs
--repairpath arg root directory for repair files -
defaults to dbpath
--journal enable journaling
--nojournal disable journaling (journaling is on by
default for bit)
--journalOptions arg journal diagnostic options
--journalCommitInterval arg how often to group/batch commit (ms) WiredTiger options:
--wiredTigerCacheSizeGB arg maximum amount of memory to allocate
for cache; defaults to / of physical
RAM
--wiredTigerStatisticsLogDelaySecs arg (=)
seconds to wait between each write to a
statistics file in the dbpath; means
do not log statistics
--wiredTigerJournalCompressor arg (=snappy)
use a compressor for log records
[none|snappy|zlib]
--wiredTigerDirectoryForIndexes Put indexes and data in different
directories
--wiredTigerCollectionBlockCompressor arg (=snappy)
block compression algorithm for
collection data [none|snappy|zlib]
--wiredTigerIndexPrefixCompression arg (=)
use prefix compression on row-store
leaf pages root@zhouls-virtual-machine:/usr/local/mongodb/bin#
找到参数
--fork
--dbpath arg
--logpath arg
--nohttpinterface
启动 MongoDB数据库
使用下列命令启动 mongod 进程。
sudo service mongod start
或者
启动数据库(推荐)
./mongod --dbpath=/usr/local/mongodb/data/ --fork --logpath=/usr/local/mongodb/log
--dbpath=/usr/local/mongodb/data/ 用于指定存放的mongodb数据库
--fork 是后台执行,不然一直在前台
--logpath=/usr/local/mongodb/log用于指定mongodb的日志记录文件

mongodb启动时报错ERROR: child process failed, exited with error number 1
检查 MongoDB 是否成功启动
通过检查 /var/log/mongodb/mongod.log 文件来确定 mongod 进程是否已经成功启动。
或者查看进程
ps -ef | grep mongod

root@zhouls-virtual-machine:~# ps -ef | grep mongod

root             : ?        :: ./mongod --dbpath=/usr/local/mongodb/data/ --fork --logpath=/usr/local/mongodb/log

root             : pts/   :: grep --color=auto mongod

root@zhouls-virtual-machine:~#
启动后即可通过mongo命令进入数据库


如果大家按照上面的步骤来,安装之后,还是出现这样的情况的话,则那么直接,用apt install mongodb-clients吧。
停止 MongoDB
sudo service mongod stop
重新启动 MongoDB
sudo service mongod restart
Ubuntu16.04下Mongodb(离线安装方式|非apt-get)安装部署步骤(图文详解)(博主推荐)的更多相关文章
- Ubuntu14.04下Mongodb(离线安装方式|非apt-get)安装部署步骤(图文详解)(博主推荐)
不多说,直接上干货! 说在前面的话 首先,查看下你的操作系统的版本. root@zhouls-virtual-machine:~# cat /etc/issue Ubuntu LTS \n \l r ...
- Ubuntu16.04下Mongodb官网安装部署步骤(图文详解)(博主推荐)
不多说,直接上干货! 在这篇博客里,我采用了非官网的安装步骤,来进行安装.走了弯路,同时,也是不建议.因为在大数据领域和实际生产里,还是要走正规的为好. Ubuntu16.04下Mongodb(离线安 ...
- Ubuntu16.04下Mongodb官网卸载部署步骤(图文详解)(博主推荐)
不多说,直接上干货! 前期博客 Ubuntu16.04下Mongodb官网安装部署步骤(图文详解)(博主推荐) https://docs.mongodb.com/manual/tutorial/ins ...
- 基于CentOS6.5下如何正确安装和使用Tcpreplay来重放数据(图文详解)
前期博客 基于CentOS6.5下snort+barnyard2+base的入侵检测系统的搭建(图文详解)(博主推荐) tcpreplay是什么? 简单的说, tcpreplay是一种pcap包的重放 ...
- 安装Hue后的一些功能的问题解决干货总结(博主推荐)
不多说,直接上干货! 我的集群机器情况是 bigdatamaster(192.168.80.10).bigdataslave1(192.168.80.11)和bigdataslave2(192.168 ...
- storm的3节点集群详细启动步骤(非HA和HA)(图文详解)
前期博客 apache-storm-1.0.2.tar.gz的集群搭建(3节点)(图文详解)(非HA和HA) 启动storm集群(HA) 本博文情况是 master(主) nimbus slave1( ...
- 全网最详细的基于Ubuntu14.04/16.04 + Anaconda2 / Anaconda3 + Python2.7/3.4/3.5/3.6安装Tensorflow详细步骤(图文)(博主推荐)
不多说,直接上干货! 前言 建议参照最新的tensorflow安装步骤(Linux,官方网站经常访问不是很稳定,所以给了一个github的地址): https://github.com ...
- CentOS6.5下nginx-1.8.1.tar.gz的单节点搭建(图文详解)
不多说,直接上干货! [hadoop@djt002 local]$ su root Password: [root@djt002 local]# ll total drwxr-xr-x. root r ...
- Jenkins安装部署使用图文详解(非常详细)
前言 最近公司需要弄一套自动化运维部署,于是抽空学习了一下,用了两天左右完成Jenkins的安装部署和各种项目的配置化,于是整理一下进行分享. 介绍 Jenkins是一个独立的开源软件项目,是基于Ja ...
随机推荐
- ny12 喷水装置(二)
喷水装置(二) 时间限制:3000 ms | 内存限制:65535 KB 难度:4 描述 有一块草坪,横向长w,纵向长为h,在它的橫向中心线上不同位置处装有n(n<=10000)个点状的 ...
- WSAAsyncSelect 模型
WSAAsyncSelect模型是winsock编程模型的一种,它提供了socket异步编程的方便,其实现是基于Windows消息机制的,最主要的就是下面这个函数: int PASCAL FAR WS ...
- LeetCode: Substring with Concatenation of All Words 解题报告
Substring with Concatenation of All Words You are given a string, S, and a list of words, L, that ar ...
- asp.net updatepanel 导致JS不能加载,而无法使用
asp.net updatepanel 局部刷新,导致JS不能加载,而无法使用,而且 updatepanel会刷两次,郁闷的. 解决方法如下: <script type="text/j ...
- 混合编程:error LNK2001: unresolved external symbol
Vs2006+matlab2010rb环境: 1:工具-选项-项目解决方案-VC++目录设置include和lib的路径 2:项目-属性-属性配置-链接器-输入-附加依赖项把库的名字添加进去 VIST ...
- java中volatile关键字的含义<转>
在java线程并发处理中,有一个关键字volatile的使用目前存在很大的混淆,以为使用这个关键字,在进行多线程并发处理的时候就可以万事大吉. Java语言是支持多线程的,为了解决线程并发的问题,在语 ...
- fullcalendar案例一<原>
fullcalendar是个很强大的日历控件,可以用它进行排班.排会议.拍任务,很直观,用户体验良好. 看下效果图: #parse("index/head.vm") <lin ...
- 一站式学习Wireshark(九):应用Wireshark显示过滤器分析特定数据流(上)
介绍 掌握显示过滤器对于网络分析者来说是一项必备的技能.这是一项大海捞针的技巧.学会构建,编辑,保存关键的显示过滤器能够节省数小时的时间. 与捕捉过滤器使用的BPF语法不同,显示过滤器使用的是Wire ...
- Idea创建sbt项目
这篇文章开始演示如何使用sbt新建项目. 1. 新建,选择Scala,SBT 填写项目名称,Scala版本号等信息. 单击完成后,后台会一直处于下载依赖文件的状态,等吧.. 最终后台运行完成后的完整目 ...
- 单网卡绑定多个ip, 多个网卡绑定成一块虚拟网卡
Linux网卡配置与绑定 Redhat Linux的网络配置,基本上是通过修改几个配置文件来实现的,虽然也可以用ifconfig来设置IP,用route来配置默认网关,用hostname来配置主机 ...
